background image

Hodedah

www.hodedah.com

[email protected]

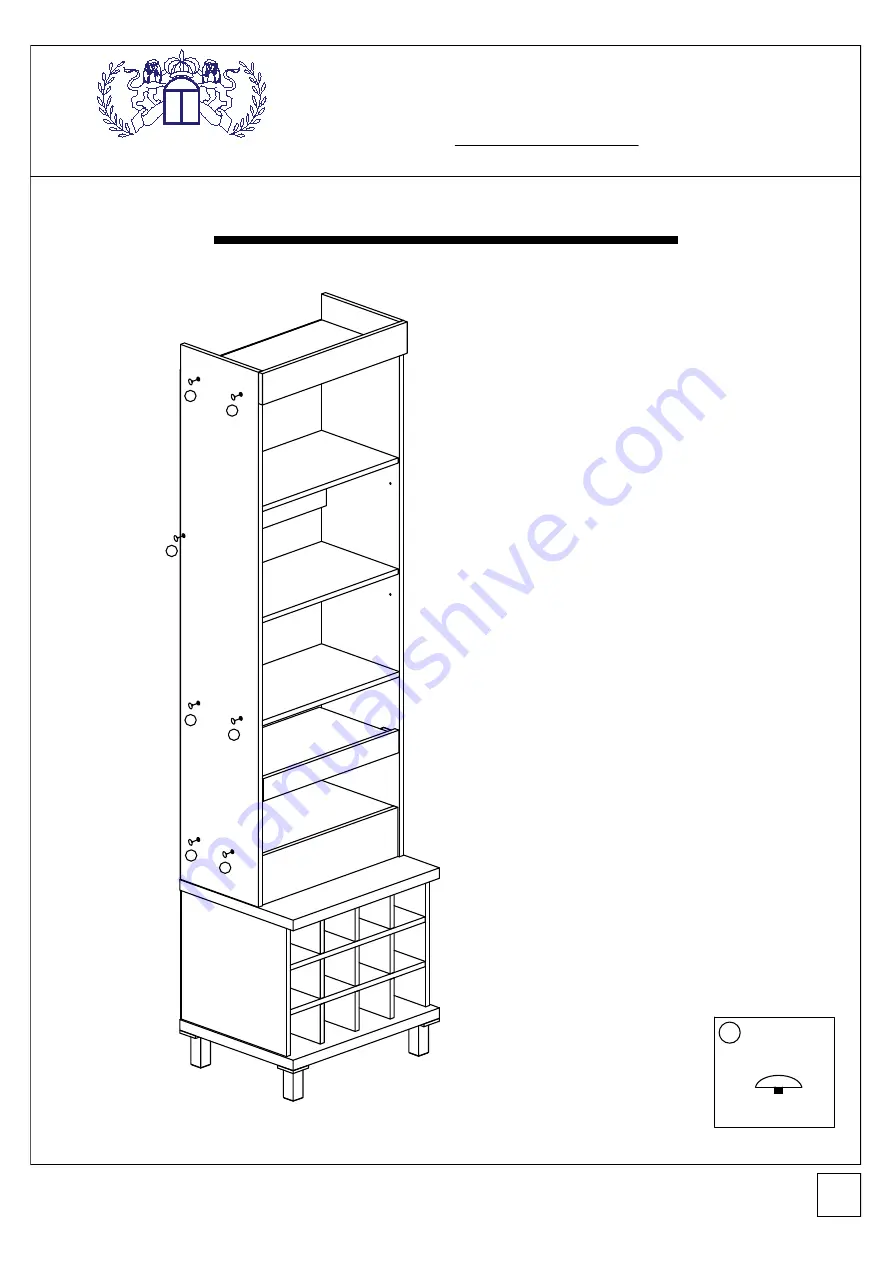
Assembly Instruction Step 11

H

T

I M

P O R

D

O

H

H

A

D

E

I

20

* Cover all the screws 

 's head with the

PVC cap provided by pushing the

cover's stem onto the hole of screw

head one by one for all screws on panels

G and L.

G

L

Screw Cap

4 Pcs.

1

1

1

1

1

1

1

1

Содержание HI W325

Страница 1: ...UCTION BOOKLET CONTAINS IMPORTANT INFORMATION ABOUT ASSEMBLY AND SAFETY PLEASE READ AND KEEP FOR FUTURE REFERENCE H T I M P O R D O H H A D E I BACK VIEW FRONT VIEW Keep these instructions for future...

Страница 2: ...PORTANT SAFETY INFORMATION PLEASE READ AND KEEP FOR FUTURE REFERENCE DO NOT RETURN PRODUCT TO THE STORE If a part is missing or damaged email our customer service We will gladly ship your replacement...

Страница 3: ...ox There are inner box es or package s that included components and accessories required to complete the assembly Parts I Main Unit II Back Drawer Lower Back Panels 1 Pcs 398 x 536 x 3mm Partition Pan...

Страница 4: ...with the product Required Or Recommended Tools H T I M P O R D O H H A D E I Screw M6 x 40mm 14 Pcs Screw M4 x 32mm 4 Pcs Screw M3 5 x 14mm 8 Pcs Mini Fix 8 Sets Pvc Dowel 74 Pcs Nail 60 Pcs Allen Ke...

Страница 5: ...rniture especially on carpet Warranty Information Hodedah warrants this product to be free from defects in material and workmanship agrees to remedy any such defect This warranty covers one year from...

Страница 6: ...d L s non thru holes as shown PANEL G PANEL L Insert the mini fix nuts with the cross arrow mark facing upward and aim to panel G and L s front thru holes As shown Insert the pvc dowels using hammer t...

Страница 7: ...ently tap them in Insert the mini fix nuts with the cross arrow mark facing upward and aim to panel A and E s top thru holes As shown PANEL A PANEL E PANEL D X 2 Insert push down and tighten mini fix...

Страница 8: ...to the upper non thru holes at panel Q Then tighten mini fix nuts clockwise to lock the mini fix up for tightening panel R and S to panel Q Cover 2 mini fix caps provided by pushing the cover s stem o...

Страница 9: ...ew to the non thru hole as shown 4pcs Inserting panel V s lower PVC dowels onto the center non thru holes at panel W Then tighten mini fix nuts clockwise to lock the mini fix up for tightening panel V...

Страница 10: ...ting the dowels onto the thru holes at Panel D As Shown CAUTIONS When insert the PVC Dowels to non thru holes don t push to hard Otherwise the side panels D may be damaged Hodedah www hodedah com supp...

Страница 11: ...rting the dowels onto the non thru holes at Panel A and Panel E As Shown CAUTIONS When insert the PVC Dowels to non thru holes don t push to hard Otherwise the side panels A E may be damaged Hodedah w...

Страница 12: ...ed Hodedah www hodedah com support hodedah com H T I M P O R D O H H A D E I 12 2 11 2 11 2 11 2 11 Screw M 6 x 50mm 4 Pcs 2 Allen Key 1 Pc 11 Place and fix Panel B onto Panel A C and E by inserting t...

Страница 13: ...on Panel B As picture shown CAUTIONS When insert the PVC Dowels to non thru holes don t push to hard Otherwise the side panels A E may be damaged Hodedah www hodedah com support hodedah com H T I M P...

Страница 14: ...allen key to tighten screws from the 7 thru holes of panel G one by one CAUTIONS When insert the PVC Dowels to non thru holes don t push to hard Otherwise the side panels G may be damaged Screw M 6 x...

Страница 15: ...allen key to tighten screws from the 7 thru holes of panel L one by one CAUTIONS When insert the PVC Dowels to non thru holes don t push to hard Otherwise the side panels L may be damaged Screw M 6 x...

Страница 16: ...ini fix up for tightening panel M Cover 2 mini fix caps provided by pushing the cover s stem onto the hole of mini fix nut on front side of panel G and L Screw M6 x 50mm 4 Pcs 2 16 Dowel Mini Fix Inst...

Страница 17: ...e inserting panel A C and panel E s upside dowels going onto panel F s non thru holes Mini Fix Cap 4 Pcs 6 17 Dowel Mini Fix Installation Then tighten mini fix clockwise to lock the mini fix up for ti...

Страница 18: ...D E I Take panel N and place it inside the top compartment by putting it on the 4 shelf support as shown Take the drawers Q and W and slide them The white rollers at drawer slide at both side of draw...

Страница 19: ...roperly for nailing Then use hammer to nail the nails one by one and at center of 4 side edges Gap between 2 nails should be about 100mm for all Place the back panel P onto the lower back unit align i...

Страница 20: ...mbly Instruction Step 11 H T I M P O R D O H H A D E I 20 Cover all the screws s head with the PVC cap provided by pushing the cover s stem onto the hole of screw head one by one for all screws on pan...

Страница 21: ...Hodedah www hodedah com support hodedah com Job Complete H T I M P O R D O H H A D E I 21 Completion...

Отзывы: