


Internal Event Name
Definition
Chan <#> Alarm
Cleared
A sensor alarm has cleared; # is the channel
or sensor number as shown in the Launch
Logger window in HOBOware. This event also
contains the value that was furthest out of
range for the sensor before the alarm
cleared.
New Interval
The logger has entered or exited burst
logging mode.
Safe Shutdown
The battery level dropped below 2.5 V; the
logger performs a safe shutdown.
Mounting the Logger
There are several ways to mount the logger using the materials
included:
•
Use the four built-in magnets on the back of the logger to
mount it to a magnetic surface.
•
Attach the Command strip to the back of the logger to
mount it a wall or other flat surface.
•
Use the double-sided tape to affix the logger to a surface.
•
Insert the hook-and-loop strap through the mounting
loops on both sides of the logger to mount it to a curved
surface, such as a pipe or tubing.
Protecting the Logger
The logger is designed for indoor use and can be permanently
damaged by corrosion if it gets wet. Protect it from
condensation. If the message FAIL CLK appears on the LCD
screen, there was a failure with the internal logger clock
possibly due to condensation. Remove the battery immediately
and dry the circuit board.
Note:
Static electricity may cause the logger to stop logging.
The logger has been tested to 8 KV, but avoid electrostatic
discharge by grounding yourself to protect the logger. For more
information, search for “static discharge” on
www.onsetcomp.com.
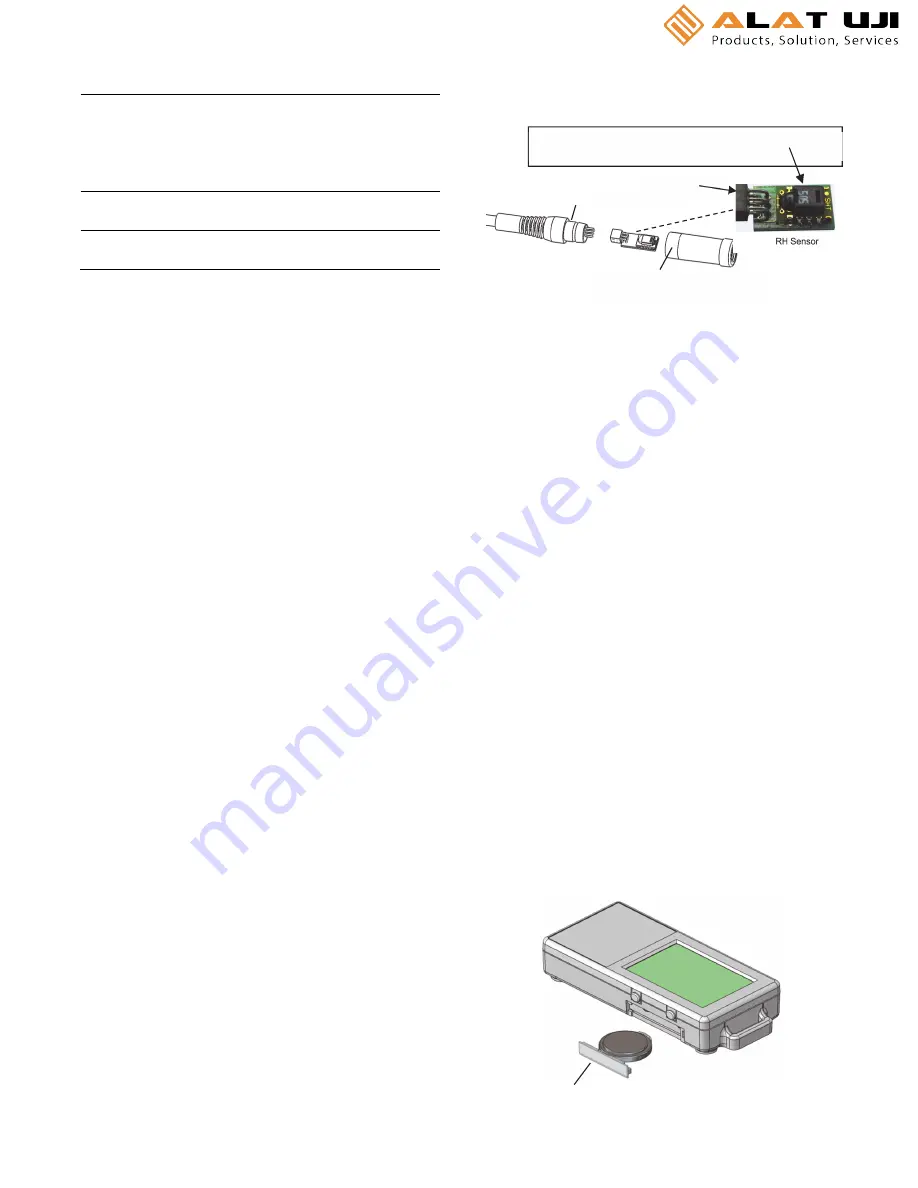
Replacing the RH Sensor
The RH sensor is protected by an ASA styrene polymer cap and
a modified hydrophobic polyethersulfone fluid barrier
membrane that allows vapor to penetrate while protecting the
sensor from condensation. RH sensor performance may
degrade over time and may require replacement. To replace
the RH sensor, order an RH Sensor Replacement Kit (HUM-
RHPCB-2) and follow these instructions:
1.
Remove the tape fastening the sensor cap to the receptacle.
Discard the tape.
2.
Grasp the cap and pull firmly to remove it. Discard the old
cap.
3.
Note the orientation of the small circuit board containing
the RH sensor. Pull it out and discard.
4.
Push gently but firmly to install the new sensor in the same
orientation.
5.
Push the RH new sensor cap onto the receptacle using a
slight twisting motion. Do not force the cap. If it does not go
on easily, the sensor may be installed backwards. Reverse
the sensor and try again.
6.
Use the included adhesive tape to fasten the sensor cap to
the receptacle. Line up the left edge of the tape where the
receptacle begins to taper down.
7.
Check logger status in HOBOware to verify the RH reading.
Battery Information
The logger contains a 3V CR2032 battery (HRB-TEMP). Expected
battery life varies based on the ambient temperature where
the logger is deployed, the logging or sampling interval,
frequency of offloading to the computer, number of channels
that are active, if burst or statistics logging modes are active,
and battery performance. A new battery typically lasts 1 year
with logging intervals greater than 1 minute. Deployments in
extremely cold or hot temperatures, a logging interval faster
than 1 minute, or a sampling interval faster than 15 seconds
can impact battery life. Estimates are not guaranteed due to
uncertainties in initial battery conditions and operating
environment.
The logger can also be powered by the USB cable when the
remaining battery voltage is too low for it to continue logging.
Connect the logger to the computer, click the Readout button
on the toolbar, and save the data as prompted. Replace the
battery before launching the logger again.
To replace the battery:
1.
Holding the logger with the LCD screen facing up, pull the
battery tray out of the logger housing.
Receptacle
RH sensor cap with integrated
protective membrane
WARNING:
Do not touch the actual sensor (black chip).
Doing so may compromise accuracy.
grasp here
Battery tray removed
from logger


