Hobbico Sun Pilot Action Series Скачать руководство пользователя страница 5

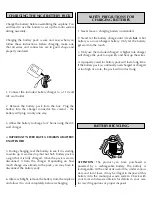
At the front edge of the wing you will notice a small

plastic post. To install the wing, push the post into the
hole on the fuselage. Fasten the wing to the fuselage
with the 3mm x 18mm sheet metal screw (the largest screw).

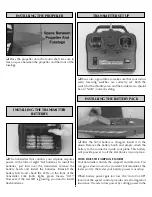
Gently work the control horn on the horizontal

stabilizer onto the z-bend. Turn the plane upside-down.
Position the stabilizer on the fuselage. Insert the plastic
post on the front of the tail piece into the hole in the
fuselage. Fasten the tail piece to the fuselage with the
1.5mm x 10mm sheet metal screw ( the medium size screw).

Insert the wire landing gear into the slot at the front

of the battery cover. Place the landing gear cover over
the wire and fasten it with two 1mm x 5mm flat head
screws (the smallest screws).

INSTALLING THE LANDING GEAR

INSTALLING THE HORIZONTAL

STABILIZER

INSTALLING THE MAIN WING

5

Содержание Sun Pilot Action Series

Страница 1: ...ification In no case shall Hobbico s liability exceed the original cost of the purchased kit Further Hobbico reserves the right to change or modify this warranty without notice In that Hobbico has no...

Страница 2: ...y the model If you make any modifications you will void your warranty 2 Test the operation of the model before each flight to insure that all equipment is operating properly and that the model remains...

Страница 3: ...the pack you may have to disconnect the battery early 6 After each flight remove the battery from the airplane and allow it to cool completely before recharging 1 Never leave a charging battery unatt...

Страница 4: ...ide thrust NiCd Battery Rechargeable batteries which are used as power for the airplane Receiver RX The radio unit in the airplane which receives the transmitter signal and relays the control to the s...

Страница 5: ...e down Position the stabilizer on the fuselage Insert the plastic post on the front of the tail piece into the hole in the fuselage Fasten the tail piece to the fuselage with the 1 5mm x 10mm sheet me...

Страница 6: ...rrectly set Both the switch for the throttle servo and the rudder servo should be on NOR normal setting After the NiCd battery is charged install it in the plane Remove the battery hatch and simply at...

Страница 7: ...It may take several tries to make your plane fly level The best way to do it is to make very small adjustments to the elevator 1 16 or less and then test the effect of the change CHECK THE SPINNER AND...

Страница 8: ...altitude The sharper the plane turns the more altitude it will lose Try to make gentle turns 10 Don t let the airplane get too far away from you The farther away it is the harder it is to see what th...

Отзывы: