


Keep hands clear of propeller during power battery installation and removal.
With the transmitter powered, place the battery on the
power magnets on the under side of the Power Module.
Make sure elevator & rudder linkages are connected.
1
2
3
Place the Power Module in the under carriage of
the fuselage. Magnets hold the module in place.
RECEIVER LED GUIDE
Constant illumination
➧
Normal operation
Blinks rapidly
for 3 seconds,
then solid illumination
➧
Frequency locking stage
(at power-up)
Blinks slowly (rate of
1 blink/second)
➧
Receiver lost signal or
frequency-lock failure
Blinks (rate of
2 blinks/second)*
* AT THIS POINT, DO NOT ATTEMPT TO OPERATE.
REMOVE LIPO AND RECHARGE.
➧
Low LiPo voltage (< 2.9V)
protection (motor will
turn off, actuators still on)
module in place.
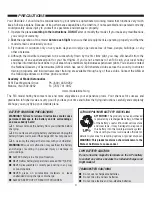
CAUTION!
The propeller is
ARMED! If the left
control stick is moved
above the minimum
position the
propeller
will operate.
6
PREPARE THE UBERLITE FOR FLIGHT
BINDING THE TRANSMITTER
The Uberlite 2-in-1 transmitter and module-mounted receiver are bound at the factory. If the receiver does not respond
after you switch on your transmitter and attach the charged LiPo battery to the power module, then follow these steps.
1. Turn off the transmitter and remove the battery from the module.
2. While holding down the Binding Button, switch the transmitter back on and release the Binding Button once
the red LED flashes.
3. Install the battery to the power module.
4. Once the LEDs on the module and transmitter are solidly illuminated, the system is now bound.
Содержание ItCanFly Uberlite 1
Страница 11: ...11 notes ...
Страница 12: ... ...


