background image

- 12 -

GB

1.1

ELECTRIC FRY-TOPS

1.2

TECHNICAL CHARACTERISTICS

Frame made of AISI 304 stainless steel, mounted on height-adjustable feet and with a rubber platform.

COOKING PLATE

 made of special steel with high thermal conductivity, in smooth and fluted versions, with splash guard

made of 18/10 stainless steel; C version with chrome worktop.

DRIP TRAY

 made of AISI 304 stainless steel.

ELECTRIC HEATING

 with armoured electrical heating elements.

INDEPENDENT CONTROLS

 for every plate zone for differentiated temperatures on EFT99 models.

Installation must be performed by qualified persons in accordance with current regulations.

WARNINGS:
If the oven is installed against a wall, the wall needs to withstand temperatures of 100°C and must be fireproof.
Before proceeding with the installation, remove the protective plastic film and eliminate any adhesive residues by means of
a suitable product for cleaning stainless steel.
Install the oven horizontally, correct positioning is obtained by turning the levelling feet.
If the unit is installed on its own, it is advisable to secure it to make its stability safer.

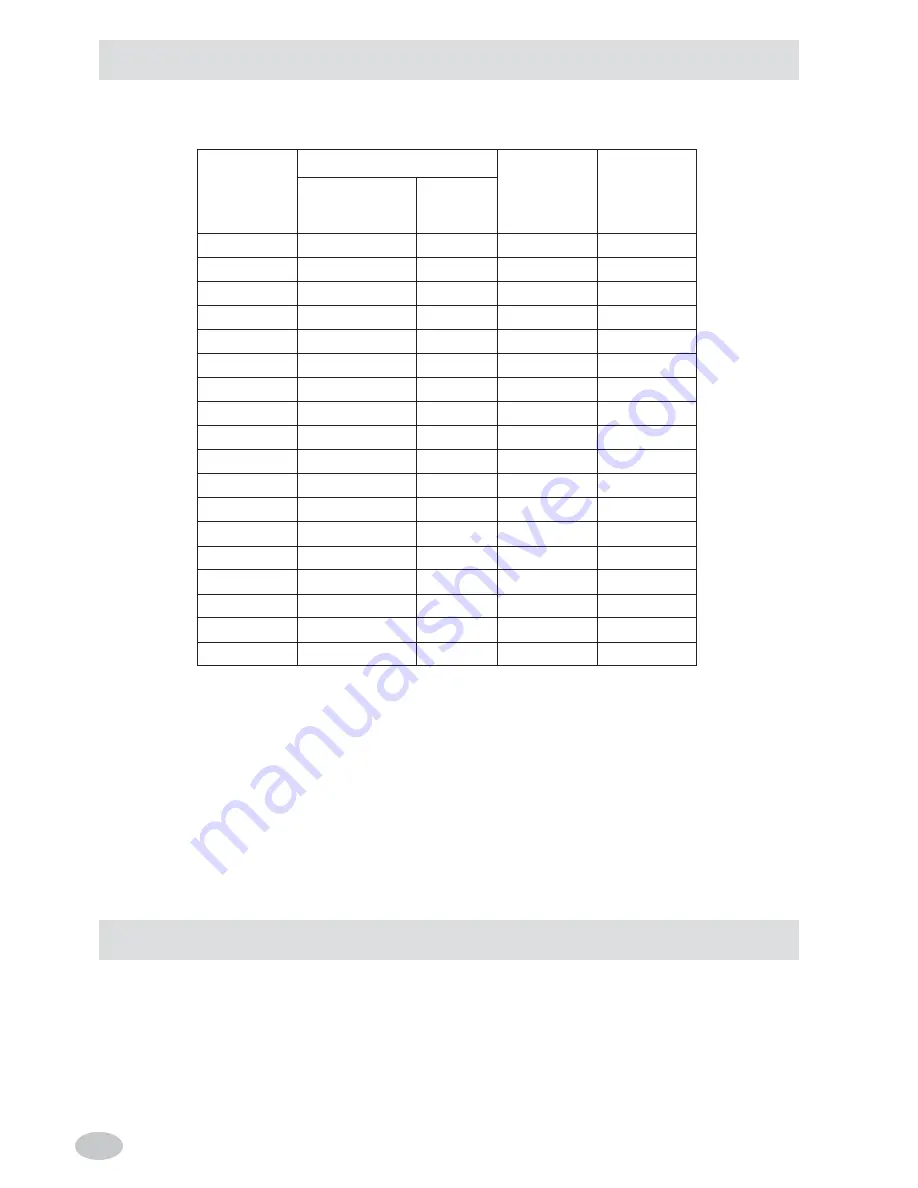
Tab. 1

L

 = Smooth plate

R

 = Fluted plate

LR

 = 50% smooth 50% fluted plate

C

 = Chrome plate

*SUPPLY VOLTAGE:

 3N AC 415 V; 3 AC 240 V; 1N 240 V 50/60 Hz.

N.B.:

The input power with 3N AC 380 V; 3 AC 220 V; 1N 220 V 50/60 Hz is approximately 16% lower.
The input power with  3N AC 400 V; 3 AC 230 V; 1N 230 V 50/60 Hz  is approximately 8% lower.

1.

TECHNICAL DATA

2.

INSTALLATION  INSTRUCTIONS

EFT49L

EFT49LC

EFT49R

EFT49RC

EFT99L

EFT99LC

EFT99R

EFT99RC

EFT99LR

EFT99LRC

EFTA49L

EFTA99L

EFTA49LC

EFTA99LC

EFTA 49R

EFTA99R

EFTA49RC

EFTA99RC

MODEL

DIMENSIONS in mm.

esternal

plate

WxDxH/H max.

450x900x250/350

450x900x250/350

450x900x250/350

450x900x250/350

900x900x290/350

900x900x290/350

900x900x290/350

900x900x290/350

900x900x290/350

900x900x290/350

450x900x925

900X900X925

450X900X925

900X900X925

450X900X925

900x900x925

450X900X925

900X900X925

WxD

375x710

375x710

375x710

375x710

825x710

825x710

825x710

825x710

825x710

825x710

375x710

825X710

375X710

825X710

375X710

825x710

375X710

825X710

POWER

INPUT

  TOTAL *

kW

6

6

6

6

12

12

12

12

12

12

6

12

6

12

6

12

6

12

WEIGHT

NET

kg

80

80

80

80

140

140

140

140

140

140

80

140

80

140

80

140

80

140

Содержание EFT49L

Страница 1: ...IONESPARALAINSTALACI N ELUSOYELMANTENIMIENTO 15 10 2007 Rev 1 160492 FRY TOP ELETTRICO SERIE DOMINA ELECTRIC GRIDDLE PLATE SERIES DOMINA FRY TOP ELECTRIQUE SERIE DOMINA ELEKTRISCHE BRAT UND GRILLPLATT...

Страница 2: ...13 2 4 Positioning 13 2 5 Electrical connection 13 2 5 1 Earthing 13 2 5 2 Equipotential system 14 2 5 3 Power supply cable 14 2 5 4 Connections to the various electric mains 14 3 Replacing the most...

Страница 3: ...fficient earthing system as envisaged by the current electrical safety regulations it is therefore necessary to verify this essential requisite and in case of doubt ask professionally qualified person...

Страница 4: ...If the unit is installed on its own it is advisable to secure it to make its stability safer Tab 1 L Smooth plate R Fluted plate LR 50 smooth 50 fluted plate C Chrome plate SUPPLY VOLTAGE 3NAC 415 V...

Страница 5: ...ged connection is of the fixed type IMPORTANT A multi polar mains cut off device must be provided upstream from each oven with a contact gap of at least 3 mm for example a manual switch of suitable ca...

Страница 6: ...mains with different characteristics to the ones envisaged or to replace the supply cable you need to remove the front panel connect the supply cable to the terminal block according to need following...

Страница 7: ...ct the wires of the heating elements remove the heating element protection box remove the brackets fixing the heating element replace the part and reassemble everything following the wiring diagram Ta...

Страница 8: ...oning To restore the safety thermostat take off the rubber cap and press the red push button Verify the causes of the action 4 1 USINGTHE ELECTRIC FRY TOP Turn the thermostat control knob Fig 1 Pos 1...

Страница 9: ...for a few minutes in order to dry it Afterwards coat it with a light layer of Vaseline oil CHROME PLATES Clean the plate frequently with a wet rag To remove any incrustations use a strong plastic scra...

Страница 10: ...ta cavo elettrico Electric cable output Sortie c ble lectrique Elektrischkabel ausgang Salida cable el ctrico SCHEMI DI INSTALLAZIONE INSTALLATION DIAGRAM SCHEMAS D INSTALLATION INSTALLATIONSPL NE ESQ...

Страница 11: ...DE INSTALACI N EFTA49L EFTA99R 700 850 150 0 80 925 880 900 70 850 80 925 880 900 600 450 700 850 150 0 80 925 900 880 900 900 600 70 85 150 0 80 93 0 880 900 900 600 45 700 850 150 0 80 925 880 900 4...

Страница 12: ...44 SCHEMA ELETTRICO ELECTRICAL DIAGRAM SCHEMA ELECTRIQUE SCHALTPLAN ESQUEMAS EL CTRICO EFT49 EFTA49...

Страница 13: ...45 SCHEMA ELETTRICO ELECTRICAL DIAGRAM SCHEMA ELECTRIQUE SCHALTPLAN ESQUEMAS EL CTRICO EFT99 EFTA99...

Страница 14: ...46...

Страница 15: ...ESPA OL REGLETA RESITENCIA TERMOSTATO 50 300 BOMBILLA VERDE BOMBILLA ANARANJADO CONMUTADOR TERMOSTATO LIMITE CABLE D ALIMENTACION ABBREVIAZIONE SHORTNAME ABREVIATION KURZZEICHEN ABREVIACION N CODICE C...

Страница 16: ...ientsouhaitantsed fairedecetappareil devradonccontacterlefabricantetsuivrelaproc durequecedernieraadopt eafindepermettrelacollectes par edel appareilarriv enfindevie La collecte diff renti e ad quate...

Отзывы: