– 7 –
EN
MTS Recording / Monitor Mode
Type of
broadcast
Hi-Fi audio track
(2-channel)
Normal audio
track
L+R
L+R
STEREO/SAP
Selection
L
L
R
R
Display on the
TV screen
Regular
(monaural audio)
Bilingual
broadcast
Stereo &
Bilingual
broadcast
Stereo
broadcast
-None-
STEREO
STEREO
SAP
SAP
-Invalid-
-Invalid-
TV STEREO*
SAP*
TV STEREO*
SAP*
L-channel R-channel
Mono
Mono
Mono
Main audio
program
Sub audio
program
Main audio
program
Sub audio
program
Main audio
program
Sub audio
program
Sub audio
program
Sub audio
program
Sub audio
program
* You must select the recording mode in TV STEREO or SAP before you record a broadcast.
When you play a VHS tape, or
receive a broadcast on the VCR
tuner channel you are watching,
the status shown below will
appear when you press [DIS-
PLAY] on the remote control.
When you record the MTS broadcast signal, you need
setting the MTS mode.
1
Press [MENU] and select "TV STEREO" or
"SAP" by pressing [PLAY] or [STOP]. Then,
press [F.FWD] for fix mode. To exit, press
[COUNTER RESET/EXIT].
• Although a program may be broadcast in both
stereo and second audio, you must select the
Recording mode in TV STEREO or SAP before you
record a broadcast.
2
Press [MENU] and select "AUDIO OUT" by
pressing [PLAY] or [STOP]. Then, press
[F.FWD]. Next, select "HIFI" or "MONO" by
pressing [PLAY] or [STOP]. To exit, press
[COUNTER RESET/EXIT].
• While the VCR is set in HIFI stereo mode, HIFI
appears on the TV screen. While the VCR is set in
monaural (MONO) mode, HIFI disappears from the
TV screen.
STOP
12:00AM
CH 32
STEREO
SAP
SP 0:00:00 HIFI
1)
2)
You can make copies of video tapes made by friends or
relatives for your enjoyment.
Warning:
Unauthorized recordings of copyrighted video
tapes may be an infringement of copyright laws.
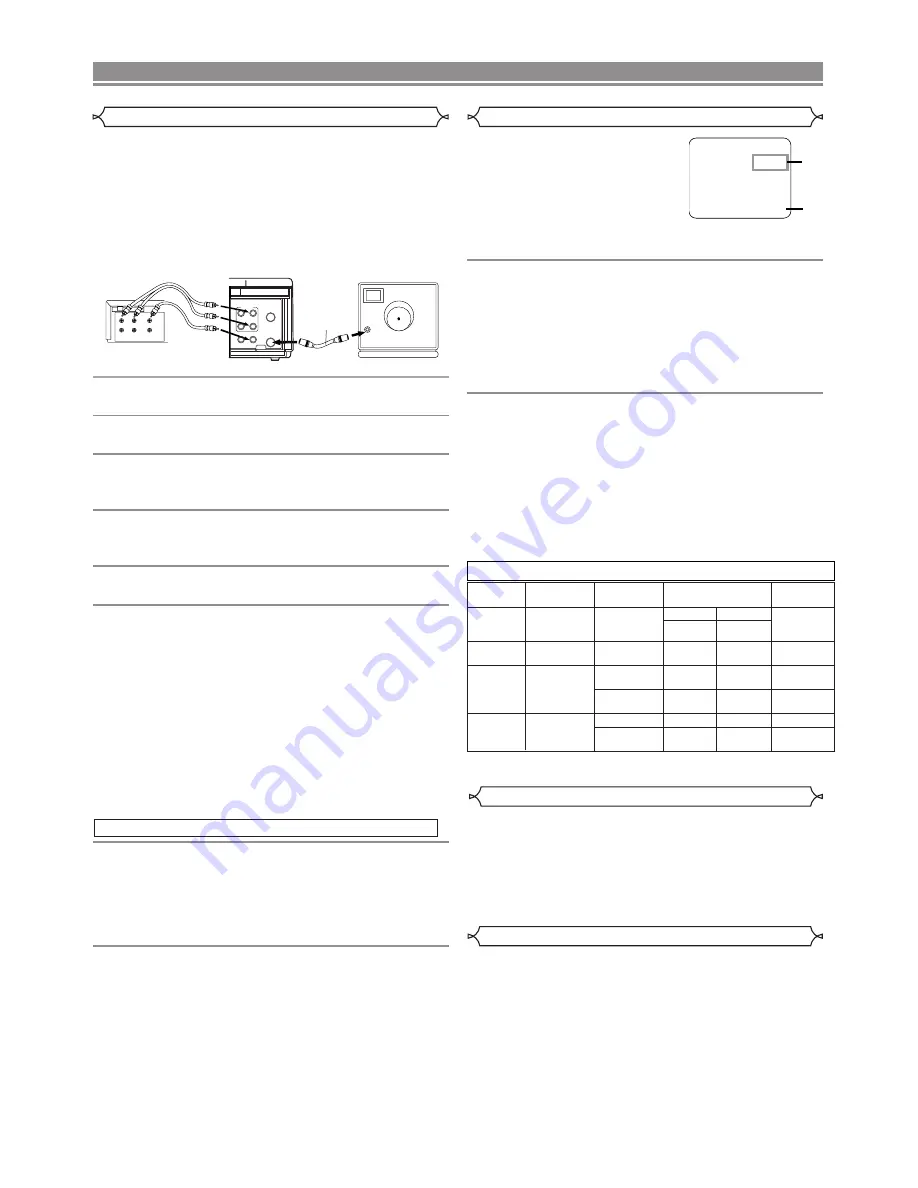
Connect the recording VCR(this unit), the playing VCR
(another source) and your TV using the following dia-
gram.
1
Insert a pre-recorded tape into the playing
VCR.
2
Insert a tape with its safety tab into the
recording VCR.
3
Press [SPEED] on the remote control of the
recording VCR to select the desired recording
speed (SP/SLP).
4
Select the “L1” or “L2”position on the record-
ing VCR. See page 3, under “Using
AUDIO/VIDEO Input Jacks”.
5
Press [REC/IRT] on the recording VCR.
6
Begin playback of the tape in the playing VCR.
• For best results during dubbing, use the VCR’s front
panel controls whenever possible. The remote con-
trol might affect the playing VCR’s operation.
• Always use video-quality shielded cables with RCA-
type connectors. Standard audio cables are not rec-
ommended.
• You can use a video disc player, satellite receiver, or
other audio/video component with A/V outputs in
place of the playing VCR.
ANT in
[TV set]
(Use for monitoring)
RF cable
(supplied)
[Playing VCR]
(another source)
Audio/Video cables
(not supplied)
IN
OUT
AUDIO
VIDEO
LEFT RIGHT
[Recording VCR]
(this unit)
ANT
AUDIO
VIDEO
IN
OUT
OUT
IN
OUT
L
R
IN
When a tape has reached the end during recording,
playback, or fast-forward, the tape will automatically
rewind to the beginning. After rewinding finishes, the
VCR will eject the tape and turn itself to off.
• The VCR will not rewind the tape automatically dur-
ing timer recording or One Touch Recording.
• This shows the elapsed recording or playback time in
hours, minutes, and seconds. (The displayed time will
not change during blank portions on the tape.)
• The indication will appear when the tape is rewound
further than “0:00:00” on the tape counter.
SPECIAL FEATURES
Auto Rewind
Copying a Video Tape
MTS (Multi-Channel Television Sound) System
Real Time Tape Counter
1
Turn on the TV and set the TV to channel 3.
If
channel 3 is already occupied for broadcasting,
change the RF output to CH4, and change the TV
channel to CH4.
(See “RF Output Channel” on page 3 for the
detail.)
2
Press [VCR/TV] on the remote control of the
recording VCR so that the VCR indicator
comes on.
To Monitor the Recording
Содержание VT-FX795A
Страница 10: ... 10 EN MEMO ...
Страница 11: ... 11 EN WARRANTY ...
Страница 12: ...WARRANTY Printed in China 0VMN03630 HD455UD TJ16971 C Hitachi Ltd 2003 ...


