12
English
1. Connect the headphones or earphones to the headphone
jack on the side of the radio.
2. No sound is emitted from the radio speakers when
headphones or earphones are connected.
3. Adjust the volume.
●
Charging
a
Smartphone
or
Cell
Phone
NOTE
○
When using the rechargeable battery as the power
source, make sure that it is adequately charged. If the
battery power is low, it may not be possible to charge the
smartphone or cell phone.
○
The charging time varies depends on the type of
smartphone or cell phone.
○
Do not use the radio to charge devices other than a
smartphone or cell phone.
○
Recharging may not be possible with certain models of
smartphones and cell phones.
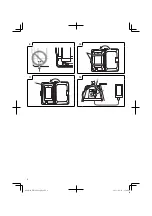
1. Connect a USB charging cable suitable for your
smartphone or cell phone (purchased from an electric
store) to the USB charging jack inside of the external
device storage case. (
Fig.
12
)
2. Turn on the radio and press the band select button to
display [FM] or [AUX].
NOTE
The display changes in the order of [FM
→
AM
→
AUX
→
FM]
each time the band select button is pressed.
3. Select FM or AUX mode to start charging.
NOTE
You can receive FM signal
If a lot of noise occurs during an FM stereo broadcast,
switch to monaural or reduce the noise.
(Refer to "For Better Reception" for switching to the
stereo reception.)
●
To
turn
the
voice
messages
on/o
ff
By factory default setting, the voice message function
plays “Welcome to Hitachi Power Tools” when the power
is turned on and “Presented by Hitachi Power Tools”
when the power is turned o
ff
.
To mute the voice messages, press memory button 1
while the power is turned o
ff
and display [OFF] on the
display panel.
To restore the voice messages, press memory button
1 while the power is turned o
ff
and display [ON] on the
display panel.
MAINTENANCE
AND
INSPECTION
WARNING
When not in use or during inspection and maintenance,
be sure to remove the AC plug, rechargeable battery and
backup batteries.
●
Inspecting
the
mounting
screws
Regularly inspect all mounting screws and ensure that
they are properly tightened. Should any of the screws be
loose, retighten them immediately. Failure to do so could
result in serious hazard.
●
Cleaning
on
the
outside
When the radio is stained, wipe with a soft dry
cloth or a cloth moistened with soapy water.
Do not use chloric solvents, gasoline or paint thinner, for
they melt plastics.
●
Storing
the
Radio
Do not store the radio in the following places.
○
Within reach of or easily accessible to children
○
In humid or dusty places
○
In high temperature such as inside a car or exposed
to direct sunlight
○
In extremely cold places or directly exposed to cold
draughts
○
Where the temperature changes drastically
○
Where it is exposed to smoke or steam such as near
a cooking appliance or humidi
fi
er
●
Service
parts
list
CAUTION
Repair,
modi
fi
cation and inspection of Hitachi Power
Tools must be carried out by a Hitachi Authorized Service
Center.
This Parts List will be helpful if presented with the tool to
the Hitachi Authorized Service Center when requesting
repair or other maintenance.
In the operation and maintenance of power tools,
the safety regulations and standards prescribed in each
country must be observed.
MODIFICATIONS
Hitachi Power Tools are constantly being improved
and modi
fi
ed to incorporate the latest technological
advancements.
Accordingly, some parts may be changed without prior
notice.
GUARANTEE
We guarantee Hitachi Power Tools in accordance with
statutory/country speci
fi
c regulation. This guarantee does
not cover defects or damage due to misuse, abuse, or normal
wear and tear. In case of complaint, please send the Power
Tool, undismantled, with the GUARANTEE CERTIFICATE
found at the end of this Handling instruction, to a Hitachi
Authorized Service Center.
NOTE:
Due to HITACHI’s continuing program of research and
development, the speci
fi
cations herein are subject to
change without prior notice.
000Book̲UR18DSL2̲EE.indb 12
000Book̲UR18DSL2̲EE.indb 12
2013/06/13 15:44:35
2013/06/13 15:44:35
Содержание UR 18DSL2
Страница 84: ...84 000Book UR18DSL2 EE indb 84 000Book UR18DSL2 EE indb 84 2013 06 13 15 44 41 2013 06 13 15 44 41 ...
Страница 86: ...86 000Book UR18DSL2 EE indb 86 000Book UR18DSL2 EE indb 86 2013 06 13 15 44 41 2013 06 13 15 44 41 ...
Страница 88: ...88 1 2 3 4 5 000Book UR18DSL2 EE indb 88 000Book UR18DSL2 EE indb 88 2013 06 13 15 44 42 2013 06 13 15 44 42 ...
Страница 90: ...90 000Book UR18DSL2 EE indb 90 000Book UR18DSL2 EE indb 90 2013 06 13 15 44 42 2013 06 13 15 44 42 ...
Страница 91: ...91 000Book UR18DSL2 EE indb 91 000Book UR18DSL2 EE indb 91 2013 06 13 15 44 42 2013 06 13 15 44 42 ...


