--- 10 ---
8-4. Reassembly
Reform reassembly in the reverse order of disassembly while ovserving the given precautions and taking care of
the following points.
(1) After disassembly, thoroughly remove old grease from the inside of the Gear Cover [8] <8>, and insert 15 g of
new grease (Nippeco JF-375, Code No. 930036, is recommended) prior to reassembly. When inserting
grease, apply it to the pinion gear teeth surfaces, and to the needle bearing inside the Inner Cover [10] <10>.
(2) When replacing the Ball Bearing [15] <15> on the commutator side of the Armature Ass'y [13] <13>, be very
careful to ensure that the Dust Seal [14] <14> is assembled in the proper direction. The Dust Seal [14] <14>
plays an important role in protecting the ball bearing against dust, and must be replaced with a new one if
disassembled.
8-5. Tightening Torque
D4 Tapping Screw (W/Flange) [26] <26> [34] <37>
• • • • • • • • • • • • • • • •
2.0 0.5 N
•
m (20 5 kgf
•
cm, 1.5 0.4 ft-lbs)
D5 Tapping Screw [7] <7>
• • • • • • • • • • • • • • • • • • • • • • • • • • • • • •
2.9 0.5 N
•
m (30 5 kgf
•
cm, 2.2 0.4 ft-lbs)
D5 Hex. Hd. Tapping Screw [27] <27>
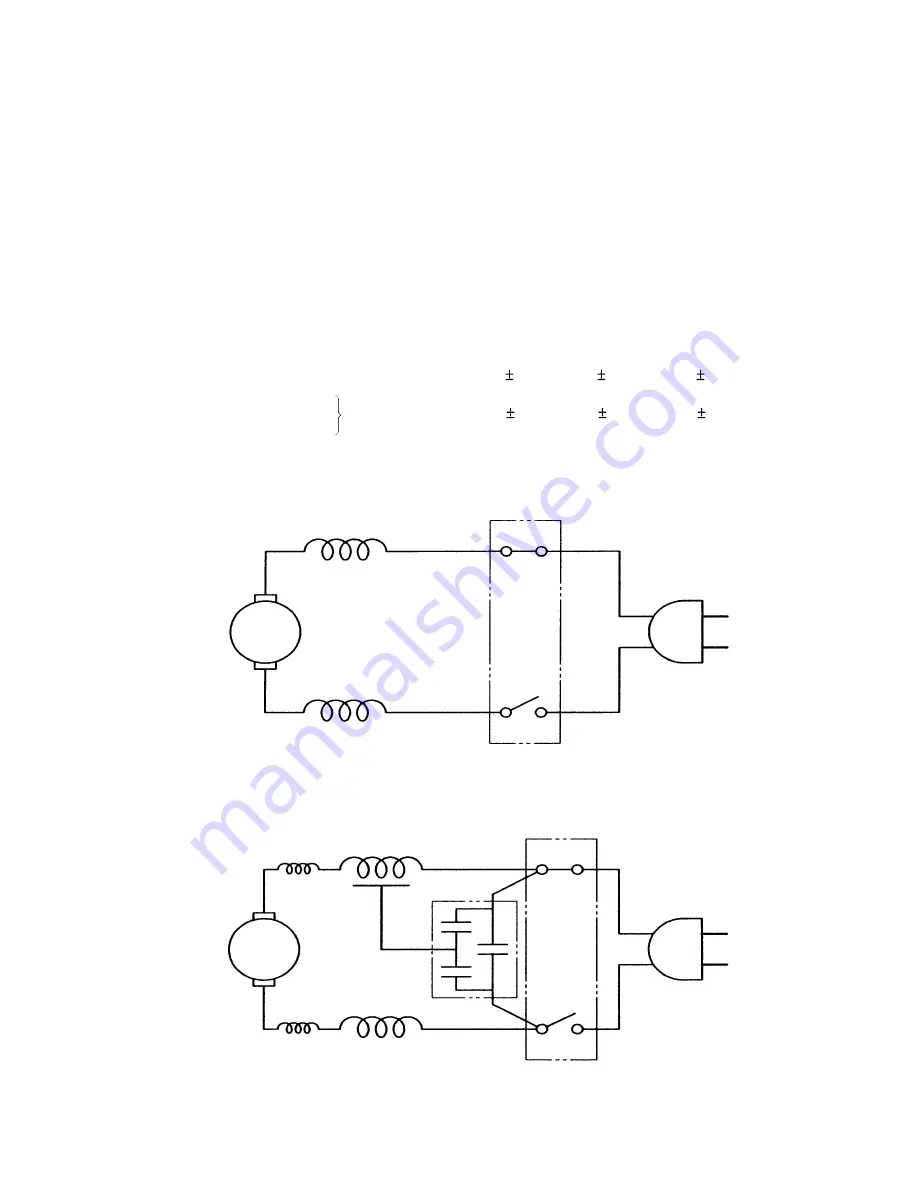
8-6. Wiring Diagrams
For the U.S.A., Canada and Asian countries (except China)
Armature
Ass'y [13] <13>
White or blue
Stator Ass'y
[17] <17>
Yellow
Switch (C) [30] <33>
Cord [37] <40>
Black or brown
White or blue
4
3
2
1
For European countries and China
Armature
Ass'y [13] <13>
Blue
Stator Ass'y
[17] <17>
Yellow
Switch (C) [30] <33>
Cord [37] <40>
Brown
Blue
4
3
2
1
Noise
Suppressor <30>
Black
Black
Silver
Choke coil
Содержание S 15SA
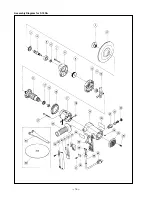
Страница 16: ... 13 Assembly Diagram for S 15SA ...
Страница 19: ... 16 Assembly Diagram for S 18SA ...


