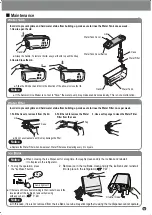
Ice Bank
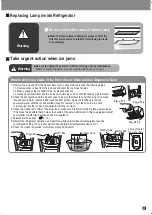
Before performing maintenance, make sure that the refrigerator is unplugged.
If there is a gap, rotate the Auger 90 degrees and then install the Ice Bank.
1. Wipe the Ice Bank dry with a soft cloth.
1. Grasp the top of the Ice Bank with both hands.
Then, lift it up and pull it towards yourself.
3. When installing the Ice Bank, be sure that there
is no gap at the bottom of the Ice Bank.
2. After removing the ice, wipe the Ice Bank with a soft cloth,
being careful to remove any water in or on the Ice Bank.
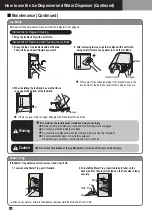
1. To remove the Water Tray, pull it forward.
2. To install the Water Tray, insert the tabs (2 tabs) on the
back side first, then insert the tabs on the front side (3 tabs)
securely.
Water Tray
●
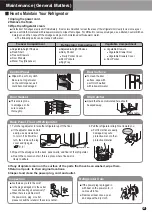
Wipe up any water or debris in the dispenser pit (especially the bottom) with a soft cloth.
If the Water Tray becomes soiled, remove it and rinse it off.
20
If there are still ice cubes remaining in the Crusher Case in the
reverse side of the Ice Bank, remove them using a spoon, etc..
Instructions for Regular Cleaning
Instructions for Removing and Cleaning the Ice Bank
GAP
90
Caution
Warning
Be careful, as the Ice Dispenser rotates and may cause injury.
Before performing maintenance, make sure that the refrigerator is unplugged.
Do not put your hands inside the Ice Bank.
Do not use the Ice Dispenser when the Ice Bank is removed from the refrigerator.
Do not disassemble, repair, or modify this equipment.
When repairs are necessary, contact retailers or service center.
Do not touch the blades of the Ice Bank when it is removed. There is a risk of injury.
Flapper
Blade
Crusher Case
Auger
Tap
Booth
Tap
Water Tray
Maintenance (Continued)
How to use the Ice Dispenser and Water Dispenser (Continued)


