


English
- 19 -
Select a channel by using “
•
” or “
” button. Press
OK
button to add selected channel to favourites list.
Press
OK
button again to remove.
Button Functions
OK
•
: Add/remove a station.
YELLOW
•
: Tag/untag a channel.
GREEN
•
: Tag/untag all channels.
BLUE
•
: Displays fi ltering options.
Managing Stations: Sorting
Channel List
You can select broadcasts to be listed in the channel
list. To display specifi c types of broadcast, you should
use Active channel list setting.
Select Active channel list from the Channel list menu
by using
“
” or “
”
button. Press
OK
button to
continue.
You can select a broadcast type option from the list
by using “
” /“
” and
OK
buttons.
On-Screen Information
You can press “INFO” button to display on-screen
information. Details of the station and current
programme will be displayed on the information
banner.
The information banner gives information on the
channel selected and the programmes on it. The name
of the channel is displayed, along with its channel
list number.
Hint: Not all channels broadcast the programme
data. If the name and time of the programme are not
available, then information banner will be displayed
with blanks.
If the selected channel is locked, you must enter the
correct four-digit numeric code to view the channel
(default code is
0000
). “
Enter PIN
” will be displayed
on the screen in such a case.
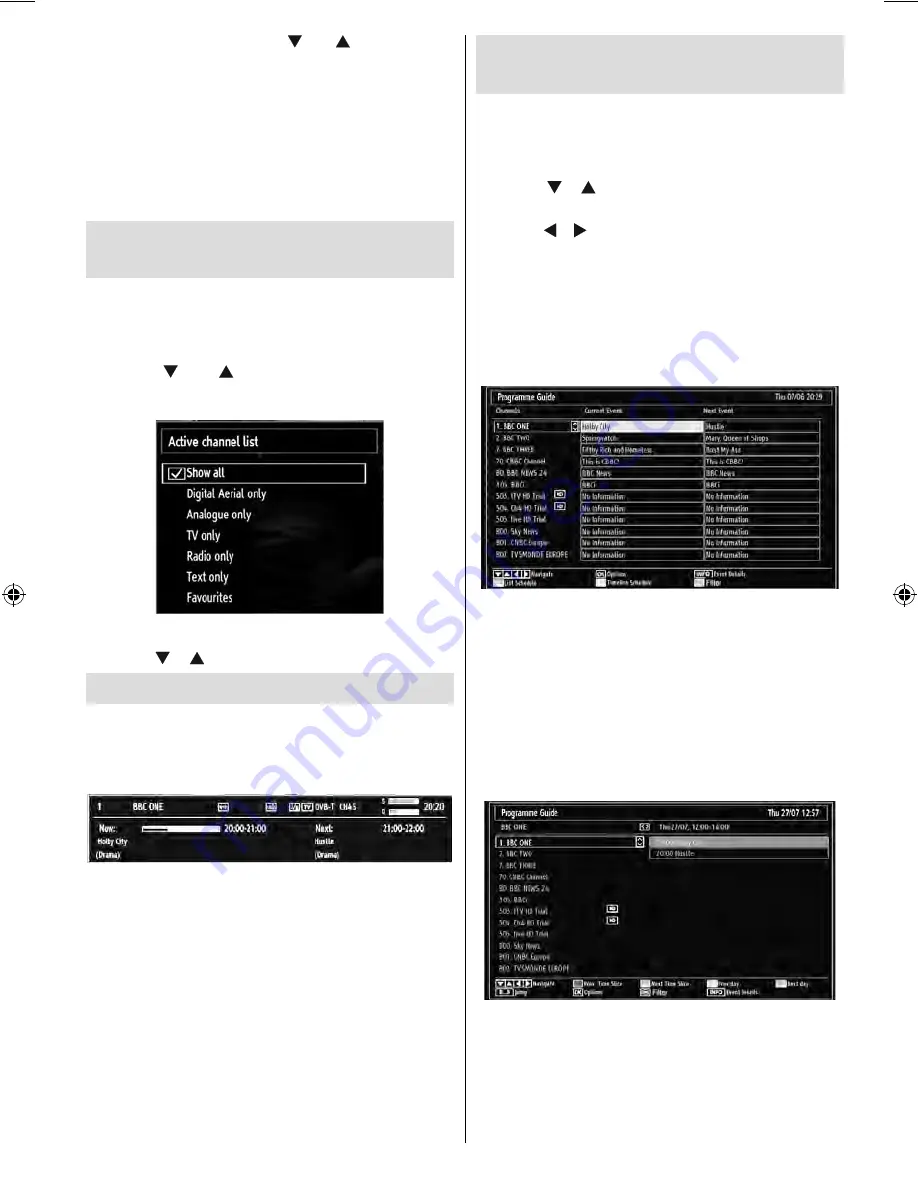
Viewing Electronic Programme
Guide (EPG)
You can view the electronic programme guide (EPG)
to view information about available programmes.To
view the EPG menu please press
EPG
button on the
remote control.
Press “
•
”/“
” buttons to navigate through
channels.
Press “
•
”/“ ” buttons to navigate through the
programme list.
EPG menu displays available information on all
•
channels.
Please note that event information is updated
•
automatically. If there are no event information
data available for channels, EPG will be displayed
with
blanks.
OK
(Options):
Displays programme options including
“
Select Channel
” option.
INFO (Event Details):
Displays the programmes in
detail.
Green button:
Programme schedule will be listed
Yellow button:
Display EPG data in accordance with
timeline schedule
Blue button (
Filter
):
Views fi ltering options.
Red
button (Prev Time Slice):
Displays the
programmes of previous time slice.
Green button (Next Time Slice):
Displays the
programmes of the next time slice.
Yellow button (Prev Day):
Displays the programmes
of previous day.
00_MB63D_[GB]_5100UK_DVB-TC_PLATINIUM6_46915LED_10070722_50183400.indd 19
00_MB63D_[GB]_5100UK_DVB-TC_PLATINIUM6_46915LED_10070722_50183400.indd 19
21.01.2011 14:34:38
21.01.2011 14:34:38
Содержание L46VG09U
Страница 40: ...Operating Instructions ...
Страница 46: ...English 7 ...
Страница 53: ...50183401 ...
Страница 54: ...www hitachidigitalmedia com 50183400 ...


