
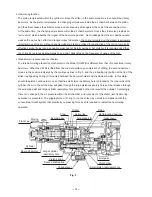


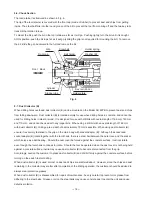


--- 22 ---
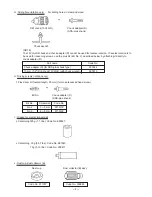
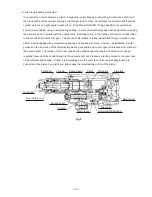
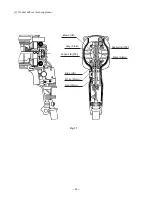
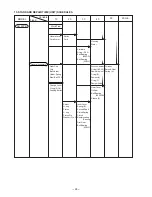
Damper (A) [31]
Stopper Ring [34]
Damper Holder [33]
5-mm diameter hole (2 pcs.)
O-ring (C) [32]
O-ring (B) [30]
O-ring (1AP-20) [28]
Second Hammer [27]
Hammer Holder [29]
Tap with a hammer.
Punch
9-2. Reassembly
Reassembly can be accomplished by following the disassembly procedure in reverse. However, special attention
should be given to the following items.
(1) Application of lubricant
Apply special grease (for hammer and hammer drill) to the O-ring (1AP-20) [28] and O-ring (B) [30] for the
Hammer Holder [29], Damper (A) [31], O-ring (C) [32], O-ring (I.D.16) [36] for the Striker [35], outer
circumference of the Striker [35], inner and outer circumference of the Piston Pin [40], outer circumference of
the Piston [37], Reciprocating Bearing [48], Reciprocating Bearing [48] rotary shaft of the Second Shaft [44],
clutch claw of the Cylinder [22], inner circumference of the metal of the Inner Cover [39], Second Hammer
[27], and the lip portion of the Oil Seal [16]. Fill 50 g of the special grease in the gear cover and 10 g in the
inner cover groove. Apply Molub Alloy No. 777-1 grease to the outer circumference of the Clutch [47] groove
and the pin portion of the Change Lever [14]. Apply Hitachi Motor Grease No. 29 to the O-ring (S-18) [15] for
the Steel Ball D7.0 [21] and the Change Lever [14].
* Application of Hitachi Motor Grease No. 29 makes it easy to mount the Spacer [42].
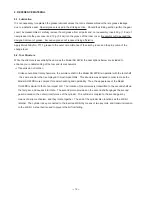
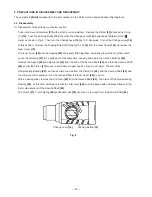
(2) Mounting the Change Lever [14]
Push the Pushing Button [12] deeply in the hole of the Change Lever [14]. Position the Change Lever [14] on
the Gear Cover [10] as shown in Fig. 12 and push it in firmly. Adjust the Change Lever [14] to the position
"Ro Hammering" ( mark) or "Rotation Only" ( mark).
Fig. 11
Содержание DH 22PB
Страница 38: ......