-5-
㩷 㩷 㩷 㩷 㩷
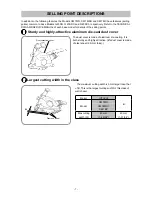
Diamond wheel
Diamond wheel
Dust
Dust
A
Before attempting disassembly or reassembly, always be sure to turn off the switch and disconnect the plug
from the power source outlet.
1. Precautions on Disassembly and Reassembly
The
[Bold]
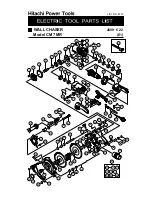
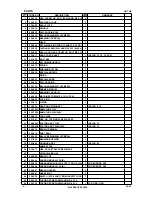
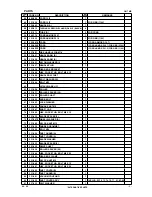
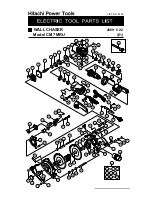
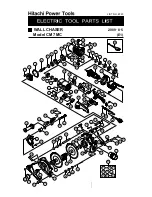
numbers in the descriptions below correspond to item numbers in the Parts Lists and exploded
view assembly diagrams for the Models CM 7MR, CM 7MRU and CM 7MC.
The main bodies of the Models CM 7MR, CM 7MRU and CM 7MC are common to those of base Models G
23SR, G 23SRU and G 23SC3, respectively. Therefore, only the disassembly and reassembly procedures
of the newly designed dust collection cover unit are described below.
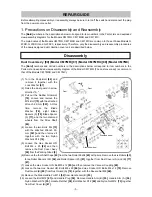
Dust Cover Ass’y [90] (Model CM 7MR) [91] (Model CM 7MRU) [88] (Model CM 7MC)
The
[Bold]
numbers and circled numbers in the descriptions below correspond to item numbers in the
Parts List and exploded view assembly diagram of the Model CM 7MR. (The dust cover ass'y is common to
that of the Models CM 7MRU and CM 7MC.)
(1) Turn the Knob Bolt
[66]
and
remove it together with the
Lock Washer
[67]
.
(2) Raise the dust guard in arrow
direction "A."
(3) Pull out the Rubber Grommet
[74]
. Loosen and remove the
M14 Bolt
[75]
with the attached
Wrench 22-mm
[501]
. At this
time, remove the Blade
Washer
[78]
, eight Blade
Spacers (5)
[79]
, Blade Spacer
(3)
[71],
and the two diamond
wheels from the Drive Shaft
[80]
.
(4) Loosen the two Bolts M4
[13]
with the attached Wrench 22-
mm
[501]
and then remove it
together with the two Nylon
Washers D14
[14]
.
(5) Loosen the Hex. Socket HD.
Bolt M6 x 25
[82]
and then
remove the Dust Cover Ass'y
[90]
from the Packing Gland
[2]
.
(6) Remove the four Shaft Caps
[69]
from the two Roller Shafts
[65]
with pliers. Remove the six Rollers
[63]
,
three Roller Spacers (30)
[64]
and Roller Spacer (20)
[81]
together from Dust Covers (A) and (B)
[77]
[87]
.
(7) Loosen the Hex. Socket HD. Bolt M5 x 12
[85]
and then remove the Vacuum Coupling
[89]
.
(8) Loosen the two Hex. Socket HD. Bolts M4 x 20
[86]
and Hex. Socket HD. Bolts M4 x 12
[70]
. Remove
Dust Guard (B)
[88]
from Dust Guard (A)
[76]
together with the Square Nut M8
[68].
(9) Remove the Side Handle For M14
[52]
from Handle Arm (B)
[53]
.
(10) Loosen the Bolt M12
[61]
and Handle Plug
[56]
. Remove Handle Arm (B)
[53]
, Handle Arm (A)
[54]
,
Nylon Washer D12
[55]
, Handle Ratchet
[59]
, Bolt Washer D12
[60]
and Nylon Nut M12
[73]
together
from Dust Cover (B)
[87]
.
REPAIR GUIDE
Disassembly


