background image

Using the Bluetooth Connection


Keep the distance of the Soundbar and your mobile phone, PC, tablet or other Bluetooth 

enabled device within 1 meter. The closer, the better.


Ensure Bluetooth is enabled on your device and that your device is discoverable.


Select the Bluetooth mode on the soundbar:

Select pairing mode:

-   Using the remote control, press the Bluetooth button. The indicator light on the 

     soundbar will be flashing blue.
-   Alternatively, Press the Mode button on the Soundbar until the indicator light 

     is flashing blue.


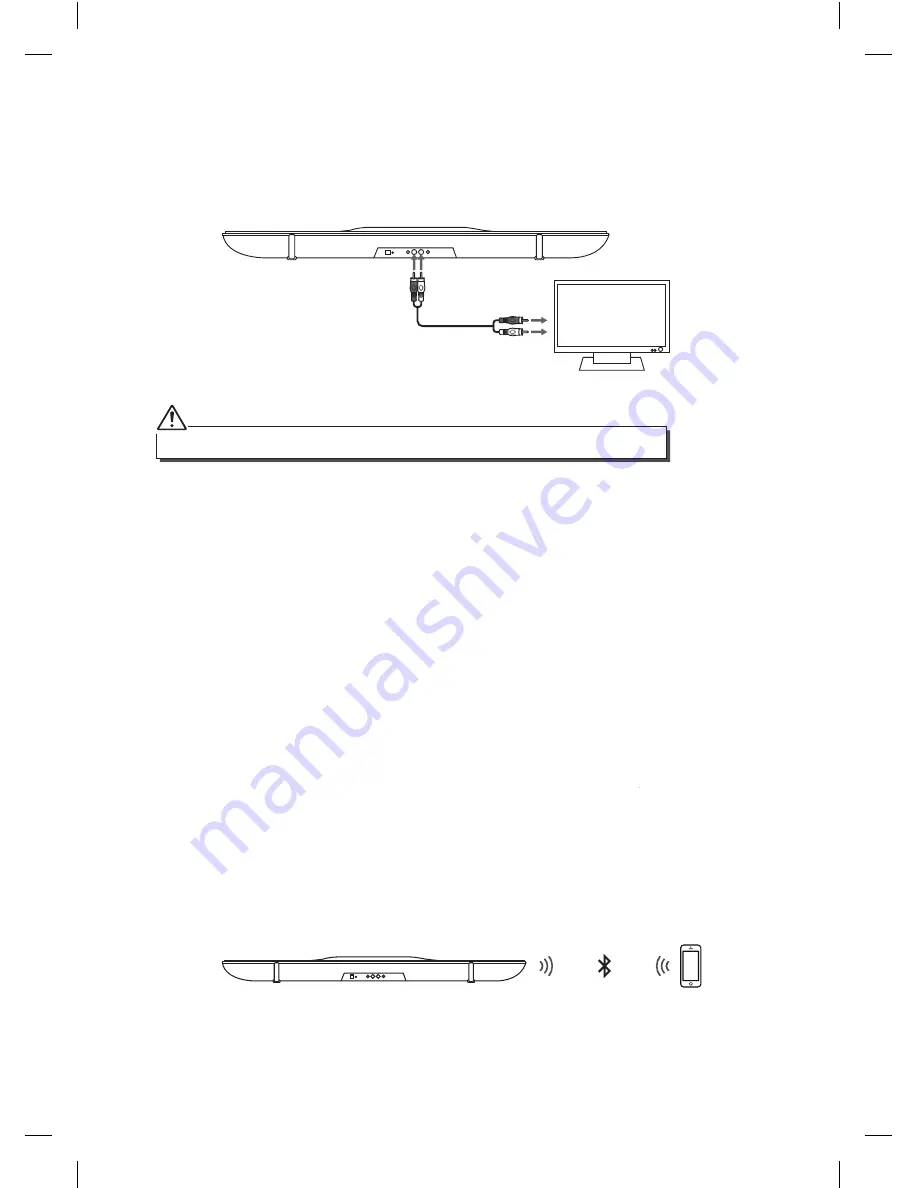
TV

Bottom view of the unit

RCA stereo audio cable

(not included)

Using the Audio Connection

Use an RCA stereo audio cable (not included) to connect the TV’s audio output sockets to 

the soundbar’s 

AUDIO IN (L/R) 

sockets.

To listen with 

AUDIO IN (L/R)

 sockets in 

AUX

 mode, make sure 

AUX IN

 socket is unplugged.

14

For any help concerning set up and use of your TV please call the Customer Helpline: 0345 604 0105

Select the Bluetooth search function on your device. Your device should discover 

the Soundbar which is called “Hitachi Soundbar”.

Select “Hitachi Soundbar”. Your device is paired with the Soundbar when the blue 

indicator light stops flashing and becomes solid.

-   Using the remote control, press and hold the Bluetooth button for 3 seconds 

     until blue indicator light is flashing rapidly.
-   Alternatively, press and hold the Mode button on the Soundbar for 3 seconds 

     until the blue indicator light is flashing rapidly.

Содержание AXS014BTU

Страница 1: ...p for future reference These instructions contain important information which will help you get the best from your Sound Bar and ensure safe and correct installation and operation For any helpconcerning set upand use of your TV please call the Customer Helpline 0345 604 0105 Lines open 9am 8pm Monday to Saturday and 10am 4pm Sunday ...

Страница 2: ......

Страница 3: ...emote Control 12 Remote Control Operation Range 12 Connections 13 Using the OPTICAL Connection 13 Using the AUX Connection 13 Using the Audio Connection 14 Connecting to the Mains Supply 15 Using the Bluetooth Connection 14 General Operation 16 Selecting Modes 16 Attaching Self Adhesive Pads 16 Adjusting the Volume 16 Maintenance 16 Cleaning the Unit 16 Hints and Tips 17 Notes for battery disposal...

Страница 4: ...s such as newspapers tablecloths curtains etc Overheating will cause damage and shorten the life of the equipment DON T allow electrical equipment to be exposed to dripping or splashing or objects DON T DON T provided and according to the instructions DON T use equipment such as personal stereos or radios that will distract you from the DON T listen to headphones at high volume as such use can per...

Страница 5: ...ich may cause a short circuit resulting in leakage or in explosion this can cause them to explode Please recycle dead batteries do not put with the normal household waste Supervise children if they are replacing batteries themselves in order to ensure these guidelines are followed Never attempt to recharge ordinary batteries either in a charger or by applying heat to them They may There are specia...

Страница 6: ...vent the risk of electric shock or that curtains and other materials do not obstruct the ventilation vents Do not install or place this unit in a bookcase built in cabinet or in another ventilated Safety Always disconnect the unit from the mains supply before connecting disconnecting other devices or moving the unit Unplug the unit from the mains socket before a lightning storm Mains Adapter The m...

Страница 7: ...l triangle is intended to alert the user to the presence of important operating and maintenance servicing instructions in the manual accompanying the unit Service To reduce the risk of electric shock do not remove screws The unit does not contain any user serviceable parts Please leave all expose dangerous voltages Maintenance Ensure the unit is fully unplugged from the power supply before cleanin...

Страница 8: ...105 Local call rates applies Lines open 9am 8pm Monday to Saturday and 10am 4pm Sunday Calls to Argos enquiry lines may attract a charge and set up fee from residential lines depending on your call plan tariff Mobile and other providers costs may vary see www bt com pricing for details For Security and training purposes telephone calls to and from customer service centres maybe recorded and monito...

Страница 9: ...ad Use it when lay the unit 3 5mm to RCA Stereo Audio Cable 3 5mm to 3 5mm Stereo Audio Cable 9 For any help concerning set up and use of your TV please call the Customer Helpline 0345 604 0105 INSTRUCTION MANUAL Soundbar AXS014BTU 281 6436 Important Please read these instructions fully before installing or operating and keep for future reference These instructions contain important information wh...

Страница 10: ...e unit between ON and STANDBY modes 2 MODE Button Selects the input source 1 D1 OPTICAL Socket 2 DC IN Socket 1 2 3 4 1 2 3 4 3 Remote Control Sensor Receives signal from the remote control 3 VOL Button Decreases the volume 4 VOL Button Increases the volume 3 AUDIO IN L R Sockets 4 AUX IN Socket Top View Bottom View 2 3 1 10 For any help concerning set up and use of your TV please call the Custome...

Страница 11: ...ow 1 Button Switches the unit between ON and STANDBY modes 2 MODE Button Selects the input source 3 Button Mutes the unit or resumes the sound 4 VOL Button Increases the volume 5 6 VOL Button Dec Bluetooth Connection reases the volume Remote Control 3 4 5 1 2 2 Pull out the battery holder and remove the old battery 3 Replace with a new battery 4 Insert the battery holder back into the remote contr...

Страница 12: ...ontrol Do not drop the remote control Do not allow anything to impact the remote control Do not spill water or liquid on the remote control Do not place the remote control on a wet object Do not place the remote control under direct sunlight or near sources of excessive heat Remove the battery from the remote control when not in use for a long period of time as corrosion or battery leakage may occ...

Страница 13: ...ut sockets to the soundbar s AUX IN socket OPTICAL cable not included TV TV TV Bottom view of the unit Bottom view of the unit Bottom view of the unit 3 5mm to RCA stereo audio cable included 3 5mm to 3 5mm stereo audio cable included Use a 3 5mm to 3 5mm stereo audio cable included to connect the TV s headphone socket to the soundbar s AUX IN socket 13 For any help concerning set up and use of yo...

Страница 14: ...se an RCA stereo audio cable not included to connect the TV s audio output sockets to the soundbar s AUDIO IN L R sockets To listen with AUDIO IN L R sockets in AUX mode make sure AUX IN socket is unplugged 14 For any help concerning set up and use of your TV please call the Customer Helpline 0345 604 0105 Select the Bluetooth search function on your device Your device should discover the Soundbar...

Страница 15: ...apter cable to its full length Connect the end of the cable to the DC IN Socket at the bottom of the unit and then connect the mains adapter to the mains socket connected and ready to use To the mains socket Ensure all audio connections of the unit are connected before connecting to the mains power socket 15 For any help concerning set up and use of your TV please call the Customer Helpline 0345 6...

Страница 16: ...f in OPTICAL and blue AUX mode is the default mode every time the unit is switched on Adjusting the Volume Press VOL on the unit or the remote control to adjust the volume Attaching Self Adhesive Pads Peel back the adhesive cover on the foot pad Press the pads firmly to ensure they are well secured Align and attach the adhesive side of the pad to the foot pad cutaway section on the bottom of the s...

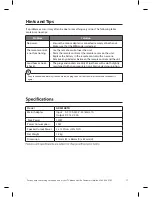
Страница 17: ... one Remove any obstacles between the remote control and the unit Loud hum or noise is heard The plugs and sockets are dirty Wipe them with a cloth slightly moistened with an appropriate non abrasive cleaning solution If any functional abnormality is encountered unplug the unit from the mains socket and reconnect it again Model AXS014BTU Mains Adapter Input AC 100 240V 50 60Hz 1A Output DC 15V 2 0...

Страница 18: ...the requirement NOT to dispose the equipment including any spent or discarded batteries as unsorted municipal waste but use the return and collection systems available If the batteries or accumulators included with this equipment display the chemical symbol Hg Cd or Pb then it means that the battery has a heavy metal content of more than 0 0005 Mercury or more than 0 002 Cadmium or more than 0 004...

Страница 19: ... the unit or consumable items instructions contained in this manual damaged by inexpert repair Customer Helpline 0345 604 0105 Guarantor Argos Ltd 489 499 Avebury Boulevard Central Milton Keynes MK9 2NW Product Guarantee This product is guaranteed against manufacturing defects for a period of Year 19 For any help concerning set up and use of your TV please call the Customer Helpline 0345 604 0105 ...

Страница 20: ...idigitalmedia com Manufacturer Hitachi Europe Ltd Whitebrook Park Lower Cookham Road Maidenhead Berkshire SL6 8YA U K Importer Argos Ltd 489 499 Avebury Boulevard Central Milton Keynes Buckinghamshire MK9 2NW U K ...

Отзывы: