background image

5

ENGLISH

• FOR THE CUSTOMERS IN THE U.K.

THIS PRODUCT IS SUPPLIED WITH A TWO PIN MAINS PLUG FOR USE IN MAINLAND EUROPE.  FOR THE U.K. PLEASE REFER TO THE
NOTES ON THIS PAGE.

IMPORTANT FOR UNITED KINGDOM

WORDING FOR CLASS I EQUIPMENT INSTRUCTION BOOKS AND LABELS

The mains lead on this equipment is supplied with a molded plug incorporating a fuse, the value of which is indicated on the pin face of the plug.
Should the fuse need to be replaced, an ASTA or BSI approved BS 1362 fuse must be used of the same rating. If the fuse cover is detachable
never use the plug with the cover omitted. If a replacement fuse cover is required, ensure it is of the same colour as that visible on the pin face of
the plug.  Fuse covers are available from your dealer.
DO NOT cut off the mains plug from this equipment.  If the plug fitted is not suitable for the power points in your home or the cable is too short to
reach a power point, then obtain an appropriate safety approved extension lead or consult your dealer.
Should it be necessary to change the mains plugs, this must be carried out by a competent person, preferably a qualified electrician.
If there is no alternative to cutting off the mains plug, ensure that you dispose of it immediately, having first removed the fuse, to avoid a possible
shock hazard by inadvertent connection to the mains supply.

WARNING: THIS EQUIPMENT MUST BE EARTHED
IMPORTANT

The wires in the mains lead are coloured in accordance with the following code :

Green and Yellow = Earth, Blue = Neutral, Brown = Live.

As these colours may not correspond with the coloured markings identifying the terminals in your plug, proceed as follows:

The wire which is coloured GREEN and YELLOW must be connected to the terminal in the plug which is marked with the letter E or by the earth
symbol 

or coloured GREEN or GREEN and YELLOW.

The wire coloured BLUE must be connected to the terminal marked with the letter N or coloured BLUE or BLACK. The wire coloured BROWN
must be connected to the terminal marked with the letter L or coloured BROWN or RED.

Brown to Live

Fuse

Cord Clamp

Green & Yellow
to Earth

Blue to Neutral

Be cautious of the power cord connection.

Incorrect connection of the power cord could result in fire or electrical shock.
•  Do not touch the power cord with a wet hand.
• Check that the connecting portion of the power cord is clean (with no dust), before using. Use a soft and dry cloth to clean the power plug.
•  Insert the power plug into a power outlet firmly. Avoid using a loose, unsound outlet or contact failure.
•  Do not cut off the fitted power plug, the removal of which could lead to impaired performance. If you wish to extend the lead,

obtain an appropriate extension lead or consult your dealer.

•  Should you require replacing the fuse in the molded plug with a new fuse, then please replace with new one of the same value,

type and approval as the original. Ensure the fuse cover is returned to its original position.

Be sure to keep safety ground connection.

Connect the ground terminal of AC inlet of this monitor with the ground terminal provided at the power outlet using the enclosed
power cord. If the provided plug does not fit your outlet, consult an electrician for replacement of the obsolete outlet.

Be careful in handling the power cord and external connection cables.

If you keep using a damaged the power cord or cables, it can cause a fire or electrical shock. Do not apply too much heat,
pressure or tension to the power cord and cables.
If the power cord or cables are damaged (exposed or broken core wires, etc.), contact your dealer.
•  Do not place the monitor or heavy objects on the power cord and cables. Also, do not place a spread, cover, etc, over them

because this could result in the inadvertent placing of heavy objects on the concealed power cord or cables.

•  Do not pull the power cord and cables. When connecting and disconnecting the power cord or cables, do it with your hand

holding the plug or connector.

•  Do not place the cord near the heater.
•  Do not touch the power plug just after disconnecting it from the power outlet to prevent electric shock.
•  Do not touch the power plug when lightening is close to you.
•  Avoid coiling the power cord and bending it sharply.
•  Protect the power cord from being walked on, pinched particularly at plugs, conveniences receptacles, and the point where they

exit from the apparatus.

•  Do not modify the power cord.

Be careful in handling the battery of the remote control.

Incorrect handling of the battery could result in fire or personal injury. The battery may explode if not handled properly.
•  Keep the battery away from children and pets. If swallowed consult a physician immediately for emergency treatment.
•  Do not allow the battery to be exposed to fire or water.
•  Avoid fire or high-temperature environment.
•  Do not hold the battery with metallic tweezers.
•  Keep the battery in a dark, cool and dry place.
•  Do not short circuit the battery.
•  Do not recharge, disassemble or solder the battery.
•  Do not physically impact the battery.
•  Use only the battery specified in the manual of this monitor.
•  Make sure the plus and minus terminals are correctly aligned when loading the battery.
•  If you observe a leakage of the battery, wipe out the liquid and then replace the battery. If the liquid adheres your body or

clothes, rinse well with water.

•  Obey the local laws on disposing the battery.

WARNING

Surely connect

the ground wire.

Содержание 55PD5000

Страница 1: ...s located on the rear of the monitor This monitor is ENERGY STAR compliant when used with a computer equipped with VESA DPMS The ENERGY STAR emblem does not represent EPA endorsement of any product or service As an ENERGY STAR Partner Hitachi Ltd has determined that this product meets the ENERGY STAR guidelines for energy efficiency Colour Plasma Display Monitor Model PW1 55PD5000 55PMA550 CMP5500...

Страница 2: ...ître dans ce manuel MARQUES DÉPOSÉES VGA et XGA sont des marques déposées d International Business Machines Corporation APPEL et Macintosh sont des marques déposées d Apple Computer Inc VESA est une marque déposée d une organisation sans but lucratif La Video Electronics Standard Association Toutes les marques ou noms de produit sont des marques de commerce ou des marques déposées de leur déposita...

Страница 3: ... the future Notes on lnstallation Work This product is marketed assuming that it is installed by qualifed personnel with enough skill and competence Always have an installation specialist or your dealer install and set up the product HITACHI cannot assume liabilities for damage caused by mistake in installation or mounting misuse modification or a natural disaster Note for Dealers After installati...

Страница 4: ...lasma display panel The 55 inch colour plasma display panel with a resolution of 1366 H x 768 V pixels creates a high definition large screen aspect ratio 16 9 and low profile flat display Free from electromagnetic interferences from geomagnetic sources and ambient power lines the panel produces high quality display images free from colour misconvergence and display distortion High Performance Dig...

Страница 5: ...culous care has been taken in the preparation of this manual you are requested to notify your dealer or us should you have any comments views or questions about our product Fully understand the prerequisites to using the product such as hardware and software specifications and constraints in using the product We are not held liable for damages caused by improper handling of the product Reproductio...

Страница 6: ...n objects could result in fire or electrical shock Use special caution in households where children are present If liquids or foreign objects should enter the projector immediately turn off the power switch disconnect the power plug from the power outlet and contact your dealer Do not place the monitor in a bathroom Do not expose the monitor to rain or moisture Do not place flower vases pots cups ...

Страница 7: ...ould lead to impaired performance If you wish to extend the lead obtain an appropriate extension lead or consult your dealer Should you require replacing the fuse in the molded plug with a new fuse then please replace with new one of the same value type and approval as the original Ensure the fuse cover is returned to its original position Be sure to keep safety ground connection Connect the groun...

Страница 8: ... with a soft cloth If it is not enough then use a cloth with mild detergent Do not use harsh or abrasive cleaners How to clean the cabinet of the monitor Use a soft cloth to clean the cabinet and control panel of the monitor When excessively soiled dilute a neutral detergent in water wet and wring out the soft cloth and afterward wipe with a dry soft cloth Never use acid alkaline detergent alcohol...

Страница 9: ...ut infrared communications devices Infrared cordless microphones headphones and other communications devices may at times become unusable due to communications interference This does not mean that the device is malfunctioning or damaged Avoid radio interference Any interfering radiation could cause distorted images or noises Avoid radio generator such as a mobile telephone transceiver etc around t...

Страница 10: ...ted at the back on the lower surface スピーカー端子 6 12W Indicating lamp External device connection terminals Rear SUB WOOFER 55 RGB input terminals 11 External speaker terminals Main Unit External speaker terminals 11 11 MENU button 16 indicates the function while the MENU is displayed on the screen Caution when moving the main unit As this product is heavy whenever it is moved two or more people are r...

Страница 11: ...UTO PinP OK SIZE RECALL MENU ID ID SET Do not use new and old batteries together The batteries could explode or leak resulting in fires physical injury or stains When loading batteries observe their correct polarities as marked on the product If loaded in the wrong direction the batteries could explode or leak resulting in fires physical injury or stains CAUTION ATTENTION Do not drop or impact the...

Страница 12: ...e the name of a qualified installer In order to prevent an internal temperature increase maintain a space of 10cm 4 inches For a desktop set up or more between the sides and other objects such as walls etc so that the ventilation holes are not blocked CAUTION Have this unit mounted in a stable place Take measures to prevent it from tumbling down to avoid possible physical injury CAUTION 10cm 4 inc...

Страница 13: ...the signal input terminal RGB 1 or RGB 2 on the rear panel of this device to the display signal output terminal of the personal computer Use a cable that fits the input terminal of this device and the output terminal of the personal computer Depending on the type of personal computer being connected the use of an optional conversion adapter or the adapter provided with the personal computer may be...

Страница 14: ...UCTIONS continued Power Cord Connection Use only the power cord provided Do not use a power supply voltage other than that indicated AC100 240V 50 60Hz as this may cause fire or electric shock CAUTION Mounting the Speaker Unit option Refer to the instruction manual concerning mounting of the optional speaker unit Connect the power cord after completing all other connections ...

Страница 15: ...trol or the SUB POWER button on the underside of the front of the frame is ON Lights orange Off Power Save When the main power switch is ON and the ON button on the remote control or the SUB POWER button on the underside of the front of the frame is ON However the state in POWER SAVE mode When the indicating lamp lights in orange or the message No Sync Signal Power Save or Invalid Scan Freq appear...

Страница 16: ...t can be switched by pressing the RGB1 RGB2 buttons of the remote control Input can be switched in the sequence of RGB1 RGB2 by pressing the INPUT SELECT button of the monitor When a button is pressed the volume adjustment status guide will be displayed The volume will increase when the VOL or button is pressed while the guide is being displayed The volume will decrease when the VOL or button is p...

Страница 17: ...t in approximately 6 seconds RECALL button RGB2 RGB H 48 4kHz V 60 1 Hz Min OFF Input mode Signal mode Input horizontal frequency Input vertical frequency Off timer On timer RGB Display area selection diagram RGB input Display Resolution Full Normal Zoom1 Zoom2 Zoom3 640 X 480 VGA 800 X 600 SVGA 1024 X 768 XGA 1280 X 1024 SXGA 1600 X 1200 UXGA 1366 X 768 WXGA Selected character WXGA Type can t sel...

Страница 18: ...separate control of up to a maximum of seven monitors Remote control ID No 2 initially ID no 1 can be set by pressing the ID SET button for 2 sec or more while holding down the ID button The number will be incremented 2 6 7 1 2 when this button pressed continuously The ID remote control is operated by pressing the various buttons while holding down the ID button Operation is possible only when the...

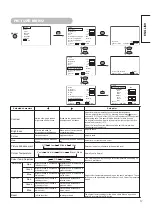
Страница 19: ... be set to Normal when Contrast setting is adjusted Brightness Black is subdued for increased overall darkness Black is set off for increased overall brightness Adjust to taste Colour Darkens colours Lightens colours Adjust to taste Hue Enhances red and weakens green Enhances green and weakens red Adjust for most realistic skin colour Picture Enhancement Off Low Middle High Sets the clarity of sma...

Страница 20: ...adium Perfect Volume Off On This will automatically adjust volume so each channel and input has the same average volume level Reset off the function waiting to reset The original factory settings for the items of this Menu page can be restored by pressing the OK button Picture Audio Timer Function Setup Language Select OK Set Audio Audio Mode Movie Treble 10 Bass 10 Balance 0 L R SRS TruBass Middl...

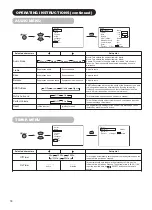
Страница 21: ...m Optional grayed out Reset off the function waiting to reset The original factory settings for the items of this Menu page can be restored by pressing the OK button Panel Life Normal Extend 1 Extend 2 This function is to suppress the contrast of the screen regardless of the Contrast setting in the Picture Menu By this control power consumption can be reduced or degradation of a panel can be mitig...

Страница 22: ...y for RGB2 Frequency Display Off On Set this to Off if the frequency information of the Input Signal Screen Display is not required WVGA Type Off On This is only available for W VGA signal When it is set to On the display area modecan be selected Full or Real RGB2 ANALOG INPUT only 55 WXGA Mode 55 Off 1280x768 1366x768 This is only available for W XGA signal When it is set to W XGA mode the displa...

Страница 23: ... Hue Picture Enhancement Colour temperature Colour Temp Adjust R Amplitude For every Colour Temperature 1 setting is registered G Amplitude B Amplitude R Cut Off G Cut Off B Cut Off Audio Audio Mode 1 setting is registered Treble For every Audio Mode 1 setting is registered Bass Balance 1 setting is registered SRS TruBass For every Audio Mode 1 setting is registered Matrix Surround Perfect Volume ...

Страница 24: ...echeck the input signal specifications 27 29 No Sync Signal Changes in the signal status are displayed on the screen as they arise OTHER FEATURES continued RGB2 RGB H 48 4kHz V 60 1 Hz Min OFF RGB Invalid Scan Freq Power Save Mode When the RGB RGB2 input is selected When this unit is connected to a VESA DPMS computer the Power Save Off mode can be set to be activated automatically when the compute...

Страница 25: ...y time The tendency of the phosphor is to degrade more the brighter the characters and figures are displayed When images of figures with different levels of brightness as shown in Fig B are continuously displayed for a long period of time it becomes easier for image marks at locations when the brighter figures are displayed to be noticeable The image retention images in this document are exaggerat...

Страница 26: ...ayed Invalid Scan Freq An input signal is not received normally Check to see if the input signal matches the monitor specifications Check the way the signal cable is connected The power indicating lamp is normally lit but no picture Check the contrast and brightness settings adjust them for higher contrast and brightness Check the way the signal cable is connected The display image appears flowing...

Страница 27: ...use of failure to light Please note that this is not a malfunction Coarse horizontal stripes appear in FULL display Adjusting the Clock Phase will reduce the horizontal stripes RGB input Flickering in the form of horizontal lines oscillating up and down PC INPUT MODE only If the direct frequency from the computer is below 85Hz try a higher frequency upper limit 85Hz There may be a slight attenuati...

Страница 28: ... Clock adjustment 6 Press the or ADJUST buttons and search for clear characters over the entire screen 7 Perform adjustment for symptom 2 below when the characters are blurred on the entire screen The display image may be momentarily disturbed during clock adjustment but this is not a failure Symptom 2 Text displayed across the screen appears blurred in its entirety figure 2 A fine pattern flicker...

Страница 29: ... 857 H x 105 D mm Net weight excluding Speakers Stand 63 5kg Ambient conditions Temperature Operating 5 C to 35 C Storage 0 C to 40 C Relative humidity Operating 20 to 80 Storage 20 to 90 non condensing Power supply AC100 240V 50 60Hz Power consumption at standby 530W 3W Audio output Speaker 12W 12W 6Ω sub woofer terminal RCA RGB input Input signals Input terminals RGB1 DVI input terminal DVI D RG...

Страница 30: ...D S Data3 With Digital RGB signal input RGB1 input No Signal mode Horizontal frequency kHz Dot clock frequency MHz Remarks Signal Name Resolution Vertical frequency Hz 1 VGA 640 X 400 70 08 31 47 25 18 2 640 X 480 59 94 31 47 25 18 3 W VGA 864 X 480 59 94 31 47 34 24 WVGA type On 4 VESA 640 X 480 72 81 37 86 31 50 5 640 X 480 75 00 37 50 31 50 6 640 X 480 85 01 43 27 36 00 7 800 X 600 56 25 35 16 ...

Страница 31: ... 18 2 640 X 480 59 94 31 47 25 18 3 W VGA 864 X 480 59 94 31 47 34 24 WVGA type On 4 VESA 640 X 480 72 81 37 86 31 50 5 640 X 480 75 00 37 50 31 50 6 640 X 480 85 01 43 27 36 00 7 800 X 600 56 25 35 16 36 00 8 800 X 600 60 32 37 88 40 00 9 800 X 600 72 19 48 08 50 00 10 800 X 600 75 00 46 88 49 50 11 800 X 600 85 06 53 67 56 25 12 1024 X 768 60 00 48 36 65 00 13 1024 X 768 70 07 56 48 75 00 14 102...

Страница 32: ...30 SUPPLEMENT ...

Страница 33: ...INSTRUCTIONS Connecting to a Video Imaging Device If video equipment with an S video output terminal is used cabling by the S video cable is recommended to provide finer video quality If the S video input terminal and the video input terminal of AV3 connect to the monitor at the same time S video input would govern If the OUTPUT MONITOR terminal is connected to an external monitor with a 75 Ohm te...

Страница 34: ...ppearing somewhat enlarged Panoramic Play a 16 9 VISTA size image in the 4 3 image faithfully reproduced on the 16 9 screen Zoom The 4 3 image is called a letterbox image In some cases some slight blanking may remain at the top and bottom Play a 4 3 image faithfully in a 16 9 screen in the standard vertical size and horizontally squeezed Full An image with an aspect ratio of 16 9 shrunk horizontal...

Страница 35: ...image is displayed over the entire screen in the Panoramic mode parts of the periphery of the image may disappear and or appear distorted in some cases Use the 4 3 mode to view images which were created in 4 3 mode This mode allows 4 3 content to be viewed without picture distortion Press Vertical picture position can be adjusted for Panoramic Zoom C14 9L and 14 9Zoom mode as follows 1 Press SIZE ...

Страница 36: ...ns the audio of the video will be output from the side on which the speaker icon is located The same video input mode cannot be selected for both screens at the same time Pressing the PinP button again or the RETURN button will cancel the 2 pictures display When the Video input is set to RGB Video this Split mode is not possible Refer to the table for 2 pictures Split mode PinP button RETURN butto...

Страница 37: ... Management Colour Decoding Select Set Return OK Picture Dynamic Colour Temp Adjust Colour Management Colour Decoding Select Set Return OK Picture Colour Management On Magenta 60 Red 30 Yellow 0 Green 60 Cyan 30 Blue 0 Reset Reset Select On Off Return OK OK Picture Colour Decoding RGB R G B Red 0 Green 60 Colour 0 Hue 31 Reset Reset Select Return Exit PICTURE MENU Picture Mode Dynamic Next Prev Se...

Страница 38: ...items of this Menu page can be restored by pressing the OK button YNR Off Low High Performs picture signal noise reduction Turn up to reduce noise CNR Performs colour signal noise reduction Turn up to reduce noise And it will be fixed as Off only when selecting DVI STB mode Film Mode Off On On Automatically detects the movie film material and faithfully reproduces the original film image Off Set t...

Страница 39: ...y This adjusts R G B level or tint to make the colour appear natural for the user s preference These settings are independently stored in each of the 4 Colour Temperature modes Green Darkens green only Lightens green only Colour Darkens colours Lightens colours Hue Enhances red and weakens green Enhances green and weakens red FUNCTION MENU 2 item is added to the Menu shown in the page Picture Audi...

Страница 40: ...inal Normally set this to Auto The system of the input signal will be automatically recognized If the input signal contains much noise or has a low level at Auto and the operation is found erratic set this to match the input signal When the component signal is received this would be not available grayed out AV2 Same to AV1 AV3 AV4 Video Input AV1 Auto HDTV SDTV DVD This should correspond to the si...

Страница 41: ...er adjustment is completed the adjustments will be recorded as shown in the table below OTHER FEATURES Automatic Store Menu Display Registration condition Picture Picture Mode 1 setting is registered Contrast For every input function and every Picture Mode 1 setting is registered Brightness Colour Sharpness Hue Colour Temperature Contrast Mode YNR CNR Film Mode PAL Comb Filter LTI CTI Black Enhanc...

Страница 42: ... Speaker 12W 12W 6Ω sub woofer terminal RCA RGB input Input signals Input terminals RGB1 DVI input terminal DVI D RGB1 audio input terminal 3 5mm Stereo Mini Jack RGB2 analog RGB input terminal D sub 15 pin RGB2 audio input terminal 3 5mm Stereo Mini Jack Video signals 0 7 V 1 0 Vp p analog RGB Recommended Signal 480i 576i 480p 576p 1080i 50 1080i 60 720p 60 Sync signals H V separate TTL level 2KΩ...

Страница 43: ...RGB G IN RGB terminal D sub 15 pin connector 1 2 3 4 5 6 7 8 9 10 11 12 13 14 15 When different kinds of input signals are simultaneously input to the monitor via a graphics board or the like the monitor will automatically select the signals in the following priority order Even in the case of the recommended signals shown on the following page there may be instances when correct display is not pos...

Страница 44: ...Remarks Signal Name Resolution Vertical frequency Hz 1 NTSC4 43 NTSC3 58 525 59 94 15 73 2 PAL SECAM 625 50 00 15 63 With Composite Input AV1 AV4 input and S video Input AV3 input No Signal mode Horizontal frequency kHz Dot clock frequency MHz Remarks Signal Name Resolution Vertical frequency Hz 1 NTSC4 43 3 58 PAL SECAM 525 625 59 94 50 00 15 73 15 63 With R G B Video input AV2 and AV4 input No S...

Страница 45: ...ect polarities as marked on the product If loaded in the wrong direction the batteries could explode or leak resulting in fires physical injury or stains CAUTION ATTENTION Do not drop or impact the remote control Do not splash the remote control with water or put it on a wet object to avoid possible failures Before leaving the remote control out of use for an extended period of time remove the bat...

Страница 46: ...his button can indicate the time by On Screen display when receiving a TV program on the screen including TELETEXT service with the time information AUDIO MODE You may recall the sound mode by pressing this button Each time pressed sound mode is changed in following sequence MATRIX SURROUND Press this button to set Matrix Surround On or Off MULTI PICTURE Press this button to change the screen to m...

Страница 47: ...ching for a required text page When the required text page has been received the page number will be displayed at the top left of the screen Press the CANCEL button again to display the TELETEXT screen RED GREEN YELLOW BLUE Each of these buttons selects a link page displayed at the lower part of the screen A FAVOURITE page can also be stored in the memory using one of the colours It can then retri...

Страница 48: ...om interference to connect the antenna Avoid using a parallel flat feeder wire as interference may occur causing reception to be unstable and stripe noise to appear on the screen Avoid using indoor antenna as this may be affected by interference Please use CATV net or outdoor antenna Keep the power cord as far away from the antenna wire as possible If there are noise appearance in the picture of V...

Страница 49: ... screen During TV mode Auto is the mode using WSS Wide Screen Signals which identify the picture format movies and programs are broadcast in Various broadcast stations now transmit WSS It can be detected and the monitor automatically switch to the correct format However some broadcasters do not transmit WSS so this monitor will not recognize which format is being transmitted Therefore Default Zoom...

Страница 50: ...PICTURE button at the 4 picture mode will cancel the multi picture mode And then pressing the MULTI PICTURE button again will display the 4 pictures Refer to the table for 4 pictures mode Activating the 12 pictures mode from the TV screen Pressing the MULTI MODE button one time at the 4 pictures mode will display 12 pictures Starting from channel 1 preset channels will automatically display in seq...

Страница 51: ...le Input terminal AV1 AV4 ANT AV1 AV2 RGB1 RGB2 TELE TEXT PAL SECAM NTSC3 58 NTSC4 43 576i 576p 480i 480p 1080i 50 1080i 60 720p 60 STB Component AV1 AV4 ANT PAL SECAM NTSC3 58 4 43 AV1 AV2 576i 576p 480i 480p 1080i 50 1080i 60 720p 60 RGB1 STB RGB2 Component Main Sub Available Input terminal AV1 AV4 ANT AV1 AV2 RGB1 RGB2 TELE TEXT PAL SECAM NTSC3 58 NTSC4 43 576i 576p 480i 480p 1080i 50 1080i 60 ...

Страница 52: ...hanges the screen back to the normal picture This function is also available from video input mode besides TV mode Refer to the table for Freeze function as below FREEZE button Picture Freezing A B 5 1 2 3 4 5 6 7 8 9 10 11 12 Active Split Strobe Split Strobe PAL SECAM NTSC3 58 4 43 576i 480i 576p 480p 1080i 50 1080i 60 720p 60 RGB DVI PC Available FUNCTION MENU Refer to the page It is same to the...

Страница 53: ...n Marino Spain Sweden Switzerland Turkey United Kingdom Search Select Set Return OK Setup Auto Tuning Manual Tuning Fine Tuning Sort Auto Off Off Select Set Return OK Setup Auto Tuning Manual Tuning Fine Tuning Sort Auto Off Off Select Set Return OK Setup Auto Tuning Manual Tuning Fine Tuning Sort Auto Off Off Select Set Return OK Setup Manual Tuning Position 99 Search C 22 Descrambler Off Name AB...

Страница 54: ...is normal then it starts the channel search Descrambler Off On Set this to Off normally If it is set to On AV4 Scart terminal operates as TV signal output and the screen changes to display AV4 Scart input signal automatically Name a letter This is used to input the name of the TV station within 5 letters After fixing the cursor on the first digit select a letter by SELECT buttons and move to next ...

Страница 55: ...O broadcast respectively NICAM signal received Red Green Red Green 8 STEREO sound broadcast When a stereo program is received sound mode display will appear in red and you can press the CH I II button to select between stereo and mono sound Each time the button is pressed or force mono appear cyclically on the screen When receiving NICAM signals NICAM display will appear as below Monaural sound br...

Страница 56: ...e control Brands of DVD Player Press Brands of DVD Player Press Hitachi RCA Pioneer Mitsubishi Panasonic Onkyo Toshiba Zenith Philips Orion JVC Shinco Samsung Skyworth Sony Bubuko RECALL 1 RECALL 2 RECALL 3 RECALL 4 RECALL 5 RECALL 6 RECALL 7 RECALL 8 RECALL 9 RECALL 0 RECALL INDEX RECALL MODE RECALL SUB PAGE RECALL CANCEL RECALL REVEAL RECALL TV TEXT RECALL button TV TEXT button MODE button REVEA...

Страница 57: ...nna has moved position 2 TV not tuned correctly 3 Adverse weather conditions 4 Transmitter problems 5 AV Input not set correctly 1 Re align antenna 2 Re tune or fine tune TV 3 None 4 Check with local Operator 5 Check the external equipment connected 1 Interference from electrical or mechanical motors fluorescent lights portable radios etc 1 Check devices for shielding and renew if necessary or mov...

Страница 58: ... 480p 576p 1080i 50 1080i 60 720p 60 Sync signals H V separate TTL level 2KΩ H V composite TTL level 2KΩ Sync on green 0 3 Vp p 75Ω Recommended signal 47 modes Video input Input signals Input terminals AV1 composite video input terminal RCA AV1 Y PB PR video input terminal RCA AV1 L R audio input terminal RCA AV2 composite video input terminal RCA AV2 Y G PB B PR R video input terminal RCA AV2 L R...

Страница 59: ...use this guarantee does not cover the replacement of exhausted batteries the adjustment of user controls or aerial alignment any parts replaced under this guarantee shall become the property of HITACHI EUROPE LTD please note that evidence of the date of purchase will be required before any service under this guarantee is carried out Use the boxes provided below to record your TV s Model and Serial...

Страница 60: ...47 Milano Italia ITALY Tel 39 02 487861 Tel 39 02 38073415 Servizio Clienti Fax 39 02 48786381 2 Email customerservice italy hitachi eu com HITACHI Europe AB Box 77 S 164 94 Kista SWEDEN Tel 46 0 8 562 711 00 Fax 46 0 8 562 711 13 Email csgswe hitachi eu com HITACHI EUROPE S A S Lyon Office B P 45 69671 BRON CEDEX FRANCE Tel 33 04 72 14 29 70 Fax 33 04 72 14 29 99 Email france consommateur hitachi...

Отзывы: