35
DP27/27D
1.2 Comb filter operation check
Adjustment preparation
(1) Receive the color bar signal at the regular tuning
point.
(2) Set the CONTRAST control to MAX and the other
controls to center.
(3) Set the DIMMER to OFF.
Adjustment procedure
(1) Check that between the color bars there are line dots
every second color bar as shown in the drawing.
A
A
A
B
3D Y/C
Dots
A None
B None
Check and line dots.
B
A
1.3 Video Settings (Advanced Settings)
1.3.1 Color Temperature
(1) Receive the Circle pattern signal.
(2) Set Color Temperature using THUMBSTICK
,
and change mode using THUMBSTICK
,
and
then press select button.
(3) Color Temperature is changed from Reddish to
medium and Standard from high.
1.3.2 Dimmer
(4) Receive the color bar signal.
(5) Select video mode by using THUMBSTICK
,
.
(6) Press THUMBSTICK
,
to select advanced
settings then press THUMBSTICK
.
(7) Select Dimmer using THUMBSTICK
,
and set it
ON by pressing SELECT.
(8) Check that display becomes dark when the front of
QM02 (light detect transistor on the control P.W.B.) is
covered with hands.
(9) Set Dimmer to OFF by pressing select button and
check that contrast of the display returns.
1.3.3 Auto Color
(10) Set the color control to MAX.
(11) Select Auto Color using THUMBSTICK
,
and
then press select button.
(12) Set the Auto Color to OFF by pressing select button
and check that the red part of color bar signal grows
deeper.
(13) Reset Auto Color to ON by pressing select button.
(14) Reset the color control to Center.
(15) Receive the color bar signal
1.3.4 Noise Reduction
(16) Select noise reduction mode using THUMBSTICK
,
and then press select button to set it ON and
check that the noise is reduced.
1.3.5 Velocity Modulation
(17) Select Velocity Modulation using THUMBSTICK
,
and press select button to ON.
(18) When the mode is ON, definition level is up at edge
of vertical line of the circle pattern.
1.3.6 Black Level Expansion
(19) Select Black Level Expansion using THUMBSTICK
,
and press select button to ON.
(20) When the mode is ON, Black level is sink at black
portion of picture.
1.3.7 Black Side Panel
(21) Select Black Side Panel using THUMBSTICK
,
and press select button to set it to ON.
(22) When the mode is ON, the side panel is sink to black.
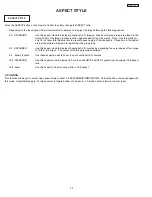
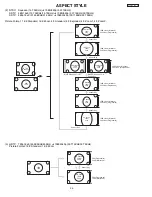
Aspect: 4:3 Normal Mode
Side Panel
BACK TO ADJUSTMENTS
Содержание 51SWX20B
Страница 55: ...55 DP27 27D SIGNAL BLOCK ASSEMBLY BACK TO ADJUSTMENTS ...
Страница 56: ...56 DP27 27D DEFLECTION P W B BACK TO ADJUSTMENTS ...
Страница 57: ...57 DP27 27D POWER SUPPLY P W B BACK TO ADJUSTMENTS ...
Страница 58: ...58 DP27 27D CPT P W B BACK TO ADJUSTMENTS ...
Страница 59: ...59 DP27 27D CONTROL P W B BACK TO ADJUSTMENTS ...
Страница 60: ...60 DP27 27D TROUBLE SHOOTING FLOWCHART 1 NO RASTER AND NO POWER How to check LED s Diagnosis ...
Страница 61: ...61 DP27 27D TROUBLE SHOOTING FLOWCHART ...
Страница 62: ...62 DP27 27D TROUBLE SHOOTING FLOWCHART ...
Страница 83: ...83 DP27 27D DP2X Protection Circuit Block Diagram Deflection Power Supply ...
Страница 84: ...84 DP27 27D DP1X Protection Circuit Block Diagram Signal Power Supply ...
Страница 96: ......
Страница 97: ......
Страница 98: ......
Страница 99: ......
Страница 100: ......
Страница 101: ......
Страница 102: ......
Страница 103: ......
Страница 104: ......
Страница 105: ......
Страница 106: ......
Страница 107: ......
Страница 108: ......
Страница 109: ......
Страница 110: ......
Страница 111: ......
Страница 189: ...DP27 27D ...


