background image


STROBE FREEZE 

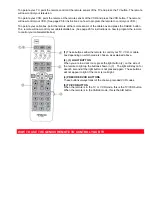
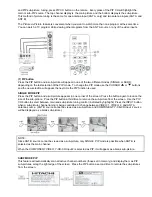
Press the FRZ button to freeze four  frames of the picture you are currently viewing.  Press this button again or 
PIP to return to normal viewing.  This feature is useful for viewing a moving picture that has many details, for 
example, a close play in a sporting event of golf swing. 

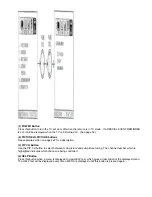
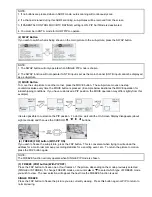
CAUTION:  A pattern burn may develop if the Sub-Picture is left in the same corner permanently.  If the 

PIP feature is used frequently, occasionally MOVE the Sub-Picture to a different corner.  You may also vary its 

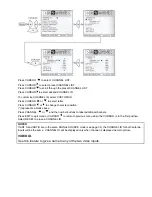
position using the CURSOR 

 ,

, or 

buttons. 

NOTE: 

1. Only sound from the main picture can be heard. 
2. Each freeze frame is delayed about 0.1 (1/10) second. 
3. The FREEZE function will display blank sub-pictures when the COMPONENT VIDEO:  Y-CB-CR INPUT 2 
source is set as main channel. 

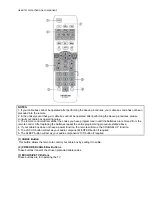
USING THE REMOTE TO CONTROL VCR FUNCTIONS  

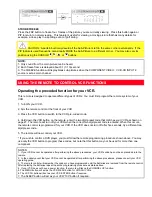
Operating the precoded function for your VCR. 

This remote is designed to operate different types of VCRs. You must first program the remote system of your 
VCR 

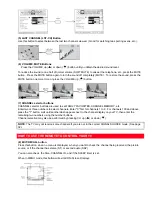
1. Turn ON your VCR. 

2. Aim the remote control at the front of your VCR. 

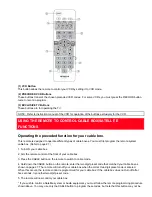
3. Press the VCR button to switch to the VCR pre-coded mode. 

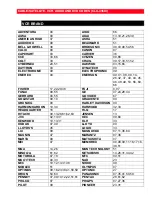
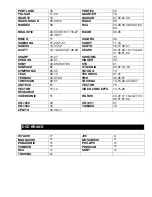
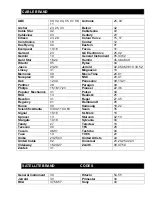
4. Hold down the VCR button on the remote, enter the two digit preset code that matches your VCR as shown on 
page 27. The remote will turn off your VCR when the correct two digit preset code is entered. When this occurs, 
the remote control is programmed for your VCR. If the VCR does not turn off after five seconds, try a different two 
digit preset code. 

5. The remote will now control your VCR. 

* If you wish to control a DVD player, you must follow the remote programming procedure shown above. You may 
use only the VCR button to program these codes, but note that this button may not be used for more than one 
component. 

NOTES:


1.  If your VCR cannot be operated after performing the above procedures, your VCR's code has not been precoded into the 
remote. 
2.  In the unlikely event that your VCR cannot be operated after performing the above procedures, please consult your VCR 
operating guide. 
3.  The remote control will remember the codes you have programmed until the batteries are removed from the remote control.  
After replacing the batteries repeat the entire programming procedure as stated above. 
4.  If your VCR does not have a power function, the remote will issue the CHANNEL UP function. 
5. The MENU button will act as the VCR MENU button for HITACHI VCRs. 
6. The LST-CH button will act as your VCR ENTER button if required.


7. The SLEEP button will act as your VCR '100' button if required. 


Содержание 43GX01B

Страница 1: ...RCES 14 AUDIO SYSTEM SET UP 16 THE GENIUS REMOTE CONTROL CLU 436UI 17 HOW TO USE THE GENIUS REMOTE TO CONTROL YOUR TV 18 HOW TO USE THE REMOTE TO CONTROL YOUR TV 20 PICTURE IN PICTURE PIP 21 USING THE REMOTE TO CONTROL VCR FUNCTIONS 24 USING THE REMOTE TO CONTROL CABLE BOX SATELLITE 25 FUNCTIONS 25 CABLE SATELLITE VCR AUDIO AND DVD CODES CLU 436UI 27 VCR BRAND 27 DVD BRAND 28 CABLE BRAND 29 SATELL...

Страница 2: ...mbers are indicated on back side of the television This television is not intended for use in a computer room CAUTION Adjust only those controls that are covered in the instructions as improper changes or modifications not expressly approved by Hitachi could void the user s warranty CAUTION TO PREVENT ELECTRIC SHOCK MATCH WIDE BLADE OF PLUG TO WIDE SLOT FULLY INSERT MODIFICATIONS The FCC requires ...

Страница 3: ... SAFETY 1 This television set is equipped with a polarized alternating current line plug a plug having one blade wider than the other This plug will fit into the power outlet only one way This is a safety feature If you are unable to insert the plug fully into the outlet try reversing the plug If the plug should still fail to fit contact your electrician to replace your obsolete outlet Do not defe...

Страница 4: ...y the manufacturer 11 2 An appliance and cart combination should be moved with care Quick stops excessive force and uneven surfaces may cause the appliance and cart combination to overturn PROTECTION AND LOCATION OF YOUR TELEVISION 12 Do not use the television near water for example near a bathtub washbowl kitchen sink or laundry tub in a wet basement or near a swimming pool etc Never expose the t...

Страница 5: ...n the vicinity of overhead power lines or other electrical lights or power circuits or where it can fall into such power lines or circuits When installing an outside antenna system extreme care should be taken to keep from touching such power lines or circuits as contact with them might be fatal 18 For added protection for the television during a lightning storm or when it is unused for long perio...

Страница 6: ...same characteristics as the original part Unauthorized substitutions may result in fire electric shock or other hazards 27 Upon completion of any service or repairs to the television ask the service technician to perform routine safety checks to determine that the television is in safe operating condition PICTURE CAUTIONS Picture Burn Prevention Continuous on screen displays such as video games st...

Страница 7: ...itachi recommended stand or a generic stand may result in instability causing possible injury 1 Remote Control Unit CLU 436UI Part No HL00728 2 Two AA size 1 5V batteries For Remote Control Unit REMOTE CONTROL BATTERY INSTALLATION AND REPLACEMENT 1 Open the battery cover of the remote control by pushing the notched part of the cover with your fingers and pulling the cover off 2 Insert two new AA s...

Страница 8: ...e optimum spot for viewing The best picture is seen by sitting directly in front of the TV and about 10 to 18 feet from the screen Picture brightness decreases as the viewer moves to the left and right of the receiver During daylight hours reflections from outside light may appear on the screen If so drapes or screens can be used to reduce the reflection or the TV can be located in a different sec...

Страница 9: ...connect to inputs and outputs located on the television s rear jack panel and front control panel S Video Super Video Connector This connector is used on camcorders VCRs and laserdisc players with an S Video feature in place of the standard video cable to produce a high quality picture ANTENNA CONNECTIONS TO REAR JACK PANEL VHF 75 Ohm antenna CATV Cable TV When using a 75 Ohm coaxial cable system ...

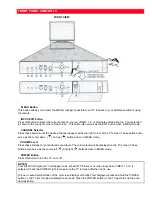
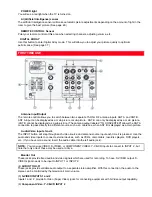
Страница 10: ...also serve as the cursor down and up buttons when in MENU mode VOLUME Level Press these buttons for your desired sound level The volume level will be displayed on the TV screen These buttons also serve as the cursor left and right buttons when in MENU mode POWER Button Press this button to turn the TV on or off NOTES Your HITACHI Projection TV will appear to be turned OFF if there is no video inpu...

Страница 11: ... directly to a different source such as a cable box when ANT B is displayed as a main picture Audio Video Inputs 1and 2 The INPUT button will step through each video source and antenna source input each time it is pressed Use the audio and video inputs to connect external devices such as VCRs camcorders laserdisc players DVD players etc If you have mono sound insert the audio cable into the left a...

Страница 12: ...AKER Terminals These terminals are used to connect external speaker which are used for the surround sound feature The volume level is controlled by the television s main volume buttons Use speaker with 8 Ohm impedance only Click here for setup diagram Typical full feature setup Follow connections that pertain to your personal entertainment system REAR SPEAKER TERMINAL CONNECTIONS CONNECT AFTER TUR...

Страница 13: ... 1 component to each input jack COMPONENT VIDEO Y CB CR connections are provided for high performance components such as DVD players Use these connections in place of the standard video connection if your device has this feature When using the Y CB CR input jacks connect your components audio output to the TV s INPUT 2 Left and Right Audio input jacks Your component outputs may be labeled Y B Y an...

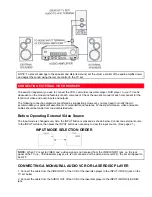
Страница 14: ...ormance video and audio cables should be made from coaxial shielded wire Before Operating External Video Source The input mode is changed every time the INPUT button is pressed as shown below Connect an external source to the INPUT terminal then press the INPUT button as necessary to view the input source See page 21 INPUT MODE SELECTION ORDER NOTE When TV is set to VIDEO and a video signal is not...

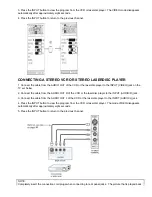
Страница 15: ...jack on the TV set below 2 Connect the cable from the AUDIO OUT R of the VCR or the laserdisc player to the INPUT AUDIO R jack 3 Connect the cable from the AUDIO OUT L of the VCR or the laserdisc player to the INPUT AUDIO L jack 4 Press the INPUT button to view the program from the VCR or laserdisc player The mode VIDEO disappears automatically after approximately eight seconds 5 Press the INPUT b...

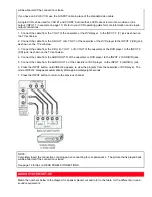
Страница 16: ...Laserdisc or the DVD player to the INPUT 2 CR jack as shown on the TV set below 4 Connect the cable from the AUDIO OUT R of the Laserdisc or DVD player to the INPUT 2 AUDIO R jack 5 Connect the cable from the AUDIO OUT L of the Laserdisc or DVD player to the INPUT 2 AUDIO L jack 6 Press the INPUT button until VIDEO 2 appears to view the program from the Laserdisc or DVD player The mode VIDEO 2 dis...

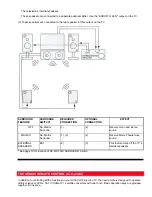
Страница 17: ...und 1 2 Receive mono and stereo sound MATRIX Sp Matrix Surround 1 3 2 Receive Movie Theater like sound EXTERNAL SPEAKERS EXT 2 3 This feature turns off the TV s internal speakers See page 10 for location of SP MATRIX SURROUND Switch THE GENIUS REMOTE CONTROL CLU 436UI In addition to controlling all the functions on your HITACHI Projection TV the new remote is designed to operate different types of...

Страница 18: ...s on how to program the remote to control your cable satellite box 1 These buttons allow the remote to control your TV VCR or cable box depending on which mode is chosen as explained above 2 3 LIGHT BUTTON When you are in a dark room press the light button 2 on the side of the remote to light up the buttons shown in 3 The light will stay on for about 8 seconds if the light button is not pressed ag...

Страница 19: ... section on pages 22 for a description 3 PIP CH Button Use the PIP CH button to select between main picture and sub picture tuning The channel number which is highlighted indicates which channel is being controlled 4 HELP Button Press this button when a menu is displayed to view HELP text which gives a description of the displayed menu The HELP text will be displayed every time a MENU is displayed...

Страница 20: ...RY etc Enter two or three numbers to select channels Enter 0 first for channels 1 to 9 For channels 100 and above press the 1 button wait until another dash appears next to the channel display on your TV then enter the remaining two numbers using the number buttons Channel selection may also be performed by pressing CH up or down NOTE The TV may not receive some channels if you are not in the corr...

Страница 21: ...ton is pressed If the Picture in Picture is on the INPUT button will select between the two sets of video input jacks and antenna source when main channel is chosen with the PIP CH button If the sub picture is chosen the INPUT button will select between the two sets of video input jacks and the ANT A antenna source ANT B cannot be displayed as a PIP sub picture and COMPONENT VIDEO Y CB CR INPUT 2 ...

Страница 22: ...s the PIP button and a sub picture appears in one corner of the screen Press the button again to reduce the size of the sub picture Pres the PIP button a third time to remove the sub picture from the screen Use the PIP CH button to select between main and sub picture tuning control indicated by highlight Press the INPUT button when a sub picture channel tuning is being controlled to change between...

Страница 23: ...tions If you have customized a PIP position the MOVE operation may differ slightly from this example It is also possible to customize the PIP position To do this wait until the On Screen Display disappears about eight seconds and then use the CURSOR buttons 4 FREEZE FRZ button With PIP ON If you wish to freeze the sub picture press the FRZ button This is convenient when trying to write down the ad...

Страница 24: ...mote enter the two digit preset code that matches your VCR as shown on page 27 The remote will turn off your VCR when the correct two digit preset code is entered When this occurs the remote control is programmed for your VCR If the VCR does not turn off after five seconds try a different two digit preset code 5 The remote will now control your VCR If you wish to control a DVD player you must foll...

Страница 25: ...system cable box Refer to page 27 1 Turn ON your cable box 2 Aim the remote control at the front of your cable box 3 Press the CABLE button on the remote to switch to cable mode 4 Hold down the CABLE button on the remote enter the two digit preset code that matched your cable box as shown on page 27 The remote will turn off your cable box when the correct two digit preset code is entered When this...

Страница 26: ...are removed from the remote control After replacing the batteries repeat the entire programming procedure stated above 4 If your cable box does not have a power function the remote will issue the CHANNEL UP function 5 The LST CH button will act as your audio component s ENTER button if required 6 The SLEEP button will act as your audio components 100 button if required 1 CABLE Button This button a...

Страница 27: ...D 00 55 GO VIDEO 67 GOLDSTAR 09 10 GRADIENTE 00 GRUNDIG 00 HARLEY DAVIDSON 00 HARMON KARDON 10 34 HARWOOD 32 33 HEADQUARTER 16 HI Q 17 HITACHI 00 13 28 61 62 63 JENSEN 13 JVC 02 13 31 KEC 09 66 KENWOOD 10 13 31 KLH 33 KODAK 07 09 LLOYD 00 LLOYDS S 45 LOGIK 33 LXI 09 MAGNOVOX 07 11 36 64 MAGNIN 47 MARANTZ 07 36 MARTA 09 MATSUSHITA 07 MEI 07 MEMOREX 00 08 09 11 16 17 18 38 51 MGA 14 26 MGN TECHNOLOG...

Страница 28: ... 61 62 SHARP 18 27 SHINTOM 33 SHOGUN 20 51 SINGER 33 SONY 04 05 06 07 65 STS 61 SUNPACK 65 SYLVANIA 00 07 14 36 SYMPHONIC 00 55 TATUNG 13 TEAC 00 13 TECHNICS 07 41 TEKNIKA 00 07 09 TMK 08 45 51 TORVISION 09 51 TOSHIBA 14 15 29 47 49 57 UNITECH 51 VECTOR 15 VECTOR RESEARCH 10 12 VIDEO CONCEPTS 12 15 26 VIDEOSONIC 51 WARDS 00 07 17 18 24 27 33 49 51 61 64 XR 1000 00 XR 1001 07 XR 1002 33 YAMAHA 10 Z...

Страница 29: ... 41 Novaplex 38 NSC 20 41 Oak 12 44 Panasonic 09 13 21 Panther 39 Paragon 09 Philips 15 16 17 23 Pioneer 22 36 Popular Mechanics 31 Pulsar 09 RCA 13 Realistic 25 Recoton 31 Regal 27 45 Regency 01 Rembrandt 05 Runco 09 Samsung 18 22 Scientific Atlanta 03 04 11 34 63 Seam 35 Signal 10 18 SL Marx 18 Sprucer 13 Starcom 02 10 Stargate 10 18 Sylvania 00 Tandy 27 Teleview 18 Texscan 00 TFC 28 Tocum 06 07...

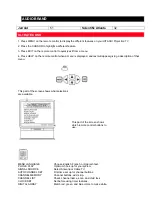
Страница 30: ...ppear giving a description of that menu This part of the screen shows what selections are available This part of the screen shows which remote control buttons to use MENU LANGUAGE Choose English French or Spanish text PLUG PLAY Optimum hook up for your system SIGNAL SOURCE Select Antenna or Cable TV AUTO CHANNEL SET First time set up for channel buttons CHANNEL MEMORY Channel buttons add skip CHAN...

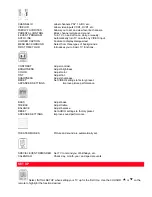
Страница 31: ...ions CONTRAST Adjust contrast BRIGHTNESS Adjust brightness COLOR Adjust color TINT Adjust tint SHARPNESS Adjust sharpness RESET Set VIDEO settings to factory preset ADVANCED SETTINGS Improve picture performance BASS Adjust bass TREBLE Adjust treble BALANCE Adjust balance RESET Set AUDIO settings to factory preset ADVANCE SETTINGS Improve sound performance THEATER MODES Picture and sound are automa...

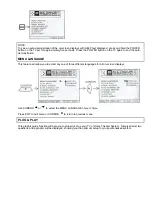
Страница 32: ...GE This feature will allow you to select any one of three different languages for all on screen displays Use CURSOR or to select the MENU LANGUAGE of your choice Press EXIT to quit menu or CURSOR to return to previous menu PLUG PLAY This graphic guide function will help you to properly set up your TV or Home Theater System Simply answer two questions and a graphic will be displayed showing you the...

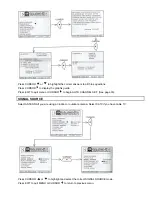
Страница 33: ...e Press EXIT to quit menu or CURSOR to begin AUTO CHANNEL SET See page 33 SIGNAL SOURCE Select ANTENNA if you are using an indoor or outdoor antenna Select CATV if you have cable TV Press CURSOR or to highlight and select the correct SIGNAL SOURCE mode Press EXIT to quit MENU or CURSOR to return to previous menu ...

Страница 34: ...s when using the CHANNEL UP or DOWN If the EXIT button is pressed while the AUTO CHANNEL SET function is engaged programming will stop If two antennas are connected switch antenna inputs with the INPUT button and repeat AUTO CHANNEL SET for the second antenna input Remember to select the correct SIGNAL SOURCE mode before using AUTO CHANNEL SET for the second antenna input See CHANNEL MEMORY to add...

Страница 35: ...uit menu or CURSOR to return to previous menu CHANNEL LIST Use this function allows you to review which channels are labeled in CHANNEL ID ID which have been added to CHANNEL MEMORY SCAN and which are protected by PARENTAL CONTROL LOCK Add CURSOR or to review more channels Press EXIT to quit menu or CURSOR to return to previous menu ...

Страница 36: ...mps and vibrations or moving the TV If you move your TV or if after a time you notice color rings or halos around objects in the picture you may want to converge align the colors Properly converged the lines appear white which is actually a combination of the outputs of the three color tubes The output of the green tube is stationary The outputs of the red and blue tubes can be adjusted When prope...

Страница 37: ...r extreme cases of misconvergence and requires assistance from service Four lines surrounding a crosshatch indicate the point being adjusted The color of these surrounding lines indicates the color being adjusted To save your adjustment data into memory press the front panel DIGITAL ARRAY button or the remote control MOVE Button If you do NOT wish to save your adjustment data into memory turn the ...

Страница 38: ...sents a blank space Press CHANNEL or and the number buttons to label additional channels Press EXIT to quit menu or CURSOR to return to previous menu when the CURSOR is in the first position Select RESET to erase a CHANNEL ID NOTES If ANT A and ANT B are in the same SIGNAL SOURCE mode see page 32 the CHANNEL ID for both antenna inputs will be the same CHANNEL ID will be displayed only when channel...

Страница 39: ...osition Press EXIT to quit menu or CURSOR to return to previous menu when the CURSOR is in the first position represents a blank space Select RESET to set VIDEO ID to original condition NOTE VIDEO ID will be displayed only when VIDEO input is displayed as main picture FAMILY FAVORITES MENU This function allows you to group your favorite channels into six personalized categories that you can rename...

Страница 40: ...reen Enter channel 00 to erase a favorite channel To reset categories and channels back to original factory preset press RECALL while you are renaming a category NOTE This function cannot be accessed when ANT B is the main channel When the setting in a SIGNAL SOURCE different from ANT A the message PLEASE SWITCH TO ANT A will appear FAMILY FAVORITES OPERATION Use this function to display FAMILY FA...

Страница 41: ... LOCK is turned on the picture and sound for all video inputs will be blocked out To lock the video inputs you must be tuned to any video input When QUICK LOCK is turned on the picture and sound for channels 3 4 on both ANT A B and all video inputs will be blocked out When FRONT PANEL LOCK is turned on all buttons on the front panel will be deactivated except the POWER button When TV TIME OUT is t...

Страница 42: ...ss CURSOR or to select the time the TV will turn on and off Use CURSOR to change position Press CURSOR or to highlight then CURSOR to select MODE ONCE TV will turn on off one time only or MODE DAILY TV will turn on off at the same time every day or MODE WEEKLY TV will turn on off at same time every week and MODE OFF to disable this function Press CURSOR or or CHANNEL or or number buttons to set th...

Страница 43: ... watch a movie with your VCR laserdisc player or DVD player When REMOTE is selected the TV will turn on and tune to VIDEO 1 or 2 automatically when the VIDEO 1 or 2 input device is turned on and the VCR laserdisc or DVD play button on your remote control is pressed This is convenient when you want to record a movie with your VCR and watch it later Select OFF to disable this function Press EXIT to ...

Страница 44: ...ure MUTE is not set MENU BACKGROUND This function allows you to choose from three menu backgrounds Use CURSOR or to change MENU BACKGROUND setting Press EXIT to quit menu or CURSOR to return to previous menu Select CLEAR and no background is visible select GRAY and a gray background is visible no picture can be seen behind menu screen select SHADED and a light background is visible FIRST TIME TOUR...

Страница 45: ...nal menu items BRIGHTNESS COLOR TINT and SHARPNESS can be selected and adjusted in the same manner Contrast and Brightness adjustments will affect only the main picture These adjustments will not affect the sub picture CONTRAST Use this function to change the contrast between black and white levels in the picture This adjustment will only affect the picture when ADVANCED SETTINGS ULTRA AI is OFF S...

Страница 46: ...onitor and adjust contrast depending on room lighting sensor is located in the front panel to produce a more natural picture 2 Automatically monitor and adjust color levels and maintain natural flesh tones 3 Automatically compensate for weak or strong TV signals to produce a clear picture Turn the AI function off to control other PREFERENCE SETTINGS AUTO COLOR The AUTO COLOR function automatically...

Страница 47: ...is selected you are adjusting BASS The additional menu items TREBLE and BALANCE can be selected and adjusted in the same manner BASS This function controls the low frequency audio to all speakers TREBLE This function controls the high frequency audio to all speakers BALANCE This function will control the left to right balance of the TV internal speakers the AUDIO TO HI FI output and WIRELESS OUT o...

Страница 48: ...ill be displayed above the sources received See example below for each selection when both stereo and second audio are received monaural is always received STEREO SELECTED SAP SELECTED MONO SELECTED INTERNAL SPEAKERS This function is useful when first setting up the external speakers or if you prefer to use only speakers from a separate stereo system AUTO NOISE CANCEL This function eliminates the ...

Страница 49: ...y set CONTRAST almost center SUPER CONTRAST OFF COLOR TEMP WARM LOUDNESS OFF PERFECT VOLUME OFF When SPORTS mode is chosen the following are automatically set CONTRAST Maximum SUPER CONTRAST ON COLOR TEMP COOL LOUDNESS OFF PERFECT VOLUME OFF You can customize each of the above modes TV MOVIE and SPORTS to your preference to increase viewing performance and pleasure depending upon the video program...

Страница 50: ...previous menu If the clock is not set you can not use this function and the next screen will appear NOTE 1 When the TV is turned on the SPECIAL EVENT REMINDER message will automatically appear at the selected time 2 Each special event message can be a maximum of 20 characters 3 When the RECALL button is pressed a special icon appears on the right bottom corner of the screen and indicates a SPECIAL...

Страница 51: ...RMATION INDEX CARE OF YOUR HITACHI PROJECTION TV AND YOUR REMOTE CONTROL DO Dust the screen and cabinet with a soft cloth Clean the screen with a soft cloth moistened with warm water and dry with a soft cloth A mild soap may be used if the screen is extremely dirty Place your television away from extreme heat humidity and extremely dusty places Remove the plug from the wall outlet if your televisi...

Страница 52: ...d other electrical appliances GHOSTS Ghosts are caused by the television signal following two paths One is the direct path and the other is reflected from tall buildings hills or some other objects Changing the direction or position of the antenna may improve reception Ghosting may also be caused by defects in the antenna system such as unshielded leads or connecting several sets to the same anten...

Страница 53: ...LLOW THIS PROCEDURE 1 Press the power switch ON OFF switch once 2 If there is still no power wait 30 seconds and press the power switch again 3 If there is still no power unplug the power cord from the wall Wait 30 seconds and plug the power cord back in Press the power switch again This protective technology should provide for years of lasting entertainment from your HITACHI Projection Television...

Страница 54: ... hours a day 800 HITACHI 1 800 448 2244 Hitachi America LTD Home Electronics Division Hitachi has made every effort to assure you hours of trouble free operation from your unit However should you require service a network of Hitachi Authorized Service Facilities has been established in all 50 states and Puerto Rico Each facility will provide you with convenient and expedient assistance Our service...

Страница 55: ...ITACHI 1 800 448 2244 During business hours Monday Friday EST 9 00AM 7 00PM Saturday EST 9 00AM 5 00PM HITACHI Canada Inc Digital Media Division 6740 Campobello Road Mississauga Ont L5N 2L8 NOTES blank page for consumer notes QR43622 FLAT FILED 10 26 00 ...

Отзывы: