


19
Changing the TV Settings
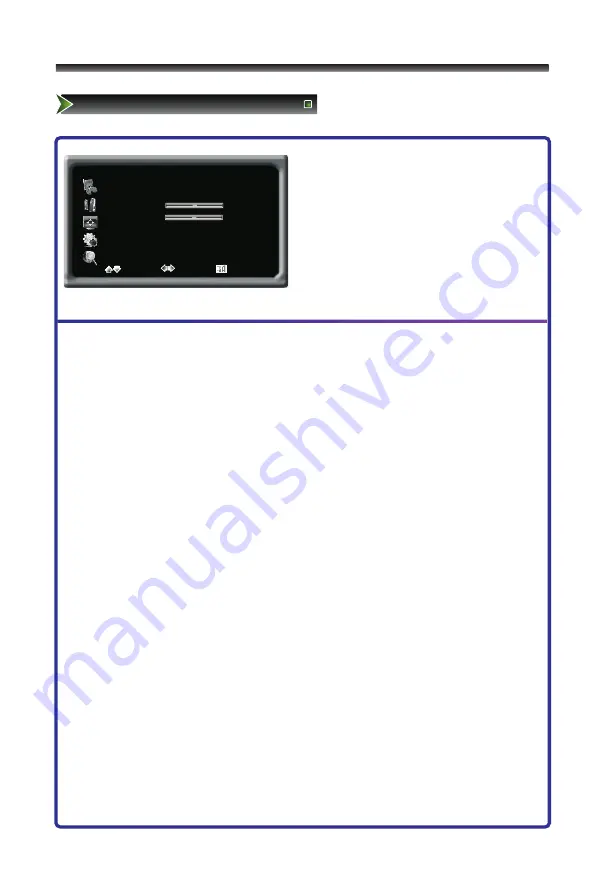
Using the Screen Menu
Screen
Image Position
►
H Size 50
V Size 50
Auto Adjust
►
HDMI Ratio ZOOM
Select Adjust Return
1 Press [Menu] button to display the main
menu.
2 Press [
∧
/
∨
] button to select Screen item.
3 Press [
>
/OK] button to enter Screen menu.
4 Press [
∧
/
∨
] button to select the option,
press [
>
/OK] button to enter or press
[
<
/
>
] button to adjust the option.
5 Press the [Menu] button to close the menu.
The options are:
■
Image Position: Adjusts the position of image on screen by press
∧
/
∨
/
<
/
>
button.
■
H-Size: Adjusts the horizontal size of the image.
■
V-Size: Adjusts the vertical size of the image.
■
Phase: Adjusts the phase of the clock used for synchronizing the image.
■
Clock: Adjusts the clock used for synchronizing the image.
■
Auto Adjust: Adjusts the position and the size of the image automatically.
Note:
HDMI interface transmits whole digital signal and Geometry Adjust function is not used,
so Screen cannot be selected under HDMI. H-Size and V-Size are not available under
VGA source, Phase and Clock are only available under VGA source.
Take Windows2000 as an example, and the Windows system display setting is as
illustrated:
1 Click "Setting" on the Windows Start menu and select "Setting" to move the mouse
horizontally
to click "Control Panel".
2 The control panel window appears; click "Display" to display a dialogue box.
3 Find the "Settings" item on the dialogue box, set the screen Resolution.
4 Click "OK" to exit.
Содержание LCD19W57DCA
Страница 9: ...VGA PR B E A L L USB SD MS MMC 8 Setting Up TV Rear TV Rear...
Страница 22: ...21 Changing the TV Settings Using the Function Menu...
Страница 31: ...LVVTKJJWWWIOPUNRUNIMSQ...


