background image


Operational Instructions and Function Adjustment


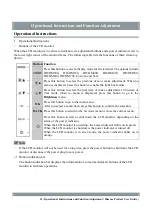
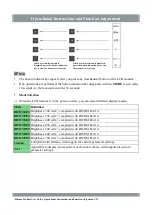
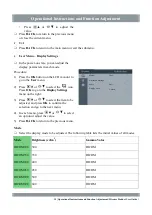
Press 

 or 

 to adjust the 

value. 


Press 

BACK

 to return to the previous menu 

or close the current menu. 


Exit 


Press 

BACK

 to return to the main menu or exit the submenu. 


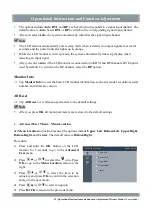
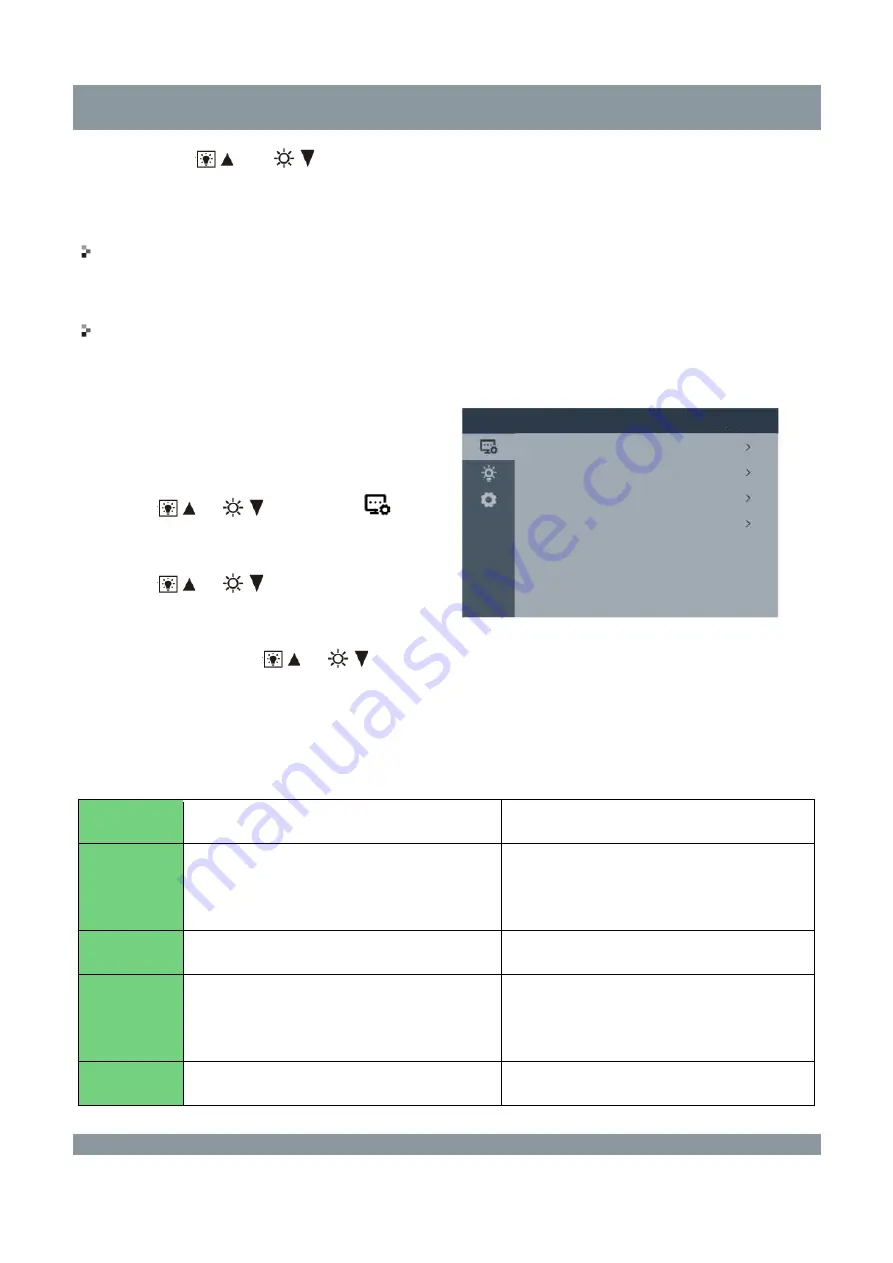
User Menu – Display Settings 


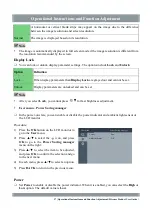
In the power-on state, you can adjust the 
display parameters in each mode. 

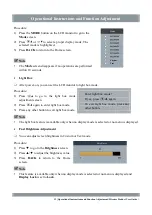
Procedure: 

1)


Press the 

OK

 button on the LCD monitor to 

go to the 

User

 menu. 

2)


Press 

 or 

 to select the 

 icon. 

Press 

OK

 to go to the 

Display Settings


menu on the right. 

3)


Press 

 or 

 to select the item to be 

adjusted, and press 

OK

 to confirm the 

selection and go to the next menu. 

4)


In each menu, press 

 or 

 to select 

an option or adjust the value. 

5)


Press 

BACK

 to return to the previous menu. 


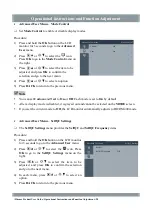
Mode 


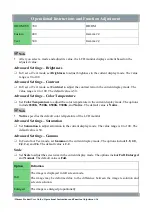
Select the display mode to be adjusted. The following table lists the initial values of all modes. 

Mode 

Brightness (cd/m

2

Gamma Value 

DICOM300  300 

DICOM 

DICOM350  350 

DICOM 

DICOM400  400 

DICOM 

DICOM450  450 

DICOM 

DICOM500  500 

DICOM 

DICOM600  600 

DICOM 

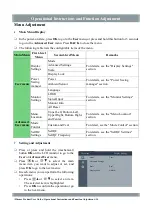
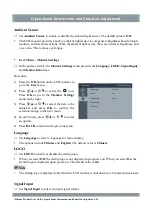
User menu


Display Settings


Mode 
 
Advanced Settings 
 
Scale 
 
Display Lock 

Text 


Full 
 
Unlock 


15 | Operational Instructions and Function Adjustment | Hisense Product User Guide | 

Содержание HMD2C21A

Страница 1: ...ead the User Guide thoroughly before using Hisense LCD monitor and keep it properly for future reference RSAG2 025 6099SS B Version You can download the latest user guide from Hisense website Hisense website www hisense com ...

Страница 2: ......

Страница 3: ... the User Guide Hisense national customer service hotline 4009940707 Hisense service quality supervision tel 0532 83091111 Only the repair personnel are allowed to repair the LCD monitor and replace its components Failure to comply will result in electric shock and fire Clean the equipment by using a piece of clean soft cotton cloth Do not wipe repeatedly with a strong force Do not scratch knock o...

Страница 4: ...d its service life Do not perform cleaning and maintenance when the LCD monitor is energized Disconnect the LCD monitor power cable whenever possible Description and Maintenance of the LCD monitor The screen is a key component of the LCD monitor and requires periodic maintenance Do not press the screen or the frame edge with force Failure to comply may cause abnormal display Do not touch or press ...

Страница 5: ...hazardous high voltage inside so do not disassemble it by yourself If the LCD monitor is abnormal contact Hisense or an authorized distributor Ensure that no sundries exist in the surrounding area of mains disconnection devices such as the switch power plug and appliance coupler and that these devices are easy to operate Ensure that the socket in use is qualified and certified by a national safety...

Страница 6: ......

Страница 7: ...SB Connection 10 Operational Instructions and Function Adjustment 11 Operational Instructions 11 Mode Selection 12 Light Box 13 Fast Brightness Adjustment 13 Menu Adjustment 14 Main Menu Display 14 Setting and Adjustment 14 User Menu Display Settings 15 User menu Power Saving manager 17 User Menu Monitor Settings 18 Advanced User Menu Menu Location 19 Advanced User Menu Mode Control 20 Advanced Us...

Страница 8: ...backlight LCD panel with a long service life The backlight is driven by low voltage which eliminates the hazardous radiation to the body and environment Ambient light induction The LCD monitor provides a built in ambient light sensor to measure ambient light in the unit of lux In different environments the LCD monitor automatically adjusts display effect based on ambient light changes Front facing...

Страница 9: ...onnector Dimensions W x H x D Whole equipment vertical orientation 384 x 517 5 to 637 5 x 273 5 mm Whole equipment vertical orientation excluding the base 384 mm x 492 mm x 70 mm Product quality Net weight About 9 3 kg Net weight excluding the base About 4 3 kg Movable range Inclination 15 upwards and 5 downwards Horizontal rotation 30 Adjustable height 100 mm Horizontal and vertical rotation 90 r...

Страница 10: ...e and quality control software Note The accessory list is for reference only If any component is lost or damaged promptly contact Hisense or the specified distributor Keep the original package properly If you need to return this product be sure to use the original package Do not place any heavy weight on top of the package during transportation Use a dedicated power adapter with the CCC certificat...

Страница 11: ...cal orientation CAUTION When adjusting the height of the monitor hold the left and right sides of the monitor with both hands Do not put your hands directly under the monitor to avoid pinching your hands when the monitor reaches the lowest level When rotating the monitor adjust the monitor to the highest point of the base to prevent the monitor from touching the base 5 Installation Hisense Product...

Страница 12: ...ion Front View of the LCD Monitor and Side Buttons Note For instructions on using the buttons see the Operational Instructions and Function Adjustment section Indicator Hisense Product User Guide Installation 6 ...

Страница 13: ...plink port Connected to a PC for LCD monitor debugging or parameter setting Input 5 V 1 A DP and DVI Connected to the digital output port on the graphics card of the PC Two USB ports downlink Connected to the keyboard and mouse only Output 5 V 0 5 A Used with USB1 port Two USB ports 7 Installation Hisense Product User Guide ...

Страница 14: ... 1 Insert the part of the cover marked with into the rear housing 2 Press tight the snap fit joint marked with on the cover 3 Press tight the snap fit joint marked with on the cover The following figure shows the rear housing with the cover correctly installed Hanging Arm Installation Remove the base assembly to install the required hanging arm or base Follow the instructions in the User Guide whe...

Страница 15: ...after the hanging arm or base is installed Do not move the removed base vertically Failure to comply may result in injury or equipment damage The monitor and the hanging arm base are heavy Their falling may result in injury or equipment damage Installation procedure 1 Place the LCD monitor on a stable bench top covered with a piece of soft cloth with the panel surface facing down 2 Uninstall the b...

Страница 16: ...the provided USB cable The following figure shows the PC connection diagram DVI port DP port Digital Digital DVI port DP port Signal cable delivered with the LCD monitor Signal cable delivered with the LCD monitor Connected to the PC Connected to the PC USB port USB port Delivered with the LCD monitor Hisense Product User Guide Installation 10 ...

Страница 17: ... is displayed press this button to go to the Brightness menu OK Press this button to go to the main menu After you select a menu item press this button to confirm the selection BACK Press this button to return to the previous menu or close the current menu Press this button to start or shut down the LCD monitor depending on the status of the power indicator When the LCD monitor is operating the po...

Страница 18: ... 400 cd m2 compliant with DICOM Part 14 DICOM450 Brightness 450 cd m2 compliant with DICOM Part 14 DICOM500 Brightness 500 cd m2 compliant with DICOM Part 14 DICOM600 Brightness 600 cd m2 compliant with DICOM Part 14 DICOM700 Brightness 700 cd m2 compliant with DICOM Part 14 Custom Compliant with Gamma with support for custom parameter settings Text Applicable to display processed text or electron...

Страница 19: ... box mode 3 Press any other button to exit light box mode Enter light box mode If yes press again To exit light box mode press any other button Note The light box feature is available only when no display mode is selected or no menu is displayed Fast Brightness Adjustment You can adjust screen brightness in Custom or Text mode Procedure 1 Press to go to the Brightness screen 2 Press to adjust the ...

Страница 20: ... All Reset Advanced User menu Menu Location Upper Left Bottom Left Upper Right Bottom Right and Center For details see the Menu Location section Mode Control Custom and Text For detail see the Mode Control section SelfQC Settings SelfQC For details see the SelfQC Settings section SelfQC Frequency Setting and Adjustment Press or press and hold the mechanical button OK on the LCD monitor to go to th...

Страница 21: ...gs menu on the right 3 Press or to select the item to be adjusted and press OK to confirm the selection and go to the next menu 4 In each menu press or to select an option or adjust the value 5 Press BACK to return to the previous menu Mode Select the display mode to be adjusted The following table lists the initial values of all modes Mode Brightness cd m2 Gamma Value DICOM300 300 DICOM DICOM350 ...

Страница 22: ...ude 6500K 7500K 8500K 9300K and Native The default value is Native Note Native specifies the default color temperature of the LCD monitor Advanced Settings Saturation Set Saturation to adjust saturation in the current display mode The value range is 0 to 100 The default value is 50 Advanced Settings Gamma In Custom or Text mode set Gamma in the current display mode The options include 1 8 2 0 2 2 ...

Страница 23: ...er you select Lock you cannot press for fast brightness adjustment User menu Power Saving manager In the power on state you can enable or disable the power indicator and ambient light sensor of the LCD monitor Procedure 1 Press the OK button on the LCD monitor to go to the User menu 2 Press to select the g icon and press OK to go to the Power Saving manager menu on the right 3 Press to select the ...

Страница 24: ...e right 3 Press or to select the item to be adjusted and press OK to confirm the selection and go to the next menu 4 In each menu press or to select an option 5 Press BACK to return to the previous menu Language Set Language to select a language for menu display The options include Chinese and English The default value is Chinese LOGO Set LOGO to enable or disable the startup logo When you select ...

Страница 25: ...w the basic LCD monitor information such as its model resolution serial number and firmware version All Reset Tap All Reset to set all menu parameters to the default settings Note After you press OK all menu parameters are restored to the default settings Advanced User Menu Menu Location Set Menu Location to position menus The options include Upper Left Bottom Left Upper Right Bottom Right and Cen...

Страница 26: ...ayed out and cannot be selected on the MODE screen If you set the current mode to Off the LCD monitor automatically adjusts to DICOM400 mode Advanced User Menu SelfQC Settings The SelfQC Settings menu provides the SelfQC and SelfQC Frequency items Procedure 1 Press and hold the OK button on the LCD monitor for 3 seconds to go to the Advanced User menu 2 Press or to select the icon Press OK to go t...

Страница 27: ...cancel automatic calibration press BACK and select Cancel If the front facing sensor is damaged and does not pop out the message Data error operation terminated appears Contact Hisense or an authorized distributor The image detection device and light sensor are precision devices Use them carefully to avoid damage Do not prevent the light sensor from popping out and retracting with external force I...

Страница 28: ...on cables delivered with the LCD monitor be used Restart the PC The image is abnormal Check whether the output resolution of the graphics card is proper Tap All Reset to restore all display parameters of the image to the default settings The entire or part of the screen shows blurs colored irregular thin stripes This is due to mismatch between the PC s graphics card output format and that of the L...

Страница 29: ...upply equipment may affect the use of the LCD monitor and damage it Install the LCD monitor in an environment free of electromagnetic wave interference If the LCD monitor generates interference or reacts to interference take one or more of the following measures Adjust the position or direction of the affected equipment Increase the distance between the LCD monitor and the affected equipment Consu...

Страница 30: ...tances Environmental friendly service life The environmental friendly service life identifier printed on the LCD monitor s nameplate and storage box indicates that the LCD monitor has a 10 year environmental friendly service life Names and content of harmful substances in the LCD monitor Component Harmful Substance Lead and Its Compounds Mercury and Its Compounds Cadmium and Its Compounds Hexavale...

Страница 31: ...ation natural disasters or improper maintenance by a third party other than Hisense and authorized distributors The product ages because it has been used with brightness above the recommended value in the User Guide for a long time The product is faulty and damaged due to external equipment The product is faulty because its original serial number is modified or eliminated Any component of the prod...

Страница 32: ...input voltage is non linear A smaller gamma value generates an image with lower contrast whereas a greater gamma value generates an image with higher contrast In Plane Switching IPS IPS is an LCD panel technology introduced by Hitachi in 2001 Up to now five generations of technologies IPS S IPS AS IPS IPS PRO and IPS NEO have been developed for IPS Lux Lux is a unit of illumination in which a lumi...

Страница 33: ...ment Co Ltd Address North 3F Outsourcing Center of Software Park No 169 Songling Road Laoshan District Qingdao P R China Hisense national customer service hotline 4009940707 Hisense service supervision email haixinfuwu hisense com ...

Отзывы: