background image

22

FCC Statement 

FCC Caution. 
This device complies with part 15 of the FCC Rules. Operation is subject to the 
following two conditions: (1) This device may not cause harmful interference, and (2) 
This device must accept any interference received, including interference that may 
cause undesired operation. 
Any Changes or modifications not expressly approved by the party responsible for 
compliance could void the user's authority to operate the equipment. 
Note: This equipment has been tested and found to comply with the limits for a Class 
B digital device, pursuant to part 15 of the FCC Rules. These limits are designed to 
provide reasonable protection against harmful interference in a residential installation. 
This equipment generates uses and can radiate radio frequency energy and, if not 
installed and used in accordance with the instructions, may cause harmful 
interference to radio communications. However, there is no guarantee that 
interference will not occur in a particular installation. If this equipment does cause 
harmful interference to radio or television reception, which can be determined by 
turning the equipment off and on, the user is encouraged to try to correct the 
interference by one or more of the following measures: 
-Reorient or relocate the receiving antenna. 
-Increase the separation between the equipment and receiver. 
-Connect the equipment into an outlet on a circuit different from that to which the 
receiver is connected. 
-Consult the dealer or an experienced radio/TV technician for help. 
The device has been evaluated to meet general RF exposure requirement. The device can be 
used in portable exposure condition without restriction. 

This  manual  was  correct  and  complete  at  the time  of  printing.  However,  new specifications 
and updates can occur at any time without prior notice. No part of this manual may be copied, 
republished, reproduced, transmitted or distributed in any way without prior written consent 
of Hisense. Any unauthorized distribution of this manual is expressly forbidden.   

Hisense may find it necessary to modify, amend or otherwise change or update this manual. 
We  reserve  the  right  to  do  this  at  any  time,  without  any  prior  notice.  All  specifications  and 
features are subject to change without notice. All screen shots shown are simulated and may 
not represent the actual screen on production units sold to consumers. 

RF exposure statement :

This equipment complies with FCC radiation exposure limits set forth for an uncontrolled 

environment .The device has been evaluated to meet general RF exposure requirement. The

device can be used in portable exposure condition without restriction.   

Содержание HM616

Страница 1: ...1 HM616 Tablet POS User Guide ...

Страница 2: ... moderate climates We are not responsible for damage or lost data caused by malfunction misuse modifi cation of the device or battery replacement Do not attempt to disassemble repair or modify the product This will invalidate the warranty If the device will not be used for an extended period of time please charge the battery at least once per month to maintain battery life Charge the battery if a ...

Страница 3: ...re are no user serviceable parts inside Refer servicing to qualified personnel The exclamation point within an equilateral triangle is intended to alert the user to the presence of important operating and maintenance instructions in the literature accompanying the device Correct Disposal of this product This marking indicates that this product should not be disposed of with other household waste i...

Страница 4: ...alkman can damage the ear of the use Do not use while operating a motorized vehicle It may create a traffic hazard and is il legal in many areas You should use extreme caution or temporarily discontinue use in potentially hazardous situations created by obstructed hearing Even if your headphones or earphones are the open air type designed to let you hear outside sounds don t turn up the volume so ...

Страница 5: ...5 Features Functionality Tablet Front view 1 Power indicator Indicates the battery charge status 2 Front camera Capture a front view picture or record videos 3 Tounch screen Support with multi touch ...

Страница 6: ...6 Top view 1 Combo audio jack Connect to headsets 2 Built in microphone Capture voice which can provide sound input to make calls using web based apps audio recording ...

Страница 7: ...power adapter 2 USB 3 0 port Connects to USB devices 3 Micro USB port Connects to USB devices 4 5 Micro SD card slot 6 Volum button Power button Accommadate micro SD card Increases or decreases the volum level Press and hold on to turn on or turn off the devices ...

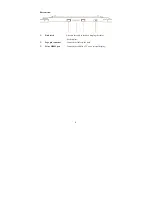
Страница 8: ...om view 1 Dock latch Attaches the table to the dock keeping the tablet fixed in place 2 Pogo pin connector Connects the tablet to the dock 3 Micro HDMI port Connects the tablet to a TV or an external display ...

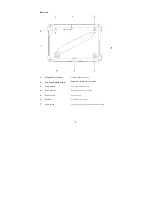
Страница 9: ...er Swipes Magnetic cards Contactless integrated circuit card 3 Scan button Press the button to scan 4 Rear camera Captures pictures or videos 5 Ports cover Built in ports 6 Speaker Provides audio output 7 Lock latch Lock the tablet on the multifunctional dock ...

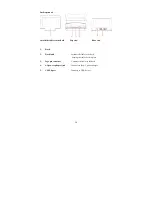
Страница 10: ...p view Rear view 1 Dock 2 Dock latch Attaches the table to the dock keeping the tablet fixed in place 3 Pogo pin connector Connects the tablet to the dock 4 AC power apdapter jack Connects to the AC power adapter 5 USB 2 0 port Connects to USB devices ...

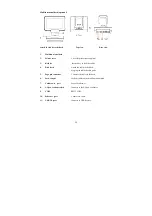
Страница 11: ...k the tablet 4 Dock latch Attach the tablet to the dock keeping the tablet fixed in palce 5 Pogo pin connector Connects the tablet to the dock 6 Lock tongue Lock the tablet on the multifunctional dock 7 Cashdrawer port Acess Cashdrawer 8 AC power adapter jack Connects to the AC power adapter 9 COM RS232 COM 10 Ethernet port Connects to cable 11 USB 2 0 port Connects to USB devices ...

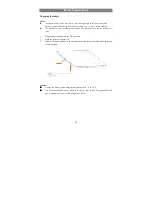
Страница 12: ...hargeable battery Charge the device when the battery level is low 1 Plug the power adapter into the DC In socket 2 Open the port cover on the left 3 Connect the power adapter to an electrical outlet and charge the tablet until the battery is fully charged Caution Charge the battery in an ambient temperature of 0 C to 35 C Use only the supplied power adapter to charge your tablet Using unauthorized...

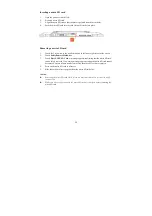
Страница 13: ...ove Hardware 3 Touch Eject XXXX SD Card A message appears confirming that the micro SD card can be safely removed If a warning message appears stating the micro SD card cannot be removed ensure all data transfers involving the micro SD card are complete 4 Press on the micro SD card to release it 5 Slide the card out after it pops out from the micro SD card slot Caution Removing the micro SD card w...

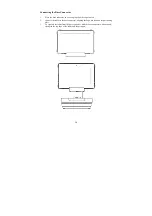
Страница 14: ...en plane like the top of a desk 2 Connect the tablet to the base connector aligning the Pogo pin jack and the positioning slots 3 To separate the tablet from the base connector hold the base connector with one hand then grab the top edge of the tablet and drag it apart ...

Страница 15: ...ory so user need not perform Android setup again before using for the first time Press and hold the Power button to turn on your tablet The lock screen appears Now the tablet is ready for use Turning Off the Tablet 1 Press and hold the Power button for at least 4 seconds 2 Touch Power off to turn off the tablet ...

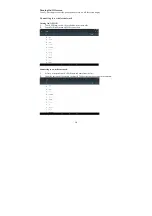
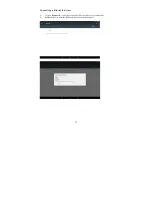
Страница 16: ...eless network Turning On Off Wi Fi 1 Touch Wi Fi on to view the available wireless networks 2 Touch Wi Fi off to turn off Wi Fi connection Connecting to a wireless network 1 Select a wireless network clik the network name from the list 2 Input the password if necessary then touch Connect to start connecting to the Internet ...

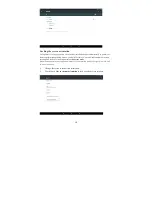
Страница 17: ...17 Connecting to Bluetooth devices 1 Turn on Bluetooth searching for available Bluetooth devices automatically 2 Select the device from the Bluetooth devices list and click pair ...

Страница 18: ...ng on how you hold the tablet You can disable automatic screen rotation and lock the screen in portrait or landscape mode Note Some apps may not support automatic screen rotation and are designed to work only in one orientation 1 Change the screen to the desired orientation 2 Touch Touch Stay in current orientation to lock or unlock screen rotation ...

Страница 19: ...r finger on an item on the screen 2 Keeping your finger in contact with the display move your fingertip to the desired location 3 Take your finger off the display to drop the item in the desired location Move items such as images and icons on the screen Swipe or Slide Move your finger in a vertical or hori zontal direction on the display Scroll through the Start screen web pages lists en tries pho...

Страница 20: ... devices headphones and speakers from the tablet and from their electrical outlets 3 Moisten a soft lint free cloth with either water or a display cleaner and wipe the surface of the tablet until it is clean Do not allow water from the cloth to seep down to the tablet ports or buttons Caution 1 To avoid damaging the tablet or display do not spray cleaning solution directly onto the display Only us...

Страница 21: ...ch screen Multi touch screen Display resolution Resolution 1280 800 Pixels 10 1 inch LCD Battery pack Rechargeable lithium battery 9000 mAh AC power adapter AC power adapter for pad and express dock Input 100 240 V 50 60 Hz AC Output 5 V DC power 20 W AC power adapter for Multi function dock Input 100 240 V 50 60 Hz AC Output 24 V DC power 60 W I O Ports Pad Combo audio jack 1 Micro HDMI port 1 Mi...

Страница 22: ...of the following measures Reorient or relocate the receiving antenna Increase the separation between the equipment and receiver Connect the equipment into an outlet on a circuit different from that to which the receiver is connected Consult the dealer or an experienced radio TV technician for help The device has been evaluated to meet general RF exposure requirement The device can be used in porta...

Отзывы: