


Ԣ
Ԣ
Ԣ
15
Timed ON
selected, press the time schedule key
⑨
to
indicate the time, set mode, set function and
target outlet water temperature of the timed
startup. And the timed startup icon flashes at 1
Hz.
(a) Press time schedule key
⑨
, and go to time
setting 06:00. Now press “
>
”, “
<
” of time
setting key , clock increases or decreases by
15 minutes, and press “
>
”, “
<
” for long, clock
increases or decreases by 1 hour.
(b) Press time schedule key
⑨
, and go to the
mode setting. Now press “
>
”, “
<
” of time
setting key
to select. Because this model
only has the heating function, the cooling mode
can not be selected.
(c) Press time schedule key
⑨
, and go to function
selection setting. Now press “
>
”, “
<
” of time
setting key
, and according to actually
mounted terminals, set by referring to “5.1.6
In-situ Settings”. The floor heating or domestic
hot water function is selected, and P1 floor
heating or P6 domestic hot water on the LCD
screen will change according to the function
selected.
(d) Press time schedule key
⑨
, and go to the
temperature control. Through “
ġ
”, “
Ģ
” of the
temperature regulation key
③
, the target
temperature of water outlet is set. For floor
heating, the lowest set temperature is 20°C
and the highest set temperature is 55°C; for
domestic hot water running, the lowest set
temperature is 35°C and the highest set
temperature is 75°C.
selected, press the time schedule key
⑨
to
indicate the time of the timed shutdown. And
the timed shutdown icon flashes at 1 Hz.
Ԣ
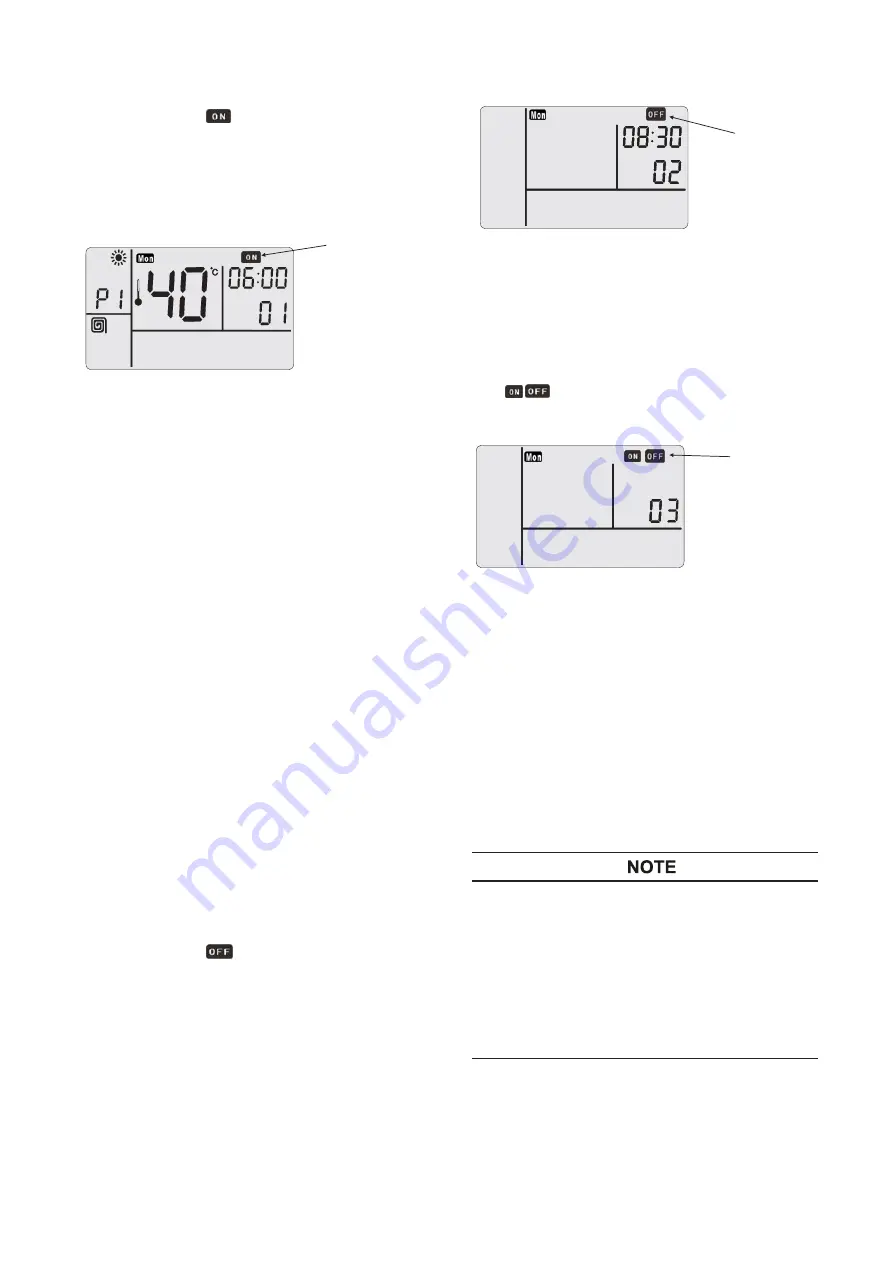
Timed OFF
Press the time schedule key
⑨
, and go to time
setting 08:30. Now press “
>
”, “
<
” of time setting
key , clock increases or decreases by 15
minutes, and press “
>
”, “
<
” for long, clock
increases or decreases by 1 hour.
(3) If select the sterilization key
①
to cancel timing
screen displays as follows
ON/OFF
Press the time schedule key
⑨
, cancel the timing
for this time period and return to the time period
selection state.
Step 4
Return to the time period selection state, set other
time periods. After the time periods for the date are
set, press the sterilization key
①
for canceling,
and return to the week selection state. Implement
the similar settings for other days in the week. At
the selection state of day in the week, press the
cancel key (sterilization key
①
), and quit from the
time schedule setting state.
Ɣ $WHDFKNLQGRIVHWWLQJVWDWHSUHVVWKHFDQFHO
key (sterilization key
①
) to return the upper
level setting state, and until quit from the time
schedule setting.
Ɣ ,QDVDPHGD\LIWKHWLPHVHWWLQJVIRUWLPH
periods are the same, the later settings should
prevail and the previous settings will be
automatically cancelled.
(1) If the timed on (“ ” flashes at1 Hz) is
(2) If the timed off (“ ” flashes at 1 Hz) is
(“ ” ON/OFF flashes at 1 Hz), the LCD
flashes at 1 Hz
flashes at 1 Hz
flashes at 1 Hz