MACH 4002
Release 1.0 10/05
21
2.1.6
Setup or installation of the device in a 19" rack
U
Setup
Using the basic device as a desktop device:
V
Attach the rubber foot delivered with the device to its underside.
– First remove the protective film from the rubber foot.
– Stick one rubber foot approximately 2 cm from each corner.
Note:
The adhesive surface should be free of dust and grease.
U
Installation
The devices are intended to be installed in a 19” rack.
V
Make sure there is sufficient ventilation. If necessary, provide a fan for
the 19” rack. This will prevent the basic device from overheating.
V
Measure the depth of the 19” rack so as to allow the power supply ca-
ble and, if required, the M4-POWER power supply cables from the
back, and data cables to be connected from the front.
Note:
For rack mounting use chassis runners.
2.1.7
Grounding the device
The device is grounded via the power supply connectors.
Note:
The shielding ground of the connectable twisted pairs lines is connec-
ted to the front panel as a conductor.
When the device is being operated by means of the 230/120 VAC power
supply unit, it is grounded via the safety plug. When it is being operated with
external DC voltage via the M4-POWER connections, the device is grounded
via the M4-POWER connection.
2.1.8
Assembling the power unit chassis (if required),
Connecting to the MACH 4002
V
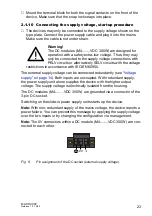
Connect the switch chassis and the M4-POWER power unit chassis with
the mounting angle included in the delivery.
V
For the redundant power supply, you use the power supply cable to
connect the power unit(s) in the M4-POWER power unit chassis with
the M4-POWER connection on the back of the MACH 4002 device.
Содержание MACH 4002 48+4G
Страница 40: ...40 MACH 4002 Release 1 0 10 05 ...
Страница 42: ... ...

