


HIKVISION DS-8104AH(L)I-S User‟s Manual
33
2.
Select the
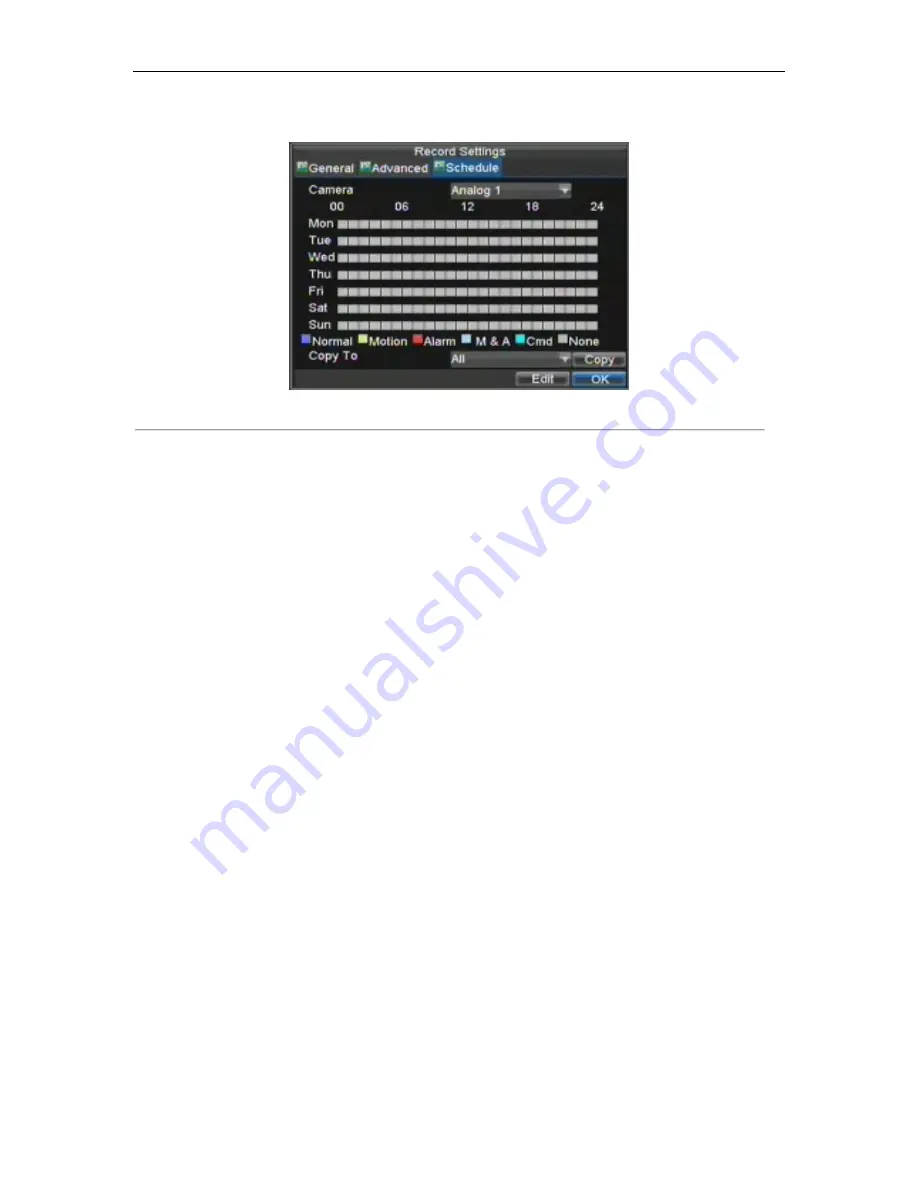
Schedule
tab to open the Schedule menu, shown in Figure 4.
Figure 4. Schedule Settings
3.
Select Camera to edit schedule for.
4.
Click the Edit button.
5.
Click and check
Enable Schedule
.
6.
Select the day you would like to setup the schedule for or select All Week to record the entire week.
7.
Select to record the entire day by clicking
All Day
or at different time periods. Up to 8 time periods
can be scheduled. It is important to note that time periods cannot be overlapped.
8.
Select recording
Type
. Recording type can be based on time and triggered by motion detection and/or
alarm. Motion detected and alarm triggered recordings are further explained in
Configuring Alarms
.
9.
Click the OK button to finish configuration.
10.
Repeat steps 3-9 for other cameras or copy settings from one schedule to the next under the
Copy To
section.
11.
Click OK to finish and save the schedule settings.
Note:
Command Record
will take effect when there is a cash transaction happening on ATM and trigger recording
channel is enabled in the ATM settings (See
ATM Settings
)
Note:
Event
encoding parameters will take effect when motion detection or alarm happens.
Normal
encoding
parameters will take effect when there are no events happening.
Starting a Manual Recording
A manual recording can be started at any time. To start a manual recording:
1.
Press the REC/SHOT button on the front panel or in the Main menu to bring up the Manual Record
menu (shown in Figure 5).
Содержание DS-8104AH(L) I-S Series
Страница 1: ...HIKVISION DS 8104AH L I S User s Manual 1 DS 8104AH L I S Series DVR USER S MANUAL ...
Страница 7: ...HIKVISION DS 8104AH L I S User s Manual 7 C H A P T E R 1 Introduction ...
Страница 18: ...HIKVISION DS 8104AH L I S User s Manual 18 C H A P T E R 2 Getting Started ...
Страница 24: ...HIKVISION DS 8104AH L I S User s Manual 24 5 Click the Apply button to save the settings ...
Страница 25: ...HIKVISION DS 8104AH L I S User s Manual 25 C H A P T E R 3 Live Preview ...
Страница 30: ...HIKVISION DS 8104AH L I S User s Manual 30 C H A P T E R 4 Record Settings ...
Страница 39: ...HIKVISION DS 8104AH L I S User s Manual 39 C H A P T E R 5 Playback ...
Страница 45: ...HIKVISION DS 8104AH L I S User s Manual 45 C H A P T E R 6 Backup ...
Страница 50: ...HIKVISION DS 8104AH L I S User s Manual 50 C H A P T E R 7 Alarm Settings ...
Страница 60: ...HIKVISION DS 8104AH L I S User s Manual 60 C H A P T E R 8 Network Settings ...
Страница 68: ...HIKVISION DS 8104AH L I S User s Manual 68 C H A P T E R 9 PTZ Controls ...
Страница 74: ...HIKVISION DS 8104AH L I S User s Manual 74 6 Click OK to save and exit from menu ...
Страница 75: ...HIKVISION DS 8104AH L I S User s Manual 75 C H A P T E R 1 0 Camera Management ...
Страница 79: ...HIKVISION DS 8104AH L I S User s Manual 79 C H A P T E R 1 1 HDD Management ...
Страница 85: ...HIKVISION DS 8104AH L I S User s Manual 85 C H A P T E R 1 2 ATM Settings ...
Страница 94: ...HIKVISION DS 8104AH L I S User s Manual 94 C H A P T E R 1 3 DVR Management ...
Страница 105: ...HIKVISION DS 8104AH L I S User s Manual 105 Figure 17 Log Search Export Menu 7 Click Cancel to exit out of menu ...
Страница 106: ...HIKVISION DS 8104AH L I S User s Manual 106 C H A P T E R 1 4 Appendix ...


