background image

HD Video and Audio Decoder User Manual 

DS-6900UDI Decoder User Manual 

79 


Screen Control Interface (3) 

Figure 5-56


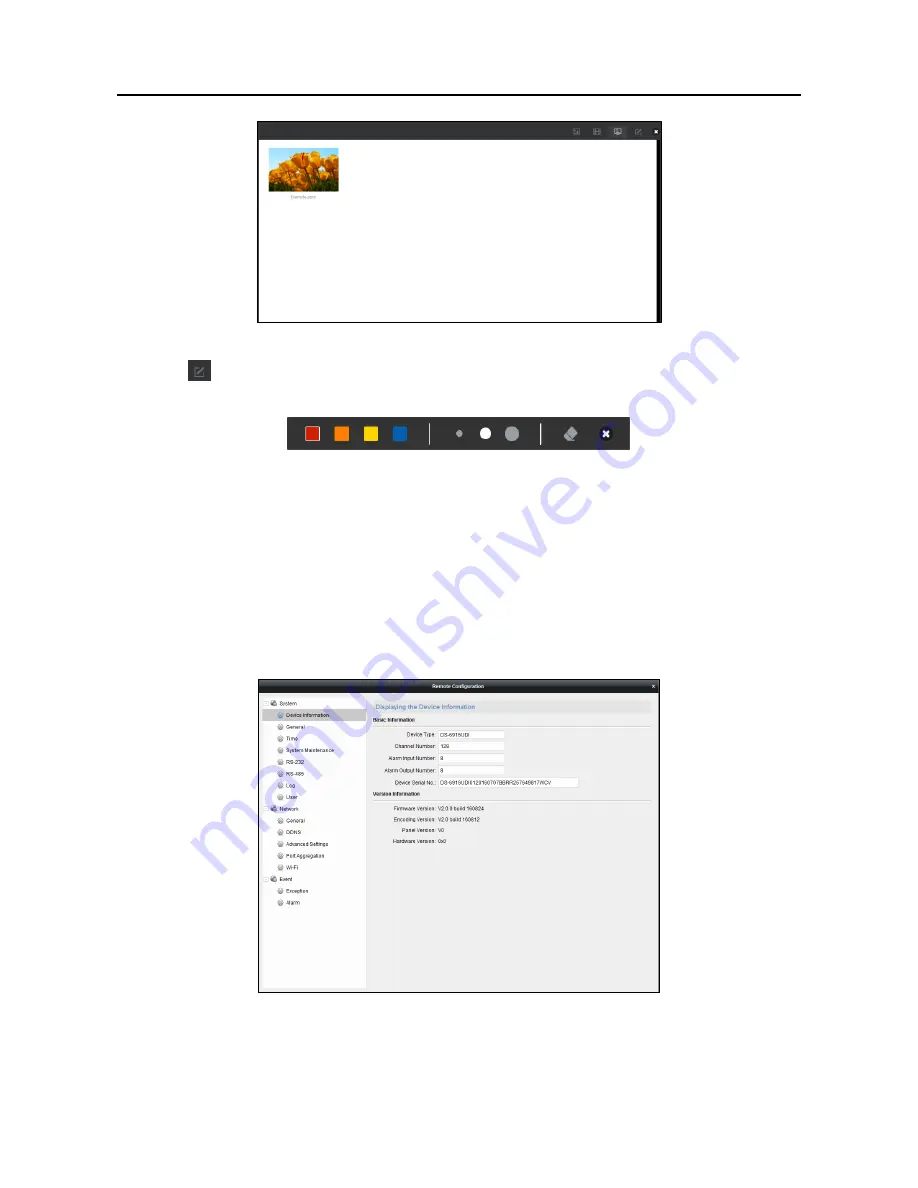
Click 

 to pop up the following remark tool bar. You can select a color and set the line width 

to make remarks on the PPT. 


Remark Tool Bar 

Figure 5-57

Remote Configuration  

5.6 

Purpose 

On the Remote Configuration interface, you can configure the parameters of the added device, 
including the system, network, event, etc.. 


On the Device Management interface, click to select an added device from the list and click 

Step 1

Remote Configuration

 to enter Remote Configuration interface. 


Remote Configuration 

Figure 5-58

Содержание DS-6900UDI

Страница 1: ...HD Video and Audio Decoder User Manual UD02829B ...

Страница 2: ...ks and logos mentioned below are the properties of their respective owners Legal Disclaimer TO THE MAXIMUM EXTENT PERMITTED BY APPLICABLE LAW THE PRODUCT DESCRIBED WITH ITS HARDWARE SOFTWARE AND FIRMWARE IS PROVIDED AS IS WITH ALL FAULTS AND ERRORS AND HIKVISION MAKES NO WARRANTIES EXPRESS OR IMPLIED INCLUDING WITHOUT LIMITATION MERCHANTABILITY SATISFACTORY QUALITY FITNESS FOR A PARTICULAR PURPOSE...

Страница 3: ...e harmful interference 2 This device must accept any interference received including interference that may cause undesired operation EU Conformity Statement This product and if applicable the supplied accessories too are marked with CE and comply therefore with the applicable harmonized European standards listed under the EMC Directive 2014 30 EU the LVD Directive 2014 35 EU the RoHS Directive 201...

Страница 4: ... may be found in this document are defined as follows Symbol Description Provides additional information to emphasize or supplement important points of the main text Indicates a potentially hazardous situation which if not avoided could result in equipment damage data loss performance degradation or unexpected results Indicates a hazard with a high level of risk which if not avoided will result in...

Страница 5: ...d to the power socket If smoke odor or noise rise from the device turn off the power at once and unplug the power cable and then please contact the service center Preventive and Cautionary Tips Before connecting and operating your device be advised of the following tips Ensure unit is installed in a well ventilated dust free environment Unit is designed for indoor use only Keep all liquids away fr...

Страница 6: ...4 1 2 Configuring RS 485 RS 232 Serial Port 17 4 1 3 Configuring Basic Network Settings 18 4 1 4 Configuring DDNS Settings 19 4 1 5 Configuring Wi Fi Settings 21 4 1 6 Configuring Stream Settings 24 4 1 7 Configuring Transparent Channel 25 4 1 8 Configuring Synchronous Output Settings 26 4 1 9 Configuring Personalized Settings 27 4 1 10 Managing User Account 27 4 1 11 Importing Exporting Configura...

Страница 7: ...ing Video on Video Wall 58 5 3 Decoding and Displaying Video 59 5 3 1 Opening Window via Coordinate 61 5 3 2 Configuring Playback 62 5 3 3 Configuring Auto Switch Decoding 64 5 3 4 Window Configuration 64 5 3 5 Decoding Thermal Network Camera 65 5 4 Configuring the Thermal Network Camera Parameters 65 5 4 1 Decoding Thermal Network Camera on the Video Wall 73 5 4 2 Remote Screen Control 74 5 5 Con...

Страница 8: ...I DS 6908UDI DS 6910UDI DS 6912UDI DS 6916UDI provide HDMI adaptable to DVI D and BNC output interfaces Up to 4K 3840 2160 30 Hz via HDMI interface only for even interface and up to 1080p 60Hz via VGA interface H 265 H 265 H 264 H 264 MPEG4 and MJPEG video stream formats PS RTP TS ES HIK encapsulation formats Supports window opening and window roaming Three encoding levels baseline main and high p...

Страница 9: ...creen configurable to display multiple signal sources and get rid of the restriction of physical screen LCD output type configurable for the BNC and VGA outputs LCD and LED output types configurable for HDMI outputs You can configure what the video wall show when decoding ends and streaming fails via the Web browser and client software Auto switch of sub stream configurable via the Web browser and...

Страница 10: ...e 2 1 Front Panel of DS 6904 6908UDI Front Panel of DS 6904 6908UDI Figure 2 2 1 2 3 4 5 6 7 No LED Indicator Interface Description 1 POWER Power indicator 2 LINK Network connection indicator 3 Tx Rx Data transmitting receiving status indicator 4 HDMI video output HDMI output for decoded video 5 VGA video output VGA output of decoded video 6 Audio output Audio output 3 5mm connector 7 Video output...

Страница 11: ...interface 5 GE2 Local management network interface 2 6 G2 10 100 1000 Mbps Ethernet interface 2 7 RS 232 serial interface Connect to RS 232 devices e g PC etc 8 GE1 Local management network interface 9 G1 10 100 1000 Mbps Ethernet interface 10 LAN LAN 10 100 Mbps Ethernet interface DS 6904UDI provides 4 ch HDMI output interfaces and other interfaces are the same with DS 6908UDI Front Panel of DS 6...

Страница 12: ...net interface 6 GE1 Local management network interface 7 RS 232 serial interface Connect to RS 232 devices e g PC etc 8 USB USB 2 0 interface 9 GE2 Local management network interface 2 10 G2 10 100 1000 Mbps Ethernet interface 2 Rear Panel 2 2 Rear Panel of DS 6901UDI Rear Panel of DS 6901UDI Figure 2 4 Description of DS 6901UDI Rear Panel Table 2 5 Interface Connections 1 LINE IN OUT Two way audi...

Страница 13: ...m outputs 6 Power supply 12 VDC power input 7 GND Interface Connections 1 Wi Fi For Wi Fi connection 2 Audio output BNC connector 3 Video output BNC connector 4 HDMI video output HDMI output of decoded video 5 DVI video input DVI input of decoded video 6 VGA video input VGA input of decoded video 7 LINE IN OUT Two way audio input output 3 5mm connector 8 RS 485 serial interface Connect to RS 485 d...

Страница 14: ...same with DS 6916UDI Interface Connections 1 Wi Fi For Wi Fi connection 2 Audio output BNC connector 3 Video output BNC connector 4 HDMI video output HDMI output of decoded video 5 DVI video input DVI input of decoded video 6 VGA video input VGA input of decoded video 7 LINE IN OUT Two way audio input output 3 5mm connector 8 RS 485 serial interface Connect to RS 485 devices e g keyboard etc 9 Ala...

Страница 15: ...ault IP address is 192 0 0 64 Activating via SADP Software 3 1 SADP software is used for detecting the online device activating the camera and resetting the password Get the SADP software from the supplied disk or the official website and install the SADP according to the prompts Follow the steps to activate the camera Run the SADP software to search the online devices Step 1 Check the device stat...

Страница 16: ...ularly especially in the high security system resetting the password monthly or weekly can better protect your product Change the device IP address to the same subnet with your computer by either modifying Step 5 the IP address manually or checking the checkbox of Enable DHCP Modify the IP Address Figure 3 2 Input the password and click the Modify button to activate your IP address modification St...

Страница 17: ...ty of your product And we recommend you reset your password regularly especially in the high security system resetting the password monthly or weekly can better protect your product Confirm the password Step 4 Click OK to save the password and enter the live view interface Step 5 Activation via Client Software 3 3 The client software is versatile video management software for multiple kinds of dev...

Страница 18: ...r the Device Management interface as shown in Step 2 the figure below Control Panel Figure 3 5 Check the device status from the device list and select an inactive device Step 3 Click the Activate button to pop up the Activation interface Step 4 Create a password and input the password in the password field and confirm the password Step 5 ...

Страница 19: ...our password regularly especially in the high security system resetting the password monthly or weekly can better protect your product Activation Interface Client Software Figure 3 6 Click OK button to start activation Step 6 Click the Modify Netinfo button to pop up the Network Parameter Modification interface as Step 7 shown in the figure below Modify the Network Parameters Figure 3 7 Change the...

Страница 20: ...work properly contact with your dealer or the nearest service center Purpose You can configure and operate the device by Web browser or the iVMS 4200 Video Wall Client Software In this chapter the operation and management of the decoder by the Web browser is provided The tested Web browsers include IE 8 0 Chrome 18 0 Firefox 5 0 and Safari 5 02 Open the Web browser and input the IP address of Deco...

Страница 21: ...ies upper case letters lower case letters numbers and special characters in order to increase the security of your product And we recommend you reset your password regularly especially in the high security system resetting the password monthly or weekly can better protect your product If the device is already activated input the user name and password in the login interface and click the Login but...

Страница 22: ...k Configuration System System Settings Basic Information to view Device Type Device Serial No Firmware Version DSP Version etc The description about the decoder configuration and operation by web browser below is based on the firmware decoding web and plugin version shown in the following figure Checking Device Information Figure 4 4 Configuring Time Settings 4 1 2 Purpose You can set the time for...

Страница 23: ... properties configured the camera will synchronize automatically with the time server Enable the NTP function by selecting the radio button and configure the following settings NTP Server IP address of NTP server NTP Port Port of NTP server Configure Time by NTP Figure 4 6 If the device is connected to a public network you should use a NTP server that has a time synchronization function such as th...

Страница 24: ...lick Save to save the settings Step 4 Configuring RS 485 RS 232 Serial Port 4 1 3 Configure RS 232 Parameters Click Configuration System Settings RS 232 to enter the following interface Step 1 Configure RS 232 Settings Figure 4 8 Configure the RS 232 parameters including the baud rate data bit stop bit and parity type Step 2 Select the Operating Mode of RS 232 as Console or Transparent Channel Ste...

Страница 25: ... 485 Settings Figure 4 9 Configure the RS 485 parameters including the baud rate data bit stop bit and parity type Step 2 Click Save to save the settings Step 3 Configuring Basic Network Settings 4 1 4 Purpose You can set the network parameters for the decoder in the parameter configuration interface Click Configuration Network TCP IP to enter the general network settings interface Step 1 Configur...

Страница 26: ...th your DDNS Provider is required before configuring the system to use DDNS Click Configuration Network DDNS to enter the DDNS Settings interface Step 1 Check the Enable DDNS checkbox to enable this function Step 2 Select DDNS Type Five different DDNS types are selectable IPServer DynDNS PeanutHull Step 3 HiDDNS and NO IP DynDNS 1 Enter Server Address for DynDNS e g members dyndns org 2 Enter the ...

Страница 27: ...gs Figure 4 12 PeanutHull 1 Enter User Name and Password obtained from the PeanutHull website 2 Click Save to save the settings PeanutHull Settings Figure 4 13 HiDDNS 1 Enter the Server Address of the HiDDNS server www hik online com 2 Enter the Domain Name of the device You can register the alias of the device domain name in the HiDDNS server first and then enter the alias to the domain name in t...

Страница 28: ... having successfully registered the device on the HiDDNS server you can access your device via Web browser or client software with the Device Domain Name device name Configuring Wi Fi Settings 4 1 6 Purpose The Wi Fi can be used as the supplement of the wired network You can get stream and decode the video on the video wall when Wi Fi is enabled if no wired network can be accessed Click Configurat...

Страница 29: ... wireless network The SSID Security Mode Signal Strength and Connection Status are shown in the list Up to 20 Wi Fi can be listed Select one from the wireless list Step 3 Check the checkbox of Enable Wi Fi to enable the selected Wi Fi Step 4 You can view the Security Mode and other parameters Step 5 Not Encrypted The Wi Fi is not encrypted and can be accessed randomly Wi Fi Settings 1 Figure 4 16 ...

Страница 30: ...he Wi Fi With the shared system authentication the key must be matched with the preset access point key 2 For the Key Length 64 bit 128 bit and 152 bit are selectable 3 For the Key Type HEX and ASCII are selectable 4 Select one Key for activation 4 keys can be selected Input the key Wi Fi Settings 2 Figure 4 17 WPA Personal 1 For the Encryption Type TKIP and AES are selectable 2 Input the Key Wi F...

Страница 31: ...ng note window pops up Click OK to reboot the device and exit from the Wi Fi mode Note 2 Figure 4 20 If wired network cable is connected to the device when the Wi Fi is enabled wired network will be connected by priority But the decoding capability will conform to the configuration in the Wi Fi mode In Wi Fi mode up to 16 channels can be decoded with up to 1080p resolution of each channel and the ...

Страница 32: ...tically switch to sub stream to lower the bandwidth Configuring Transparent Channel 4 1 8 Purpose The Transparent Channel refers to the transmission channel used for forwarding data between the decoder and the encoder without operating on the data Click Configuration Decoding Configuration Transparent Channel to enter transparent Step 1 channel settings interface Transparent Channel Interface Figu...

Страница 33: ...as the transparent channel by the encoding device You can click Delete to delete the selected channel Configuring Synchronous Output Settings 4 1 9 Purpose All video outputs of the device can be configured to be synchronous Click Configuration Decoding Configuration Synchronous Output Settings to enter the Step 1 Synchronous Output Settings interface Synchronous Output Settings Figure 4 24 Click t...

Страница 34: ...elect Blank Screen or Last Frame when decoding ends If you select Blank Screen the Step 2 screen will change blank when the decoding ends If you select Last Frame the screen will show the last frame when the decoding ends Select No Network Signal or Last Frame when streaming fails If you select No Network Step 3 Signal there shows no network signal when streaming fails If you select Last Frame the...

Страница 35: ...al DS 6900UDI Decoder User Manual 28 Configure User Account Figure 4 27 You can add modify or delete the user account as well as configure operating permissions Step 2 for each user account Add User Account and Set Permissions Figure 4 28 ...

Страница 36: ...he high security system resetting the password monthly or weekly can better protect your product Importing Exporting Configuration Files 4 1 12 Purpose The configuration files of the device can be imported from or exported to local device for backup which maintains convenient parameters configuration Click Configuration System Maintenance to enter the parameters import export Step 1 interface Impo...

Страница 37: ...ng to the prompt on the screen The device will restart after completing the upgrade Restoring the Default Settings Click Default to restore the completed factory settings of the decoder Or Click Restore to restore a part of the factory settings of the decoder Restore Default Settings Figure 4 31 Rebooting the Device Click Reboot to reboot the device Reboot the Device Figure 4 32 ...

Страница 38: ...e Step 1 Video Wall Configuration Figure 4 33 You can use the default video wall layout or click to add a new layout Input the number Step 2 of screens in row and column and up to 16 20 split screens are available Screen Layout Configuration Figure 4 34 Click OK to finish the adding of the video wall information Step 3 Drag the output channels from the left side list to the display screen Step 4 M...

Страница 39: ...Video Wall Configuration to enter the corresponding interface Right click one of the Step 1 BNC signal sources BNC Decoding Output Figure 4 36 Right click one of BNC signal sources and select Resolution Configuration to pop up the Step 2 interface as below Resolution Configuration Figure 4 37 Select the resolution from the LCD Resolution drop down list PAL and NTSC are selectable Step 3 Check the ...

Страница 40: ...click one of the HDMI signal sources Step 1 HDMI Decoding Output Figure 4 39 Click Resolution Configuration to enter the interface below Step 2 Resolution Configuration Figure 4 40 Select the Output Mode and set the corresponding parameters You can select LCD and LED Step 3 LCD 1 Select the Output Mode to LCD 1 Select the resolution from the LCD Resolution drop down list ...

Страница 41: ...eight in the corresponding text fields Set LED Resolution Figure 4 42 The value of LED width and height cannot exceed the output resolution you select The supported min value of LED width height of HDMI output is 288 288 and the max value is 1920 1080 Check the checkbox of Batch Configuration to set the same configuration for other outputs Step 4 with same signal source ...

Страница 42: ...he interface below Output Mode Configuration Figure 4 44 Select the output mode to HDMI or DVI Step 7 Check the checkbox of Batch Configuration to set the same configuration for other HDMI Step 8 outputs Click OK to save the settings Step 9 Decoding Operation 4 4 Purpose After the video wall layout configuration the decoding video on the video wall can be realized in this section Click Video Wall ...

Страница 43: ... in the Web 2 Scene The Web supports up to 8 scenes by default capable of independent scene configuration and fast switching 3 Video Wall Video wall operation interface 4 Shortcut Toolbar Select decoding screen layout Save the scene Delete all windows Refresh all windows If two decoding windows overlap with each other click the icon to switch the upper window to the bottom Adding an Encoding Devic...

Страница 44: ...ncoding devices Step 1 Encoding Device List Figure 4 46 Input Device Name IP Address Port User Name Password and Channel Number and Step 2 select the Transmission Protocol Area Name and Device Manufacturer Check the checkbox of Get Stream by Stream Media to lower the network load of the device Add Device via IP Address Figure 4 47 ...

Страница 45: ...he area Step 3 Click Next to select the channel The channel s displayed here depend s on the Channel Step 4 Number you input on the previous page Select the Channel Figure 4 48 Click OK to save the settings and add the device Step 5 Adding an Encoding Device via URL Click URL to add encoding devices Step 1 Encoding Device List Figure 4 49 ...

Страница 46: ...the Area Name from the dropdown list or click to Step 2 add a new area Add Device via URL Figure 4 50 Click OK to save the settings Step 3 Modifying the Area and Added Encoding Device 4 4 2 Select one area or one encoding device and click Modify to modify corresponding Step 1 parameters Modify Area Figure 4 51 ...

Страница 47: ... or Added Encoding Device 4 4 3 Select one area or one encoding device and click Delete to pop up the note interface below Step 1 Deleting Note Figure 4 53 Click OK to delete it Step 2 Decoding on the Video Wall 4 4 4 Purpose You can decode the channels from the encoding device list on the video wall by dragging the channel directly or opening window via coordinate ...

Страница 48: ...uts If there are more than 3 encoding devices in an area when you drag the area file to the video wall the note pops up to remind you that no more window can be opened or the total area of layers in single screen has reached the limit Only the first 3 encoding devices in the area file can be decoded on the video wall Decode the Video on the Wall Figure 4 54 Select one decoding window and click to ...

Страница 49: ... the button to stop decoding Decoding Status 1 Click the button to enter the decoding status interface 2 View the decoding status Decoding Status Figure 4 57 3 Click More to check the decoding information of each channel Check More Decoding Status Information Figure 4 58 Turn on Audio 1 Click the button to enter the interface below ...

Страница 50: ...luency Decoding Delay Figure 4 60 3 Click OK to save the settings Enable Smart Information 1 Click the button to enable smart information 2 Optional Click Disable Smart Information to disable the function For the normal IP camera the smart information refers to the VCA information For the thermal network camera the smart information refers to the VCA and the temperature dynamic fire source detecti...

Страница 51: ...rpose You can switch the encoding channel to display on the selected decoding window Select a decoding window and select an encoding channel from the left side list Step 1 Click Switch Channel from the right click menu to switch the selected channel to the Step 2 decoding window Right Click Menu Figure 4 63 Configuring Auto Switch of Cameras 4 4 6 Purpose You can enable auto switch of the added ca...

Страница 52: ...ize window division in the selected Step 3 roaming window with 1 4 6 8 9 12 16 25 36 available Optional Generally the selected window is at top by default Click to place the Step 4 selected window at bottom Roaming and fluent video cannot be realized in the window with the signal output via BNC interfaces The roaming window cannot cross the output window of different resolution For example you can...

Страница 53: ...dow Save the Scene Figure 4 67 Click Save to save the scene directly or click Save as to pop up the following dialog box Step 2 Save as Interface Figure 4 68 Input the Name and click OK to save the scene Step 3 Scene List Figure 4 69 Select one of the scenes you have configured Click to call the scene Step 4 Optional You can also click to rename the scene or click to delete the scene Step 5 ...

Страница 54: ...is chapter the basic procedure of operating the decoder by the software is described and the description is based on the video wall client software version shown in the following figure Video Wall Client Software Information Figure 5 1 The following figure shows the main interface after accessing to the software Main Interface Figure 5 2 Refer to the following table for the description of the deco...

Страница 55: ...VCA information can be viewed in live view Stop All VCA Decoding Stop VCA decoding for all live view signals Open Window Draw a window according to your need The size and position of the window are adjustable Open Window via Coordinate Open a window by inputting X coordinate Y coordinate width and height Refresh Refresh the video wall status The software is capable of many functions for controllin...

Страница 56: ...egment and HiDDNS Add Device by IP Domain Figure 5 4 You can add device by detecting the online devices The active online decoding devices in Step 3 the same local subnet with the software are displayed on the list Select the decoder and click Add to Client to add the decoder Add Device by Detecting the Online Device Figure 5 5 The successfully added encoding decoding device can be viewed in the l...

Страница 57: ... 2 Configuring Video Wall Layout 5 2 1 Adding a Video Wall Click Video Wall tab to enter the Video Wall interface Step 1 Video Wall Interface Figure 5 7 You can use the default video wall layout or click and select Add Video Wall to enter the Step 2 Add Video Wall interface You can modify the default video wall but not allowed to delete it ...

Страница 58: ... to 5 video walls can be added to the client software The range of the row number is between 1 and 16 and column number between 1 and 20 Drag the output channels from the left side list to link the decoding output to the video wall Step 5 Link Decoding Output to Video Wall Figure 5 9 Optional You can select a linked display window and click Cancel to cancel the linkage or Step 6 click Cancel All t...

Страница 59: ...Select Delete Video Wall and the information dialog box pops up Click OK to delete the selected video wall Delete Video Wall Figure 5 11 Configuring Decoding Output 5 2 2 Purpose You can set the output type and resolution of BNC and HDMI decoding outputs on the Add Modify Video Wall interface Configuring BNC Output On the Add Modify Video Wall interface select a BNC decoding output and click to en...

Страница 60: ...igured Select the Video Standard PAL and NTSC are selectable Step 3 Check the checkbox of Batch Configuration to set the same configuration for other outputs Step 4 with same signal source Batch Configuration Figure 5 13 Click OK to save the settings Step 5 Configuring HDMI Output On the Add Modify Video Wall interface select a HDMI decoding output and click to Step 1 enter the Edit Output interfa...

Страница 61: ...st LED 1 Select the Output Type to LED 2 Select the Output Resolution from the dropdown list 3 Input the Width Height in the corresponding text fields Set LED Resolution Figure 5 15 The value of LED width and height cannot exceed the output resolution you select The supported min value of LED width height of HDMI output is 288 288 and the max value is 1920 1080 Check the checkbox of Batch Configur...

Страница 62: ...g General Parameters of Video Wall 5 2 3 Purpose You can configure what the screen show when decoding ends and streaming fails enable auto switch of sub stream and set the LED window display mode on the Add Modify Video Wall interface On the Add Modify Video Wall interface select the added decoder and click to enter the Step 1 General Parameters Configuration of Video Wall interface General Parame...

Страница 63: ...e Auto Switch to enable auto switch Step 5 of sub stream Select the LED Window Display Mode Normal and Tiled are selectable Step 6 Click OK to save the settings Step 7 Configuring Virtual Screen 5 2 4 Purpose Video wall layout is restricted by the physical screen and in practice one physical screen usually displays more than one signal source Virtual screen layout allows one physical screen to dis...

Страница 64: ... 5 1 Select a virtual screen mode from and input the row and column number For the mode the row number ranges from 1 to 16 and column number ranges from 1 to 20 For modes such as the row number ranges from 2 to 16 and the column number ranges from 2 to 20 For modes such as the row number ranges from 2 to 16 and the column number ranges from 3 to 20 Configure Virtual Screen Figure 5 21 2 Input the ...

Страница 65: ...l screen area and click Delete Virtual Screen to delete Step 6 it On the Video Wall interface drag a signal source to the window and you can view the live Step 7 view in the virtual video wall layout Live View in Virtual Screen Figure 5 23 Displaying Video on Video Wall 5 3 Purpose After the settings of the encoding device decoding device and video wall the video stream from the encoding devices c...

Страница 66: ...the scene interface You can click to add a new scene click to Step 2 edit the name for the scene click to delete the scene and click to save the scene Up to 8 scenes can be added Scene List Figure 5 25 Drag the camera from the left side camera list to the display window of video wall The video Step 3 stream from the camera will be decoded and displayed on the video wall You can also select a decod...

Страница 67: ... 26 Right click on a playing window to activate the decoding management menu as shown below Step 5 The menu differs depending on the devices Right click Menu Figure 5 27 Start Stop Decoding Start stop the decoding Start Stop Live View Start stop the live view of the decoded video Start Pause Auto Switch Decoding Start pause auto switch decoding This function is only supported by decoder Start Stop...

Страница 68: ...Coordinate 5 3 2 Purpose On the LED and non LED screen you are allowed to open the window via coordinate Opening Window for Non LED Screen Enter the Video Wall interface select the non LED screen and click the button to open Step 1 the window via coordinate Open Window via Coordinate 1 Figure 5 28 Select the Device Name from the drop down list and input the X Coordinate Y Coordinate Step 2 Width a...

Страница 69: ...n the video wall Step 3 You cannot open the window via coordinate across both the non LED and LED screens You cannot edit the LED X Coordinate and LED Y Coordinate The X coordinate and Y coordinate are relative output channel coordinates Configuring Playback 5 3 3 Purpose The video file is supported to be played back on the video wall Playback function is only supported by decoder Drag the camera ...

Страница 70: ...start searching the video files of the camera Step 3 Playback Interface Figure 5 31 If the record file is of current day the video file can be played back automatically If not you Step 4 can click to show the date and click More Search Conditions to specify more conditions and click Search to find the video file Search Record File Figure 5 32 The following icons are available for controlling the p...

Страница 71: ...display window of the video wall Step 1 Click to set the dwell time for the auto switch decoding and click to start auto switch Step 2 decoding You can view the auto switch decoding on the physical video wall You can click to stop auto switch decoding Auto Switch Decoding Figure 5 33 Window Configuration 5 3 5 Purpose You can set the window as the alarm window to display the video triggered by eve...

Страница 72: ...according to the actual needs Functions like Fluent Video Smart Decoding 3D DNR Defog and Low Illumination are not supported by DS 6900UDI Decoding Thermal Network Camera 5 4 Purpose The thermal network camera can be connected to the decoder and you can realize live view and playback and decode the video including the temperature or fire point information on the video wall Configuring the Thermal ...

Страница 73: ...ace to set the temperature measurement configurations Enable Temperature Measurement Check the checkbox to enable temperature measurement function Display Temperature Info on Stream Check the checkbox to display temperature information in live view Add Original Data on Capture Check the checkbox to add original data on capture Add Original Data on Stream Check the checkbox to add original data on ...

Страница 74: ...show the alarm rule interface Alarm Rule The alarm rule varies according to different types The rule is to compare the temperature information of two selected regions For targets set by frame the rules include Max Temperature is Higher than Max Temperature is Lower than Min Temperature is Higher than Min Temperature is Lower than Average Temperature is Higher than Average Temperature is Lower than...

Страница 75: ...erance temperature as 3 C set alarm temperature as 55 C and set pre alarm temperature as 50 C The device sends pre alarm when its temperature reaches 50 C and it alarms when its temperature reaches 55 C and only when the device temperature is lower than 52 C will the alarm be cancelled 4 Draw the Target Region Select the rule and draw the corresponding frame line point Click to draw the point Clic...

Страница 76: ...linkage methods 7 Click Save to save the settings Configure the local parameters to display the temperature information on the live view Step 4 interface 1 Click Configuration Local Configuration to enter the Local Configuration interface Local Configuration Figure 5 40 2 In the Live View Parameters section select the Enable radio button of Display Temperature Info on Stream to display the tempera...

Страница 77: ...ction as the VCA Resource Type 4 Click Save to save the settings and the device will reboot to take the settings into effect For the VCA resource type only one type can be configured For example if you select Temperature Measurement and Behavior Analysis as the VCA resource type you cannot set Dynamic Fire Source Detection Configure dynamic fire source detection parameters Step 2 1 Click Configura...

Страница 78: ...cate highest temperature point or frame fire point on the live view interface 1 Click Configuration Local Configuration to enter the Local Configuration interface Local Configuration Figure 5 43 2 In the Live View Parameters section check the checkbox after Fire Point to enable the functions required Display Fire Point Distance Display Highest Temperature Locate Highest Temperature Point and Frame...

Страница 79: ... when ship is detected in this area 2 Click Draw Alarm Line button Click the mouse on the live view image to draw an alarm line and right click to finish drawing The device alarms and counts the ship number when ships are detected in the area and the ship information will be displayed on the right Make sure the alarm line is longer than the width of ship detection area 3 Click Recount to start cou...

Страница 80: ...s to enable corresponding displays Display Target info on Alarm Picture There will be a frame on the target on the uploaded alarm picture if the checkbox is checked Display Rule info on Alarm Picture The captured target and the configured area will be framed on the alarm picture Display VCA info on Stream The green frames will be displayed on the target if in a live view or playback Configure the ...

Страница 81: ...ire point distance highest temperature highest temperature point and fire point frame in the live view If ship detection is enabled and there is a ship detected you can view the configured frames and alarm line in the live view Optional You can click Window tab on the bottom of the interface and click Start Playback Step 4 to start playing back the camera Refer to Chapter 5 3 3 Configuring Playbac...

Страница 82: ...lick to run it Run the RSC Server Figure 5 47 You can click Status to check the server information including the IP address name port Step 2 password of the server and the connected device number Click Settings to check the directory of saving the program files enable or disable the Step 3 feature of Auto Run when OS starts and select the language Chinese English Local Configuration of RSC Server ...

Страница 83: ...igure 5 49 Enter the parameters to add the RSC server Please refer to Chapter 0 Adding an Encoding Decoding Device to add the RSC server Step 2 The default user name is admin and the server password is 12345 and we highly recommend you to change the default password to avoid the security problem The successfully added RSC server is listed in the camera list Step 3 Added RSC Server Figure 5 50 On t...

Страница 84: ...lick on the window and select Screen Control to remotely control the signal source Step 5 The RSC server supports the screen control for 1 channel video output only Right click Menu Figure 5 52 You can use the toolbar on the window s upper right corner to realize the operations for Step 6 image video PPT and remark ...

Страница 85: ... 5 53 Click to display all the image files in the directory set in the RSC Sever Screen Control Interface 1 Figure 5 54 Click to display all the video files in the directory set in the RSC Sever Screen Control Interface 2 Figure 5 55 Click to display all the PPT files in the directory set in the RSC Sever ...

Страница 86: ... make remarks on the PPT Remark Tool Bar Figure 5 57 Remote Configuration 5 6 Purpose On the Remote Configuration interface you can configure the parameters of the added device including the system network event etc On the Device Management interface click to select an added device from the list and click Step 1 Remote Configuration to enter Remote Configuration interface Remote Configuration Figu...

Страница 87: ...rnet Channel is port link aggregation technology or port channel architecture used for the connection between the switches Click Remote Configuration Network Port Aggregation to enter the Port Aggregation Step 1 Settings interface Select a link number from the list Step 2 Check the checkbox to select the network interfaces to form a channel group link which can Step 3 effectively enhance the link ...

Страница 88: ...terface 3 to GE2 and network interface 3 to G2 on the rear panel The G1 and G2 can be used as 2G switch when the network interface 2 and network interface 4 are configured in port aggregation Configuring Wi Fi Settings 5 6 2 Purpose The Wi Fi can be used as the supplement of the wired network You can get stream and decode the video on the video wall when Wi Fi is enabled if no wired network can be...

Страница 89: ...e DHCP Click Save to Step 5 save the settings and the device will reboot to enter the Wi Fi mode If you want to enable Wi Fi you must select NIC Type to Auto Switch In this mode if wired network cable is connected wired network will be connected by priority If wired network cable is not connected the configured Wi Fi will be connected After the device reboots enter the remote Wi Fi settings interf...

Страница 90: ...cters or 8 to 64 hexadecimal characters are allowed Click Save on the Wi Fi Settings interface to save the settings Step 8 If wired network cable is connected to the device when the Wi Fi is enabled wired network will be connected by priority But the decoding capability will conform to the configuration in the Wi Fi mode In Wi Fi mode up to 16 channels can be decoded with up to 1080p resolution of...

Страница 91: ...etwork default ID DIRECT TV Step 2 DONGLE XXXXXX default password 12345678 Open the browser of your phone or pad and input https 192 168 211 161 in the address Step 3 field to enter the settings page Settings Page Figure 6 1 Configure the HDMI Dongle parameters including the Name Hotspot Password Device Step 4 Display Output and the Soft Ap Frequency The Soft Ap Frequency parameter must be consist...

Страница 92: ... 960 60Hz 720p 1280 720 50Hz 60Hz SXGA 1280 1024 60Hz XGA 1024 768 60Hz Video Audio output HDMI output 1 ch 4 ch 8 ch 4K 3840 2160 30Hz for even interface only 1080p 1920 1080 50 60Hz WSXGA 1680 1050 60Hz UXGA 1600 1200 60Hz for even interface only 720p 1280 720 50Hz 60Hz SXGA 1280 1024 60Hz XGA 1024 768 60Hz VGA output 1 ch 1080p 1920 1080 50 60Hz WSXGA 1680 1050 60Hz SXGA 1280 1024 60Hz 720p 128...

Страница 93: ...daptive Ethernet interface 2 10 100 1000 Mbps self adaptive management network interface 2 10 100 1000 Mbps self adaptive Ethernet interface 16 10M 100Mbps self adaptive Ethernet interface Serial interface 1 RS 232 RJ 45 1 RS 485 Two way audio in 1 ch 3 5 mm connector 2 0 Vp p 1 k Ω Two way audio out 1 ch 3 5 mm connector 2 0 Vp p 1 k Ω Audio output 1 ch 4 ch 1 DB 15 8 ch 1 DB 15 Alarm in 8 ch Ala...

Страница 94: ...h 4K 3840 2160 30Hz for even interface only 1080p 1920 1080 50 60Hz WSXGA 1680 1050 60Hz UXGA 1600 1200 60Hz for even interface only 720p 1280 720 50Hz 60Hz SXGA 1280 1024 60Hz XGA 1024 768 60Hz BNC output 5 ch 2 DB 15 6 ch 2 DB 15 8 ch 2 DB 15 Audio Video decoding Decoding resolution Up to 12MP Decoding channel 80 ch 96 ch 128 ch Decoding capability 12MP 20fps 10 ch 8MP 30fps 20 ch 5MP 30fps 30 c...

Страница 95: ...e Ethernet interface Serial interface 1 RS 232 RJ 45 1 RS 485 Two way audio in 1 ch 3 5 mm connector 2 0 Vp p 1 k Ω Two way audio out 1 ch 3 5 mm connector 2 0 Vp p 1 k Ω Audio output 10 ch 2 DB 15 12 ch 2DB 15 16 ch 2 DB 15 Alarm input 8 Alarm out 8 General Power supply 100 to 240 VAC Power consumption 108 W Working temperature 10 C to 55 C 14 F to 131 F Working humidity 10 to 90 Dimensions W D H...

Страница 96: ...address Cable is connected User name and password of decoder are correct Why cannot play back the record files in DVR with decoder Check the DVR network connection Check the parameters of the playback file Check if there are files existed in the selected time duration Why cannot decode the stream transported by stream media server Check the network connection between decoder and stream media serve...

Страница 97: ...meras Access 7 3 IP Camera Manufacturer Model Supported Video Format Panasonic SP306H H 265 H 265 H 264 H 264 MJPEG MPEG4 SP336H Sony SNC CH220 SNC RH124 Axis P5532 Q7404 Sanyo VCC HD2500P SAMSUNG SND 5080P Bosch NBC265P Zavio D5110 Arecont AC1305M Pelco IX30DN ACFZHB3 Onvif Supported 0200001060914 ...

Страница 98: ...HD Video and Audio Decoder User Manual DS 6900UDI Decoder User Manual 91 ...

Отзывы: