


© Hikvision
Figure 6-19
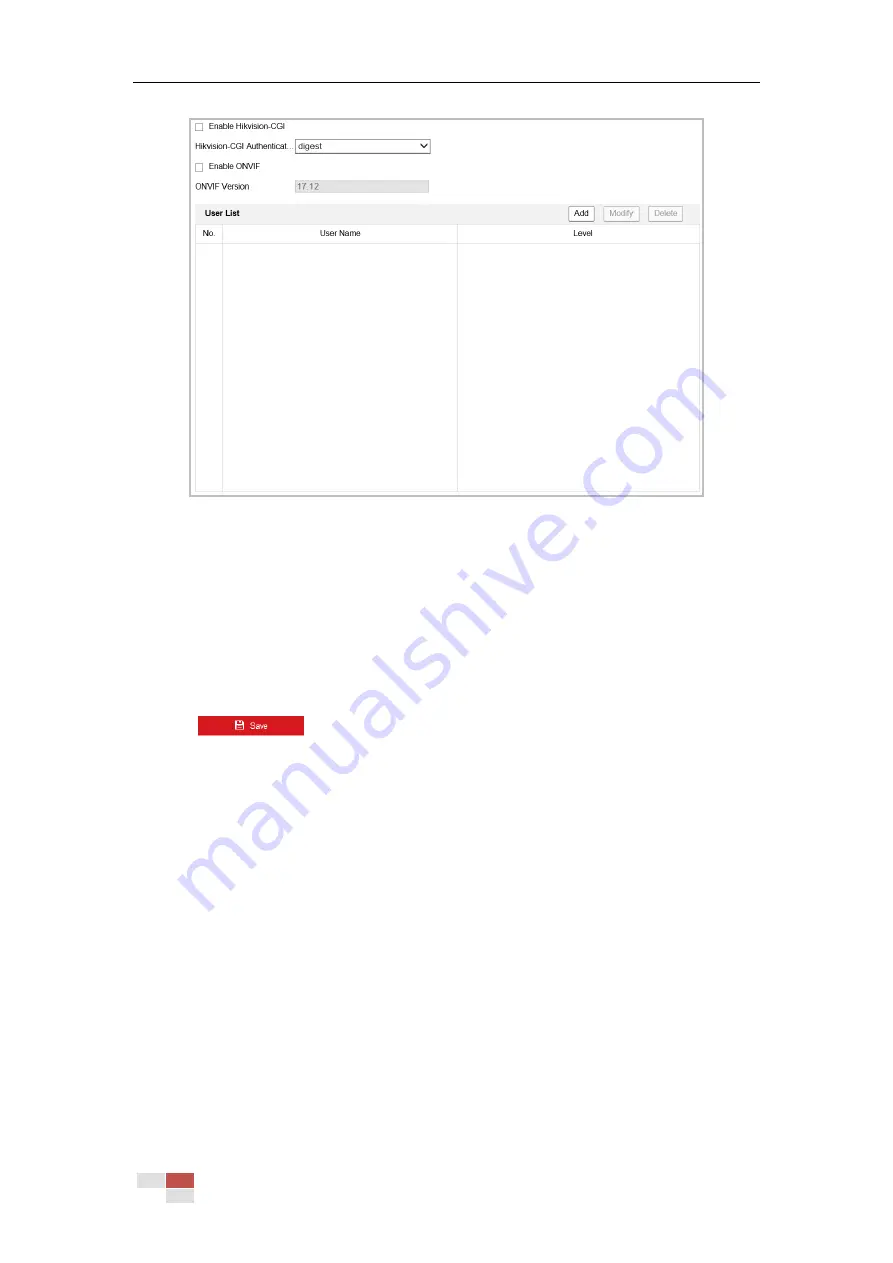
Integration Protocol Settings
2.
Check the Enable Hikvision-CGI checkbox and then select the authentication from the
dropdown list. Then you can access to the camera through the third party platform.
3.
Check the Enable ONVIF checkbox to enable the function.
4.
Click Add to add a new ONVIF user. Set the user name and password, and confirm the
password. You can set the user as media user, operator, and administrator.
5.
Click Modify to modify the information of the added ONVIF user.
6.
Click Delete to delete the selected ONVIF user.
7.
Click
to save the settings.
Network Service
Purpose:
You can control the ON/OFF status of certain protocol that the camera supports.
Notes:
Supported services vary according to camera models.
Keep unused function OFF for security concern.
WebSocket or WebSockets protocol are used for plug-in-free live view.
When you use Google Chrome 57 and its above version or Mozilla Firefox 52 and its
above version to visit your camera, you should enable WebSocket or Websokets
protocol. Otherwise, live view function is not usable.
If the camera uses HTTP, enable WebSocket.
If the camera uses HTTPS, enable WebSockets.
Note:
WebSocket or WebSockets protocol are only supported by certain camera models.
SDK Service and Enhanced SDK Service
Содержание DS-2DB4223I-CX
Страница 1: ...UD15369B Explosion Proof Zoom Bullet Camera User Manual...
Страница 20: ...Hikvision 3 Visit the camera via the applied domain name...
Страница 110: ...Hikvision Figure A 1 2 Modify Network Parameters...
Страница 111: ...Hikvision...


