


FRU Replacement Guide
7 Storage Enclosure Basic Field Replaceable Units
75
7.2 Hard Disk Drive Replacement Procedure
Based on the configuration of a Storage Enclosure Basic, an enclosure contains seven sleds.
Prerequisites
• If you are replacing multiple drives on different enclosures, temporarily configure the MetaStores as read only. Do
not attempt to replace multiple drives on different enclosures unless you first make the MetaStores read only. For
instructions, see
Managing Storage
in the
HGST Active Archive System Administration Guide
.
• Decommission the faulty drive in the CMC. For more information, see
Managing Hardware
in the
HGST Active
Archive System Administration Guide
.
• Obtain a replacement HDD from HGST Support.
Required Tools
• None
Time Estimate
: 1 hour
To replace a hard disk drive, do the following:
Note:
• Ensure that you store all removed parts in a safe location while replacing the FRU.
• The hard disk drive FRU is defined as the hard drive with the drive carrier. This means that you need
to replace the hard drive along with the carrier.
Warning:
If you are replacing more than one hard disk drive, wait in between each replacement until the
CMC displays a
Disk Safety
of 5.
1.
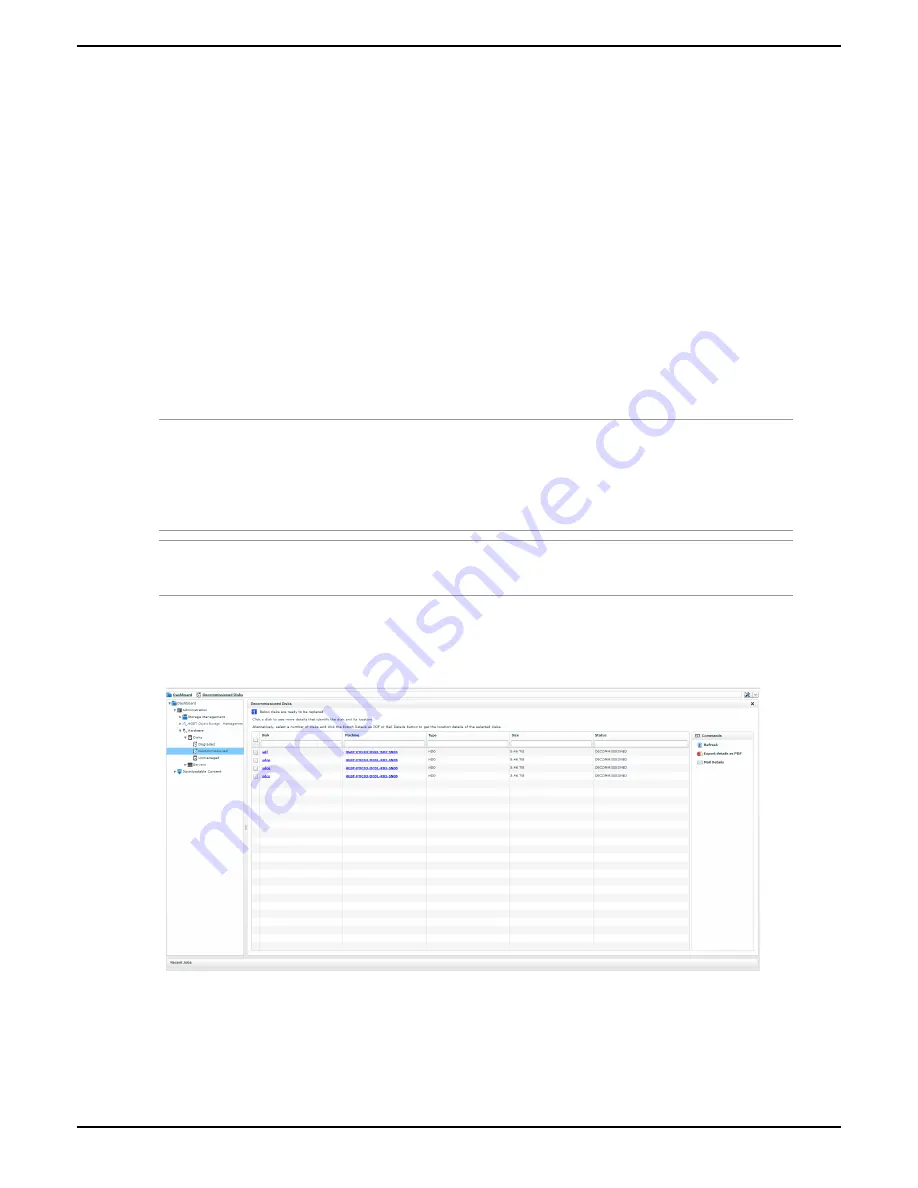
Obtain details about the decommissioned disk from the CMC.
a) In the CMC, navigate to
Dashboard
>
Administration
>
Hardware
>
Disks
>
Decommissioned
.
Figure 46: Decommissioned Disks in the CMC
b) Click the desired decommissioned disk.
A PDF is displayed.
c) Click
Save
or
.
The PDF contains
decommissioned disk details
, which you will need refer to:
• The
device name


