background image

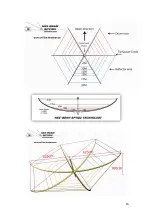
HEX – BEAM SP7IDX TECHNOLOGY 


HEXBEAM MARK III HD

 & 

HEXBEAM MARK III Light 

Ver 05.018 


HEX-BEAM SP7IDX TECHNOLOGY ANTENNA

 is a broad band hex 

antenna operating in PLUG AND PLAY system, its assembly time is 1-1,5h for 
one person.  Its installation doesn't require any additional tuning. Thanks to 

its small and compact structure its turning requires only a small light rotor.  

The antenna works properly even when it's installed relatively low over the 

ground. 


Both antennas are equipped with all parts, required for a one, five or 

six bands beam in range from 6 to 20 meters. The 

HEXBEAM SP7IDX 

TECHNOLOGY

 offers mounted on the ground gain for front – to – back huge 

amplify. The antenna offers the same values as a full size YAGA antenna. Has 

unique shape: is much smaller, stiffly and makes less noise than typical 

beams, it is lighter, easier to montage.


Please see its possible assembly methods on:  

http://sp7idx-hexbeam.eu/hexbeam/mounting-suggestion  
 

The antennas are tested at 7,3m height with 

analyser RigExpert AA-

55 ZOOM

 +


MetroVNA Pro Touch Deluxe


24,8 m 

AIRCELL


7 + RG400/U HEW-Kabel GmbH Germany Filial Nordic-

Örebro-Cable


Test connections conducted with 

transceiver


Flex Radio System 

6600M

 + 

Electraft K-3s


PA Team SPE  EXPERT 1,3K + 2K 


It is helpful if you completely read through the instructions a couple of time before 
you start

.  

The antenna is assembled intuitively, but please 

READ

 the manual carefully. 

Please pay special attention to the red inscriptions.  


Содержание MARK III HD

Страница 1: ...und gain for front to back huge amplify The antenna offers the same values as a full size YAGA antenna Has unique shape is much smaller stiffly and makes less noise than typical beams it is lighter ea...

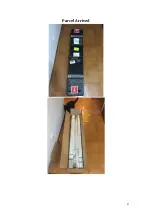
Страница 2: ...2 Parcel Arrived...

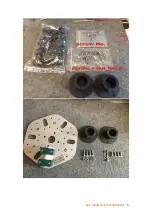
Страница 3: ...DX TECHNOLOGY 3 PART LIST Three types of spreders poles 6 pieces small ones kevlar lines with S hooks 6x 1m diameter 12 7mm 4 8 6 pieces medium 6x 1 35m diameter 17mm 5 8 6 pieces large 6x 1 35m diame...

Страница 4: ...4 Set of hol dres wire cleat set Size 5 6 set Size 7 24 set Size 9 6 set STORE Insulating tape 1 piece option 2 8 Screw 8 x 20 4 pieces for hub clamp on rure with centerpost...

Страница 5: ...HEX BEAM SP7IDX TECHNOLOGY 5...

Страница 6: ...6 Down centerhub mast...

Страница 7: ...HEX BEAM SP7IDX TECHNOLOGY 7...

Страница 8: ...8 6 sets of electric component driven reflector spacer cords 6 10 12 15 17 20m 2 8...

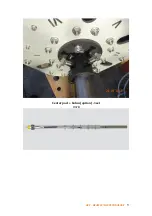
Страница 9: ...HEX BEAM SP7IDX TECHNOLOGY 9 Center post balun option 1set 3 8...

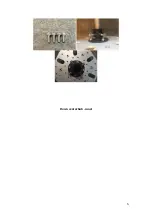
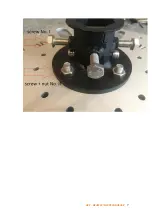
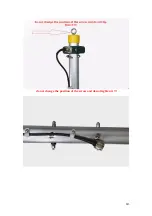
Страница 10: ...10 do not change the position of the screw and do not tighten it...

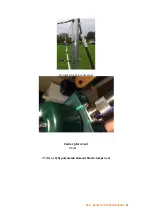
Страница 11: ...HEX BEAM SP7IDX TECHNOLOGY 11 Normal situation centerpost Center plate 1set 1 8 7 8 or 8 8 polyamide element block clamps 6 set...

Страница 12: ...12 8 8 or 7 8 sleeve 6 art...

Страница 13: ...HEX BEAM SP7IDX TECHNOLOGY 13...

Страница 14: ...14 Centerhub complet centerpost...

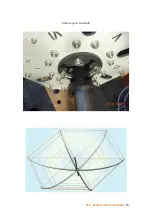
Страница 15: ...HEX BEAM SP7IDX TECHNOLOGY 15 bottom part centerhub...

Страница 16: ...16...

Страница 17: ...holders on spreaders with 2 3 4 5 and 6 symbols so that they look like on spreaders no 1 6 small poles 1m 12 7mm holders no 5 1 piece per pole 6 medium poles 1 4m 17mm holders no 7 4 pieces per pole...

Страница 18: ...uch The wires should be a little slack do not screw it tightly not the wheel from the car Only minor adjustment is required if any for proper tension of the wires Not to tight not to much sag of the w...

Страница 19: ...HEX BEAM SP7IDX TECHNOLOGY 19...

Страница 20: ...20 Attention correct wire tension adjust with black handle fixing left or right Do not tighten the wire too much do not screw it tightly not the wheel from the car...

Страница 21: ...HEX BEAM SP7IDX TECHNOLOGY 21...

Страница 22: ...22...

Страница 23: ...EAM SP7IDX TECHNOLOGY 23 Step 2 Place the centre post inside the centre plate so that the UC1 socket was facing the log As an additional protection against the self turning of the whole structure the...

Страница 24: ...24 flange is equipped with an additional passer by screw tight it up carefully Block the centre plate by turning two set screws located in both flanges upper and bottom one...

Страница 25: ...ibreglass spreaders and pipes in the centre plate Pay attention to places with cut outs which are inserted into locks in pipes from the centre plate The poles are marked with numbers and those with th...

Страница 26: ...26...

Страница 27: ...HEX BEAM SP7IDX TECHNOLOGY 27 Block rivet...

Страница 28: ...28...

Страница 29: ...en fixed in the center post fasten lines around the perimeter one to the other in clockwise direction The holders for electric components should be faced in inward direction Perform this action very c...

Страница 30: ...30...

Страница 31: ...HEX BEAM SP7IDX TECHNOLOGY 31 Step 5...

Страница 32: ...side of the lead on screw in centre post then keep putting it through holders on poles until you reach the second screw in the centre post If the lead is too loose or cannot reach the second screw mo...

Страница 33: ...uch them they need to hang down to avoid their breakage during strong wind or snow To correct the lead tension loosen or tighten one of the lead holders two or three pieces this doesn t affect proper...

Страница 34: ...34...

Страница 35: ...HEX BEAM SP7IDX TECHNOLOGY 35...

Страница 36: ...36 There needs to be a small backlash the lines should hang down a bit DO NOT TIGHTEN THEM...

Страница 37: ...op down and touch the wire below This is als o not good and will cause the SWR of those two to not be right You want to kee p the spacing between wires Remember taut wires might look better but I t ca...

Страница 38: ...38 This is how properly bent poles look like...

Страница 39: ...HEX BEAM SP7IDX TECHNOLOGY 39...

Страница 40: ...40 HEXBEAM SP7IDX TECHNOLOGY is very light...

Страница 41: ...HEX BEAM SP7IDX TECHNOLOGY 41...

Страница 42: ...a has been tested normal balun to 1500W PEP and continuous 1300 1400W Abuse of too much power can cause permanent damage to the antenna especially in the aggressive environment high humidity and high...

Страница 43: ...HEX BEAM SP7IDX TECHNOLOGY 43...

Страница 44: ...44 For the purpose of outside operation there is a special small mast for HEXBEAM of 7 10 m length...

Страница 45: ...HEX BEAM SP7IDX TECHNOLOGY 45 For tests and antennas control MAX6 antenna analyser...

Страница 46: ...bsite you re welcome to visit it The photos can differ a bit from the actual structure due to implemented structural improvements If you have any additional questions or think that the structure shoul...

Страница 47: ...de the amateur bands DO NOT transmit even with the aid of a tuner outside the designed bands This can cause excessive voltage and arching of the terminals on the center post and replacement is not cov...

Страница 48: ...ouch Deluxe RigExpert AA 55 ZOOM through 24 8 m Aircell7 Hexbeam was real 7 4 5m above the ground Remember that this beam is broad banded so the SWR will remain quite low across each band and well wit...

Страница 49: ...HEX BEAM SP7IDX TECHNOLOGY 49...

Страница 50: ...50...

Страница 51: ...HEX BEAM SP7IDX TECHNOLOGY 51...

Страница 52: ...52...

Страница 53: ...HEX BEAM SP7IDX TECHNOLOGY 53...

Страница 54: ...54...

Страница 55: ...HEX BEAM SP7IDX TECHNOLOGY 55...

Страница 56: ...56...

Страница 57: ...HEX BEAM SP7IDX TECHNOLOGY 57...

Страница 58: ...58...

Страница 59: ...HEX BEAM SP7IDX TECHNOLOGY 59...

Страница 60: ...60...

Страница 61: ...Centre hub failure Lifetime Warranty 4 Double flange failure Lifetime Warranty 5 Spreaders Support Cords Five 5 years What the Warranty Does Not Cover 1 Does not cover storm wind Ice or any weather d...

Страница 62: ...62...
Отзывы: