


Braille Labeler BL-1000 LINK
General
Page 4
The large round button at the bottom center is the cut button and is called the CUT button.
The CUT button is used to cut the braille tape after braille printing. If the internal cutter and/or
the CUT button no longer lock into their normal position, remove the cover above the CUT
button and pull the cutter out with a thin object.
The slightly larger round button to the right of the CUT button is the SET button. The SET
key is used to position the Braille tape in the print unit for a new printout.
The triangular key to the right above the SET key is the backspace key. Use this key to
move the Braille Tape to the right. Use this key if the braille tape gets stuck.
Below the back button is a kidney-shaped depression with the three LEDs green, red and
yellow. These have the following meaning:
•
Red: The device is switched on
•
Green: The Braille Tape is correctly inserted and ready for printing.
•
Yellow: There is data in the memory buffer waiting to be printed out.
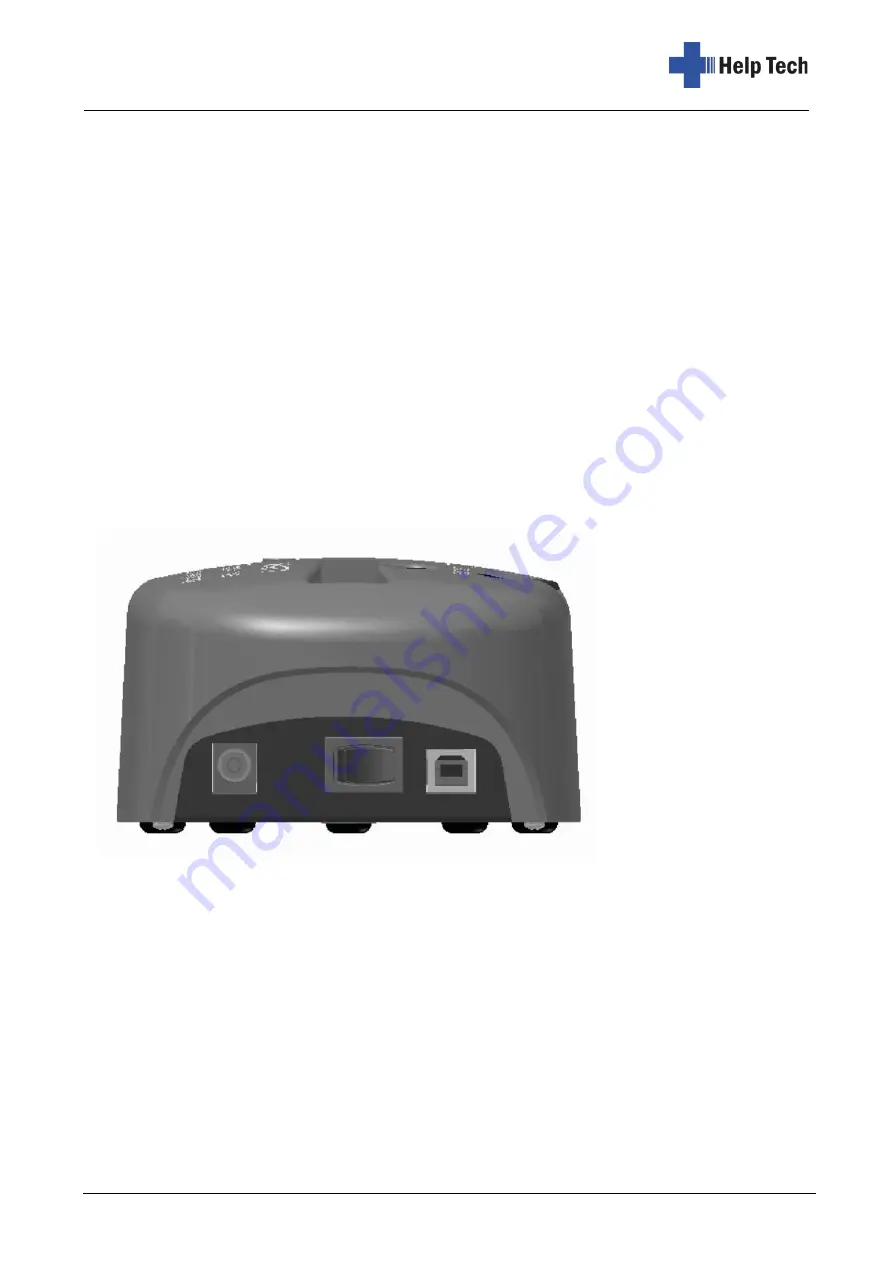
On the left side of the
device there are - from
top to bottom - a round
connection socket for the
power supply, the on/off
switch, as well as a USB
interface.


