Temperature Control System WHS HE
Installation and Operating Instructions
14
EN
EN
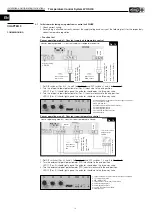
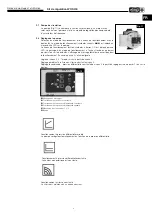
3�1 Initial commissioning using electronic control unit WHSE
1. Check correct wiring.
2. If everything is attached correctly, connect the supply voltage and carry out the following tests for the respectively
correct temperature regulation.
– Function test
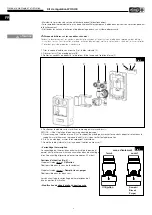
Sensor operating mode 1: Constant supply air temperature control
1. Set DIP switches (Pos.
û
) 2, 3 and 5 to Position A and DIP switches 1 and 4 to Position B.
2. Turn the internal setpoint potentiometer (Pos.
â
) clockwise to the end position.
LED Y1 (Pos.
á
) should light up and the actuator should open the three-way valve.
3. Turn the internal setpoint potentiometer (Pos.
â
) counter clockwise to the end position.
LED Y2 (Pos.
é
) should light up and the actuator should close the three-way valve.
.
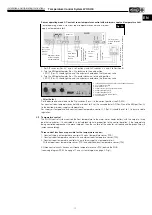
Sensor operating mode 2: Constant room temperature control
1. Set DIP switches (Pos.
û
) 3 and 5 to Position A and DIP switches 1, 2 and 4 to Position B.
2. Turn the external setpoint potentiometer (TFR) clockwise to the end position.
LED Y1 (Pos.
á
) should light up and the actuator should open the three-way valve.
3. Turn the external setpoint potentiometer (TFR) counter clockwise to the end position.
LED Y2 (Pos.
é
) should light up and the actuator should close the three-way valve.
CHAPTER 3
COMMISSIONING
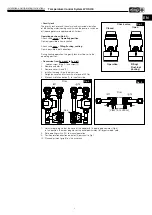
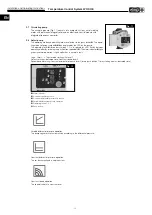
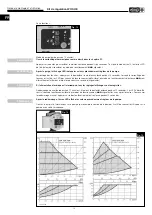
+Main
-Main
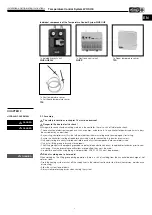
Mounted dir
ectly
behind the heating
element (heated side)
Both TFK ar
e identical
and included in delivery
Installation in supply air duct on heated side
duct sensor Frost
protection
duct sensor
Main sensor
Setpoint setting
on WHSE
Fig� 18
â
ê
ô
û
áé
ó
ú
â
Setpoint temperature for operation with constant supply air temperature
ê
CF = Cascade factor setting
ô
MIN = Minimum limit
û
Setting/selection of control mode via Dip switches
á
Actuator operating display Y1
é
Actuator operating display Y2
ó
nti-freeze: LED alarm and reset button
ú
Operating display
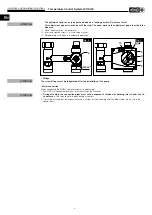
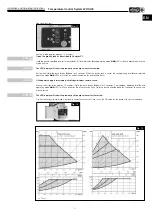
Mounted dir
ectly
behind the heating
element (heated side)
Installation in r
oom
TFR room sensor
and setpoint
setting
duct sensor
Frost protec-
tion
Sensor operating mode 2: Constant room temperature control
Setpoint
+Main
Fig� 19
â
ê
ô
û
áé
ó
ú
â
Setpoint temperature for operation with constant supply air temperature
ê
CF = Cascade factor setting
ô
MIN = Minimum limit
û
Setting/selection of control mode via Dip switches
á
Actuator operating display Y1
é
Actuator operating display Y2
ó
nti-freeze: LED alarm and reset button
ú
Operating display
Sensor operating mode 1: Constant supply air temperature control

