3
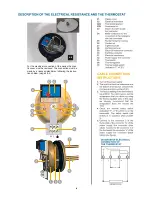
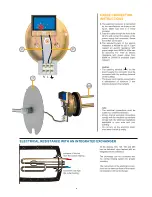
For the electrical connection of the device the plas-tic cover must be removed. The connection must be made by a licensed electrician following the instruc-tions below. (page 3 & 4)
Φ 9
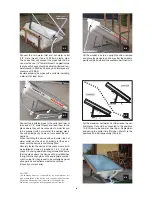
Страница 1: ...lanks Φ 2 Create the 2 triangles and place the Χ plates of the mount by tightening all screws and nuts Remove the plastic cover 1 and screw the nipple fitting 2 and the safety valve 3 Use Teflon to seal them Φ 3 INSTALLATION INSTRUCTIONS COMPACT 100 125 160 200 Φ 1 1 2 3 4 Φ 4 1 3 2 ...
Страница 2: ... at the place where it will be installed and screw it positions 1 2 3 4 photo graph 7 by using dowels and lag screws Make sure that the place where the device will be installed has the right static strength and the appropriate contain ment in order for the product to be protected against strong winds and extreme weather conditions Consult your mechanic Lift the wooden box to an upright position re...
Страница 3: ...3 For the electrical connection of the device the plas tic cover must be removed The connection must be made by a licensed electrician following the instruc tions below page 3 4 Φ 9 3 ...
Страница 4: ...4 ...