HEIKO POLE V1 Feb 2019
Page
2
of
2
INSTALLATION OF HEIKO POLE TOWEL WARMER
SPECIFICATIONS
Mounting Centre
(Approx Width)
Rating at 240 Volts AC
Voltage
IP Rating
WHSP1000 Polished stainless steel
800 mm
20 watts
230-240VAC
IP45
WHSP1000N Black
800 mm
24 watts
230-240VAC
IP45
This Package Contains:
1 Towel Warmer
2 x Mounting blocks(legs) and one wall bracket and one mounting block.
2 x Mounting Screws to fix wall bracket to wall
CAUTION:
Prior to installation please ensure the product is to your satisfaction. Once installed Heirloom cannot be responsible for
defects in the product finish. This product is not intended for use by young children or infirmed persons without supervision. In order to
avoid a hazard for very young children, this towel warmer should be installed at least 600mm from the floor. Young children should be
supervised to ensure they do not play with the product. If the supply cord is damaged it must be replaced by the manufacturer, its service
agent, or similarly qualified persons in order to avoid a hazard.
Installation:
The Strata Heiko Vertical is intended for installation in a vertical orientation, though horizontal installation is also acceptable.
This towel warmer must be installed by a registered electrician and in accordance with local and national electrical codes. We
recommend that the towel warmer be installed vertically on a flat and uniform wall, and where possible into studs or other suitable
anchor material. If fixing to hollow cavity walls, toggle anchors (not those supplied) or similar devices must be used.
Position the towel warmer so that the mains power source is easily accessible. Cable entry to the towel warmer can be top or bottom
(or left or right. Avoid the supply cable coming into contact with the heated parts of the towel warmer where installation is with exposed
flex. .
DO NOT APPLY POWER TO THE UNIT, OR SWITCH THE TOWEL WARMER ON BEFORE INSTALLATION IS COMPLETE.
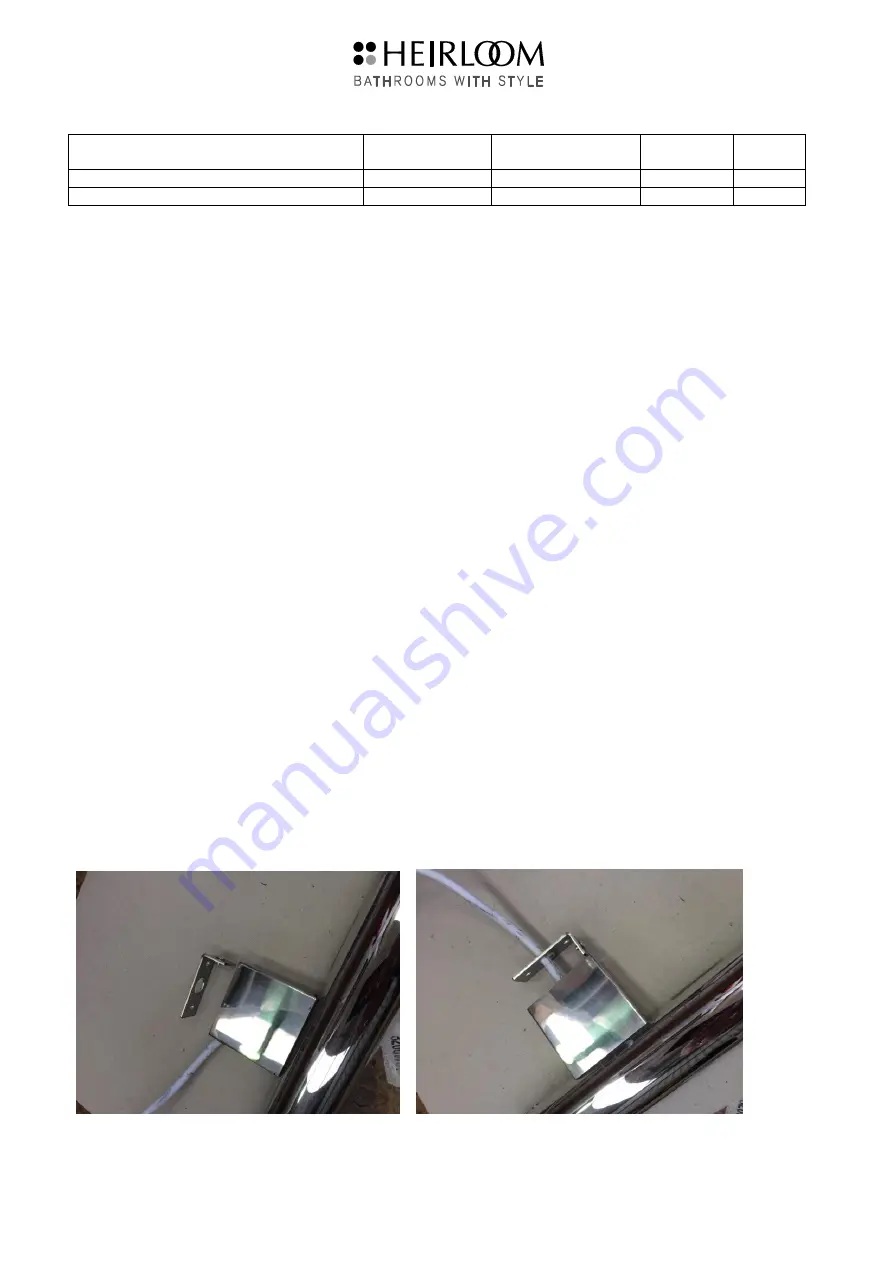
EXPOSED FLEX INSTALLATION: (Fig 1)
1
Identify suitable mounting points, preferably into timber framing. Where this is not possible, use toggles (not supplied) .
Mounting centres are 800mm vertically (can be installed horizontally). Screw flex bracket and mounting block to the wall.
2
Thread t
he “Flex Leg”
(with plastic grommet) on to the electric flex (ensuring that the leg is facing in the correct direction). Fix
the leg to the towel warmer with the two screws provided.
3
Ensure the flex exits the leg through the slot with the plastic grommet. Place the towel warmer on to the two mounting blocks
and tighten grub screws
4
Connect flex to switch at flush box (termination pack supplied may be used)
CONCEALED FLEX INSTALLATION (Fig 2)
As above, except that the flex will pass though the hole in the wall bracket.
Fig 1 Exposed wiring
Fig 2 Concealed wiring


