background image

Models covered by these
instructions:

HSOFR1500TX

– 1.5kW Oil-filled

column heater with timer.

HSOFR2000TX

– 2.0kW Oil-filled

column heater with timer.

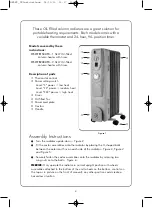
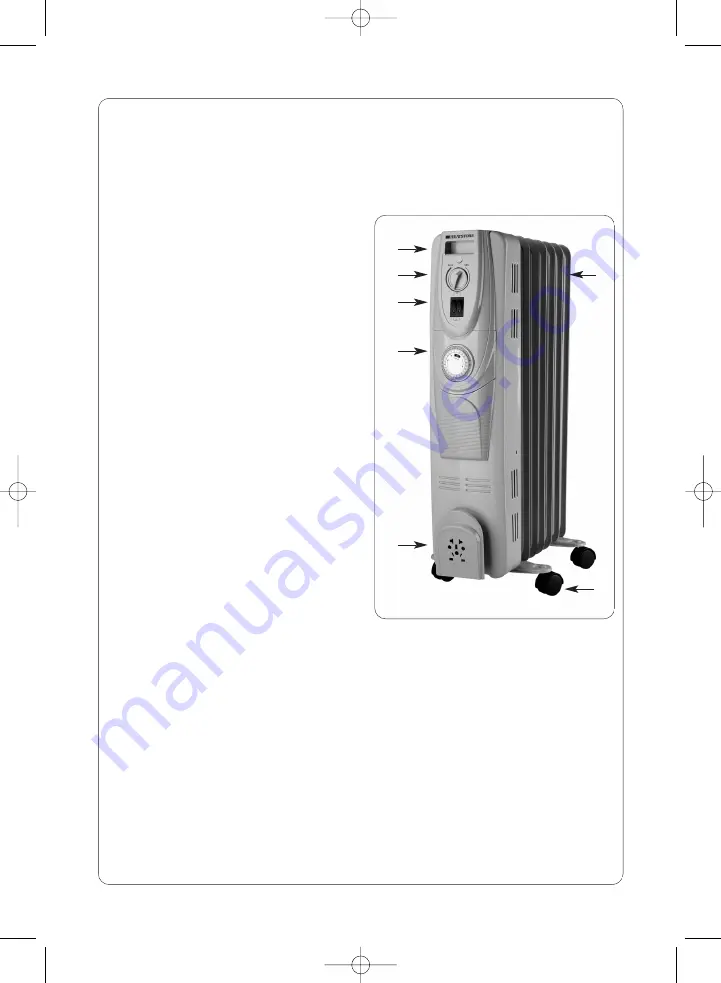
Description of parts

Thermostat control

Power setting switch

Level ”

I

” power. = low heat

Level ”

II

” power.= medium heat

Level ”

III

” power = high heat

Timer

Oil filled fins

Power cord plate 

Castors

Handle

Assembly Instructions

Turn the radiator upside-down – 

Figure 2

.

Fit the castor assemblies onto the radiator by placing the U-shaped bolts
between the outermost fins on each side of the radiator – 

Figure 3, Figure 4

and Figure 5

.

Securely fasten the castor assemblies onto the radiator by screwing two
wing nuts onto the bolts – 

Figure 6

.

WARNING:

Only operate the radiator in normal upright position with wheels

assemblies attached to the bottom of the unit (wheels on the bottom, controls on
the top as in picture on the front of manual), any other position could create a
hazardous situation.

3

Figure 1

These Oil-Filled column radiators are a great solution for

portable heating requirements. Each model comes with a

variable thermostat and 24-hour, 96-position timer. 

HSOFR_TXinstructions  26/11/15  11:37  Page 3

Содержание HSOFR1500TX

Страница 1: ...ALWAYS BE FOLLOWED PLEASE READ ALL INSTRUCTIONS CAREFULLY AND RETAIN FOR FUTURE REFERENCE IF IN ANY DOUBT ABOUT THE INSTALLATION OR USE OF THIS PRODUCT CONSULT A COMPETENT ELECTRICIAN HSOFR1500TX HSOFR2000TX Installation and Operating Instructions HSOFR_TXinstructions 26 11 15 11 37 Page 1 ...

Страница 2: ...not allow the cord to touch sharp edged or hot surfaces Always unplug the heater when not in operation The heater must only be used in the upright position The surface temperature of the heater can become very hot please do not touch Young children should be supervised at all times to ensure that they do not play with the heater The heater should be at least 90cm away from walls or other flammable...

Страница 3: ...bolts between the outermost fins on each side of the radiator Figure 3 Figure 4 and Figure 5 Securely fasten the castor assemblies onto the radiator by screwing two wing nuts onto the bolts Figure 6 WARNING Only operate the radiator in normal upright position with wheels assemblies attached to the bottom of the unit wheels on the bottom controls on the top as in picture on the front of manual any ...

Страница 4: ...hree power settings see Figure 7 Level I power low heat Level II power medium heat Level III power high heat I With power switch I pressed the indicator illuminates ON II With power switch II pressed the indicator illuminates ON III With both power switches I and II pressed both indicators illuminates ON 4 Figure 7 HSOFR_TXinstructions 26 11 15 11 37 Page 4 ...

Страница 5: ...Each segment is 15 minutes push a segment in towards the centre to turn the radiator OFF and push a segment outwards to turn the radiator ON To set the time prior to programming the ON OFF setting rotate the timer clockwise until the arrow marker points to the correct time Safety Control Thermal Cut Out This product has an overheat protection system which turns the appliance off if it becomes exce...

Страница 6: ...rt that may be present on the fins Unplug the appliance from the power supply and allow to cool Wipe of with a soft damp cloth Do not use detergent or abrasives Storage Switch off and unplug the appliance Ensure that the heater is completely cool Coil Cable Store in a cool dry place 6 HSOFR_TXinstructions 26 11 15 11 37 Page 6 ...

Страница 7: ...7 HSOFR_TXinstructions 26 11 15 11 37 Page 7 ...

Страница 8: ...iler for recycling advice ONE YEAR Telephone 0117 923 5375 Fax 0117 923 5374 Victoria Road Avonmouth Bristol BS11 9DB www heatstore co uk SPECIFICATION HSOFR1500TX RATING 230 240V 1500W 50Hz DIMENSIONS 365w x 640h x 245d mm 9 9kG SPECIFICATION HSOFR2000TX RATING 230 240V 2000W 50Hz DIMENSIONS 445w x 640h x 245d mm 12 2kG HSOFR_TXinstructions 26 11 15 11 37 Page 1 ...

Отзывы: