


$66(0%/<,16758&7,216
15
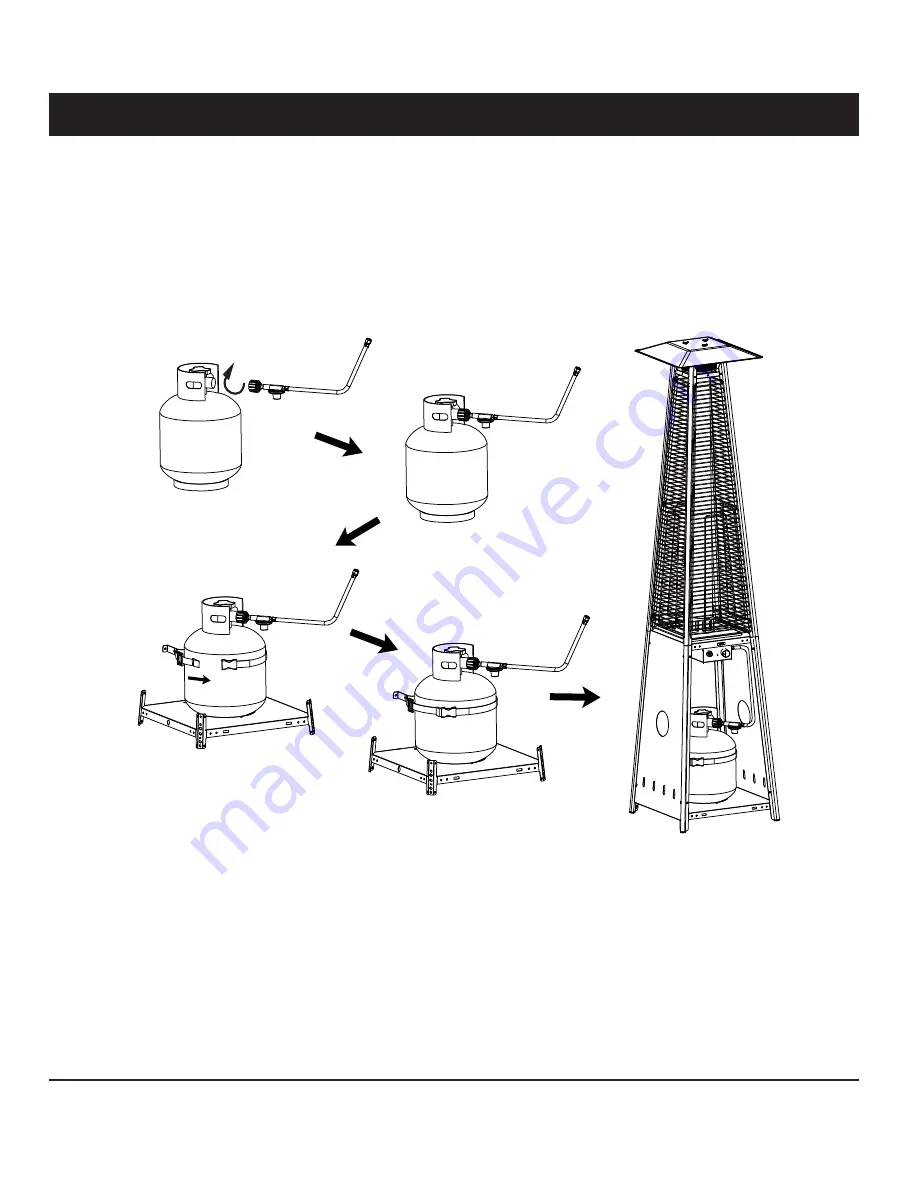
6WHS
When installing an LPG cylinder, it may be easier to remove the Front Panel completely and set aside.
Place the cylinder on the Bottom Plate. Connect the gas hose to 20lb LPG cylinder (not included).
Screw the regulator to the cylinder as illustrated. Tighten securely with the Fastening Belt.
127(
The regulator with gas hose is supplied.
Содержание SRPH98
Страница 6: ...3 2 9...


