


2
3
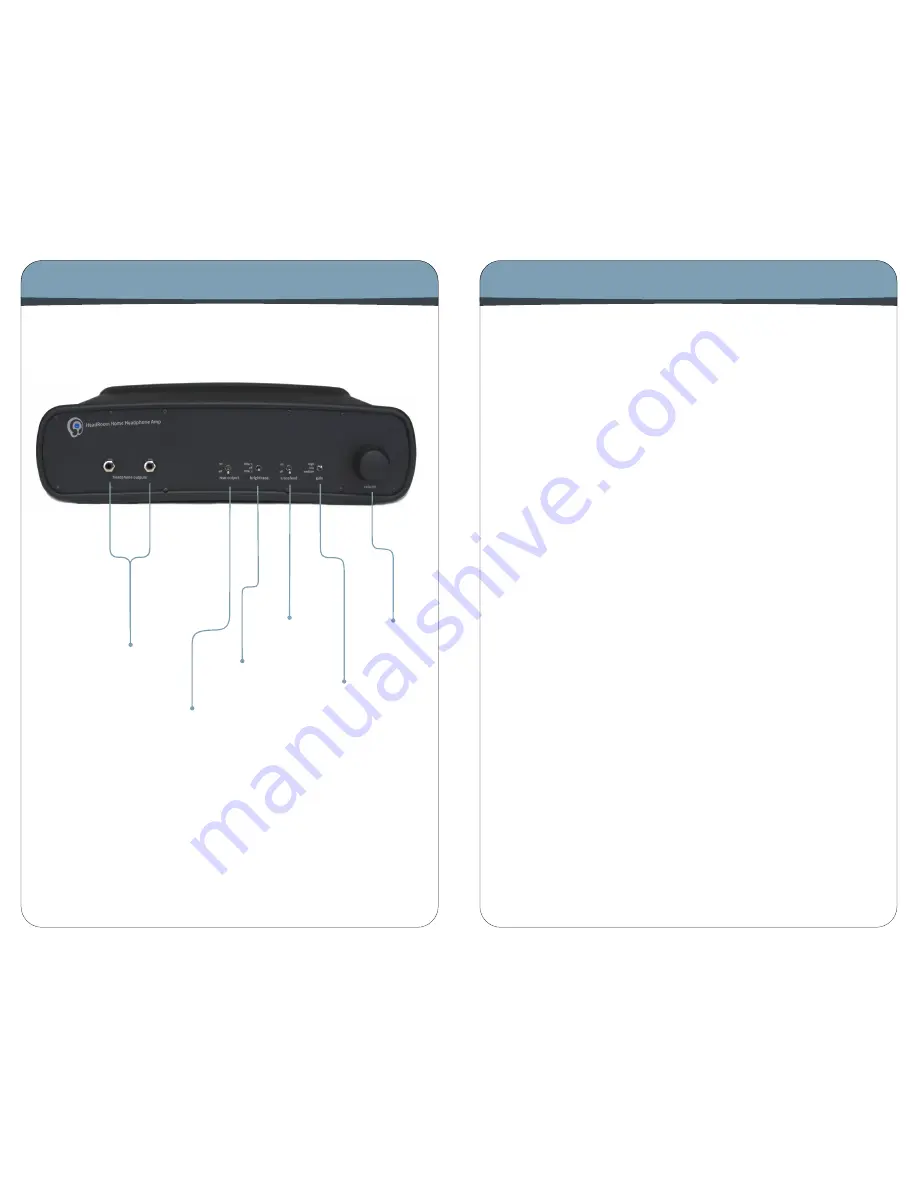
Front Panel Descriptions
The Home Amp
2.
rear
output
switch
4.
crossfeed
switch
6.
volume
control
The Home Amp
1. Headphone Ouputs
The headphone out is where you plug in your
headphones. The Desktop Amp is equipped with two 1/4” jacks.
2. Rear Output Switch
If you want to use your Home amp as a pre-ampli-
fi er, a set of RCA connectors on the rear faceplate act as analog outputs for
hooking up a power amplifi er or powered speakers.
3. Brightness Switch
The Brightness Switch is used to compensate for
the warming action of the processor. In the center position there is no fi lter
in the circuit; generally this is preferred. But if the processor is causing too
much bass or blurring of the central image, a mild high frequence boost fi lter
can be turned on. The “fi lter 1” setting accentuates the highs at about 3 kHz;
with the “fi lter 2” setting the fi lter starts an octave earlier and catches some
of the upper mids. Basically, set it to whatever sounds best to you.
4. Crossfeed Switch
This switch engages the crossfeed circuit. Audio im-
aging on headphones is often not very good; typically the image is a blob on
the left, a blob on the right, and a blob in the middle. The HeadRoom cross-
feed provides the natural acoustic cross-feed normally heard at the left and
right ear as heard from the left and right speaker. Adding back the normally
occurring cross-feed signal gives your brain enough information to build the
stable and natural audio image needed to have a quality listening experi-
ence. See page 6 to learn more about HeadRoom’s crossfeed.
5. Gain Switch
The 3-position Gain Switch accomodates various head-
phones’ power needs. For instance, the Low Gain setting would be used for
in-ear monitors, allowing a larger range on the volume control pot. Experie-
menting with your headphones and the gain switch may help you to deter-
mine which setting you prefer. If have any questions regarding your head-
phones, feel free to call and ask us.
6. Volume Control
As you turn the volume control knob clockwise, the vol-
ume increases. You never know where the volume control should be set as
different headphones often have widely different impedances and effi cien-
cies, so use your ears to choose your listening level, not the level on the dial.
(We recommend you choose a moderate level so as not to blow out your ears.)
You also need to turn the amp OFF or ALL THE WAY DOWN before plugging in
or unplugging your headphones to avoid a potential short-circuiting of the
amp.
3.
brightness
switch
5.
gain
switch
1.
headphone
outputs


