background image


FCC Statement
This equipment has been tested and found to comply with the limits for a Class B digital device, 
pursuant to part 15 of the FCC Rules. These limits are designed to provide reasonable protection 
against harmful interference in a residential installation. This equipment generates, uses and can 
radiate radio frequency energy and, if not installed and used in accordance with the instructions, 
may cause harmful interference to radio communications. However, there is no guarantee that 
interference will not occur in a particular installation. If this equipment does cause harmful 
interference to radio or television reception, which can be determined by turning the equipment 
off and on, the user is encouraged to try to correct the interference by one or more of the 
following measures:

•Reorient or relocate the receiving antenna.

•Increase the separation between the equipment and receiver.

•Connect the equipment into an outlet on a circuit different from that to which the receiver 

is connected.

•Consult the dealer or an experienced radio/TV technician for help.

Caution: Any changes or modi

cations to this device not explicitly approved by 

manufacturer could void your authority to operate this equipment.

This device complies with part 15 of the FCC Rules. Operation is subject to the following 

two conditions: (1) This device may not cause harmful interference, and (2) this device 

must accept any interference received, including interference that may cause undesired 

operation.

RF Exposure Information

The device has been evaluated to meet general RF exposure requirement. The device 

can be used in portable exposure condition without restriction.


Содержание D68VA

Страница 1: ...User Mamual D68VA ...

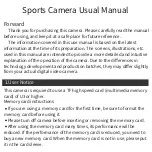
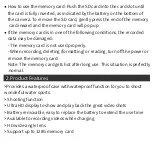
Страница 2: ...fferences in technology development and production batches they may differ slightly from your actual digital video camera 1 User Notice This camera is required to use a TF high speed card multimedia memory card of U3 or higher Memory card instructions If you are using a memory card for the first time be sure to format the memory card before using it Please turn off camera before inserting or removing ...

Страница 3: ...ry card is not used properly When recording deleting formatting or reading turn off the power or remove the memory card Note The memory card gets hot after long use This situation is perfectly normal 2 Product Features Provides a waterproof case with waterproof function for you to shoot wonderful water sports Shooting function Ultra HD display to show and play back the great video shots Battery rem...

Страница 4: ...ne 9 Micro SD 10 HDMI 11 LCD Screen 12 Battery cover 13 Stent Hole 3 Product diagra Supports a variety of video recording formats such as 4K30FPS 108060FPS 720P60FPS Multiple shooting modes support single shot or automatic shooting Super mini appearance many colors available 1 2 3 4 5 6 7 8 9 10 11 12 13 ...

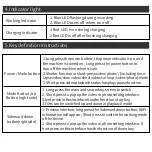
Страница 5: ...video slow video short video car loop video photo mode 3 Short press video playback status has play pause function Mode Button up Button right side 1 Long press the main and secondary screen to switch 2 Short press to pop up the video or photo setting interface Short press in this interface has the function of up key 3 Files can be switched up and down in playback mode Sideward down button right s...

Страница 6: ...6 Button function operation diagram 6 1 Video Mode 1 3 Video preview screen 10 11 Playback video pause screen 13 20 Playback video screen ...

Страница 7: ...back video pause 11 Slide volume up and down on the right side of playback 12 Playback time display 13 Video files 14 Current files and total files quantity 15 Battery icon 16 Left switch files 17 Right switch files 18 Return to preview screen 19 Current file resolution 20 Delete the current file 21 Video parameter selection 22 System setting menu 23 Return to the recording interface 6 2 Photo mode ...

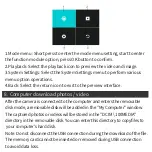
Страница 8: ...o the preview interface 8 Computer download photos video After the camera is connected to the computer and enters the removable disk mode a removable disk will be added in the My Computer window The captured photos or videos will be stored in the DCIM 100MEDIA directory in the removable disk You can enter this directory to copy files to your computer s hard disk Note Do not disconnect the USB conne...

Страница 9: ...a Slide up and down to enter the screen click on the WIFI icon the WIFI waiting icon appears on the screen 2 Open the wifi connection on the phone search for the WIFI name Action Cam and connect it the original password is 1234567890 3 Open the DV KING 4K APP program you can preview the picture being t aken in real time on the APP you can do video photo file playback download delete share and other ...

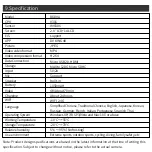
Страница 10: ...o USB2 0 HDMI MAX to 128G Micro SDHC 5V 2A Support built in 1050mAH 4K About 70 min About 2 4hours WIFI 2 4G Simplified Chinese Traditional Chinese English Japanese Korean Russian German French Italian Portuguese Spanish Thai Windows XP 7 8 SP3 Vista and Mac 10 5 or above 10 55 20 70 5 95 No frosting Extreme sports outdoor sports cycling diving family safety etc Note Product design specifications ar...

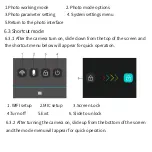
Страница 11: ...cut mode 6 3 1 After the camera turn on slide down from the top of the screen and the shortcut menu below will appear for quick operation 1 WIFI setup 2 MIC setup 3 Screen Lock 4 Turn off 5 Exit 6 Slide to unlock 6 3 2 After turning the camera on slide up from the bottom of the screen and the mode menu will appear for quick operation ...

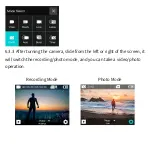
Страница 12: ...6 3 3 After turning the camera slide from the left or right of the screen it will switch the recording photo mode and you can take a video photo operation Recording Mode Photo Mode ...

Страница 13: ...ion 1 2 3 4 5 6 7 1 Short press shooting mode switch 2 Long press to switch to the secondary screen 3 Short press shooting and long press to switch on and off 4 Video Mode 5 Shoot the current file information 6 Battery icon display 7 1 2Video or photo preview interface long press the M button to switch the main and secondary screen display short press the M button to pop up the following menu ...

Страница 14: ... to correct the interference by one or more of the following measures Reorient or relocate the receiving antenna Increase the separation between the equipment and receiver Connect the equipment into an outlet on a circuit different from that to which the receiver is connected Consult the dealer or an experienced radio TV technician for help Caution Any changes or modifications to this device not ex...

Отзывы: