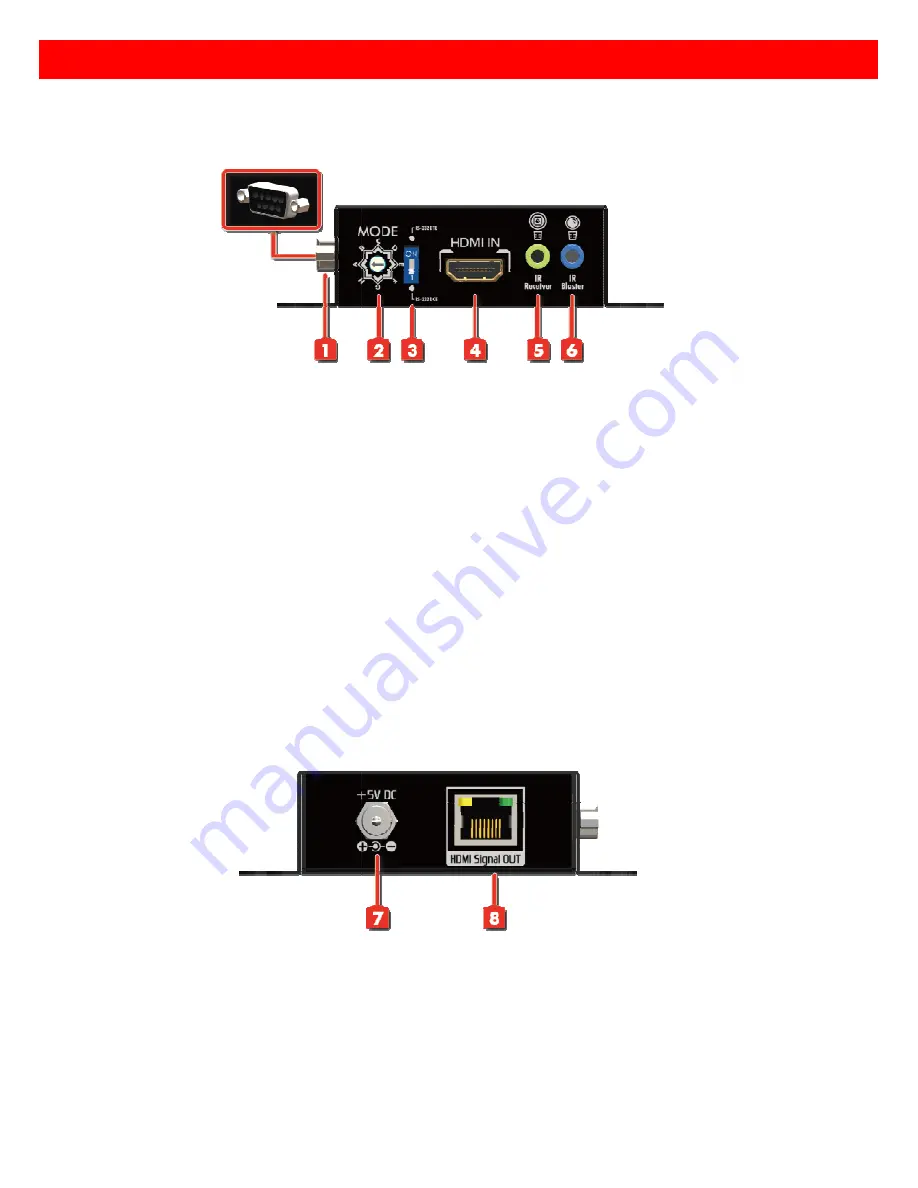
PANEL
Transmitting unit
Front Panel
1.
RS-232:
Connect to PC serial port with a DSUB
2.
MODE:
A - EDID Full-HD(1080p@60)
B - EDID Full-HD(1080p@60)
C - EDID Full-HD(1080p@60)
D - EDID Full-HD(1080p@60)
E - EDID HD(1080p@30)(1080i@60)(720p@60)
F - EDID HD(1080p@30)(1080i@60)(720p@60)
G - EDID Full-HD(1080p@60)
H – Auto EDID learning
3.
Dip Switch:
Setup the RS-232 mode for serial communication channel
4.
HDMI IN:
Connects to a HDMI source with a HDMI male
5.
IR Receiver:
Infrared 3.5mm socket for plugging in the extension cable of IR receiver
6.
IR Blaster:
Infrared 3.5mm socket for plugging in the extension cable of IR blaster
Rear Panel
7.
+5V DC:
Connect to 5V DC power supply.
8.
HDMI Signal OUT:
Plug in a Cat
HD-C5S4P-TX.
PANEL DESCRIPTIONS
Transmitting unit
►
HD-C5S4P-TX
Connect to PC serial port with a DSUB-9 male-male cable here
1080p@60) - 24bit 2D video & 7.1ch audio
HD(1080p@60) - 24bit 2D video & 2ch audio
HD(1080p@60) - 24bit 3D video & 7.1ch audio
HD(1080p@60) - 24bit 3D video & 2ch audio
EDID HD(1080p@30)(1080i@60)(720p@60) - 24bit 2D video & 7.1ch audio
EDID HD(1080p@30)(1080i@60)(720p@60) - 24bit 2D video & 2ch audio
HD(1080p@60) - 36bit 2D video & 7.1ch audio
232 mode for serial communication channel (see p.5 for details)
Connects to a HDMI source with a HDMI male-male cable
Infrared 3.5mm socket for plugging in the extension cable of IR receiver
Infrared 3.5mm socket for plugging in the extension cable of IR blaster
Connect to 5V DC power supply.
Plug in a Cat-5/5e/6 cable that needs to be linked to the transmitting unit
DESCRIPTIONS
24bit 2D video & 7.1ch audio
24bit 2D video & 2ch audio
p.5 for details)
Infrared 3.5mm socket for plugging in the extension cable of IR receiver
Infrared 3.5mm socket for plugging in the extension cable of IR blaster
to the transmitting unit


