


18
D.
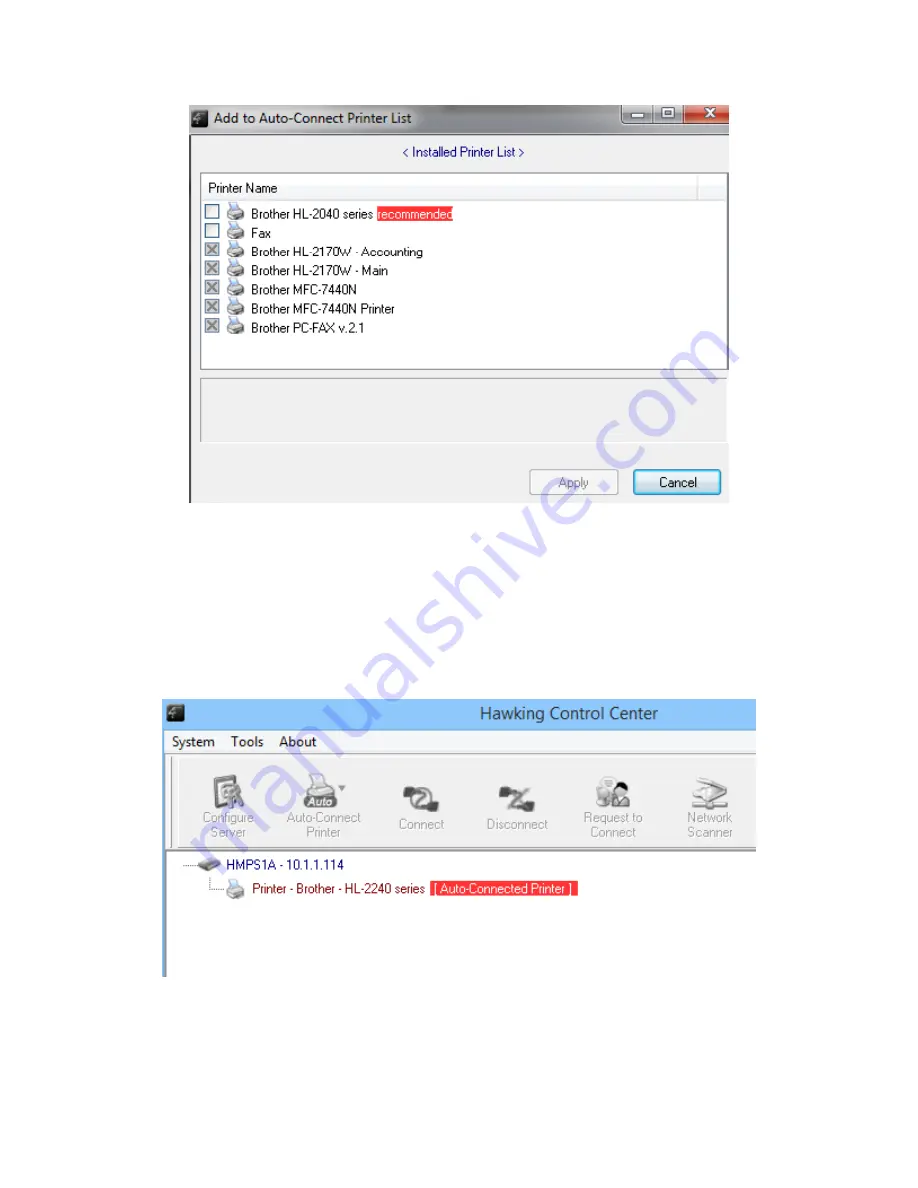
Choose the desired printer. The desired printer must be the printer that matches the
printer attached on the USB device server (this is a physical printer). Then click the
“Apply” button.
E.
The printer will then be marked as an “Auto-Connected Printer” in red. If you choose
“Auto-Connected Printer List” in the “Tools” menu, you can see a newly created item
that describes the association between the Windows printer and the physical printer
on the server.