background image

32 

MAC address 

Input MAC address allowed using this wireless 
range extender here. You don’t have to add colon 
(:) or hyphen (-) by yourself, just input 0 to 9 and a 
to f here, like 112233445566 or aabbccddeeff. 

Comment 

You can input any text here as the comment of this 
MAC address, like ‘ROOM 2A Computer’ or 
anything. You can input up to 16 alphanumerical 
characters here. This is optional and you can leave 
it blank.    However, it’s recommended to use this 
field to write a comment for every MAC address as 
a memory aid. This is optional. 

Add  

When you finish inputting MAC address and 
(optional) Comment, click this button to add the 
MAC address to the list. 

Reset 

Remove all characters in ‘MAC address’ and 
‘Comments’ field. 

Select


Check this box to select one or more MAC 
addresses to delete.


Delete Selected


Click this button to delete all selected MAC 
addresses.


Delete All


Delete all MAC address entries.


Reset


Uncheck all selected MAC address entries.


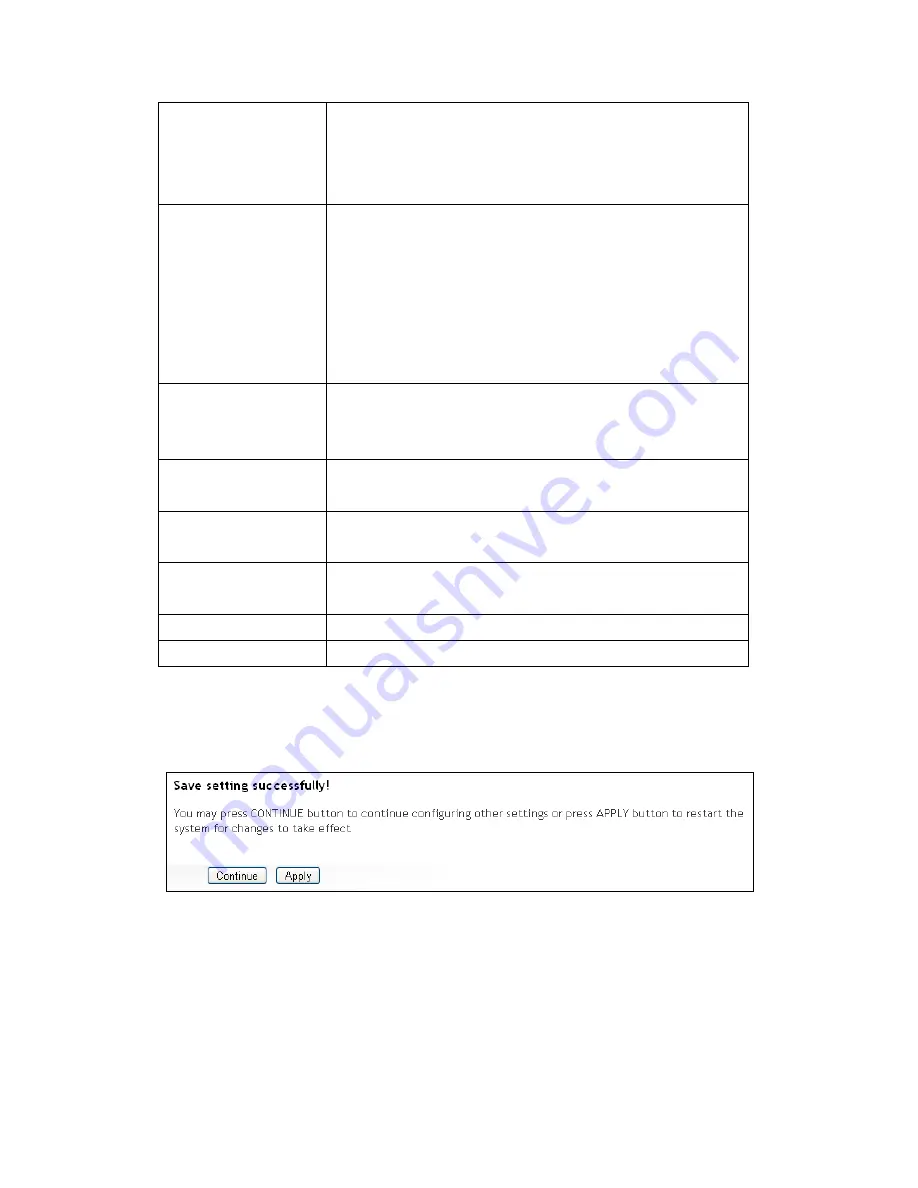
After you finish with setting, click ‘Apply’, and the following message 
will be displayed: 


When you see this message, the settings you made are successfully saved. 
You can click the ‘Continue’ button to return to the previous page and 
modify other settings, or click the ‘Apply’ button to restart the wireless 
range extender.    The changes will take effect after about 30 seconds. 

Содержание Hi-Gain HWREN15

Страница 1: ...website www hawkingtech com e mail techsupport hawkingtech com COPYRIGHT 2011 HAWKING TECHNOLOGIES INC ALL RIGHTS RESERVED USER S MANUAL HI GAINTM WIRELESS 150N Mini Range Extender HWREN15...

Страница 2: ...respect to the contents hereof and specifically disclaims any warranties merchantability or fitness for any particular purpose Any software described in this manual is sold or licensed as is Should t...

Страница 3: ...ff and on the user is encouraged to try to correct the interference by one or more of the following measures 1 Reorient or relocate the receiving antenna 2 Increase the separation between the equipmen...

Страница 4: ...This equipment complies with FCC radiation exposure set forth for an uncontrolled environment In order to avoid the possibility of exceeding the FCC radio frequency exposure limits human proximity to...

Страница 5: ...of those who install and use it However special attention must be paid to the dangers of electric shock and static electricity when working with electrical equipment All guidelines of this and of the...

Страница 6: ...ta 7 IP Address Setup 13 2 2 5 Mac OS X IP Address Setup 15 2 2 6 Connecting to Web Management Interface 16 2 3 Quick Setup 18 2 4 Status 20 2 5 Wireless Security 21 2 5 1 Disable Security 23 2 5 2 WE...

Страница 7: ...6 2 Troubleshooting 48 6 3 Glossary 51...

Страница 8: ...ility with IEEE 802 11b g Draft N wireless network standard works with other 802 11b g Draft N wireless devices High speed wireless network three times faster than conventional 802 11g wireless networ...

Страница 9: ...ld They may put the small parts in their nose or mouth and it could cause serious damage to them KEEP THIS RANGE EXTENDER OUT THE REACH OF CHILDREN 6 The range extender will become hot when being used...

Страница 10: ...ce s with wired or wireless network interface card Web browser Microsoft Internet Explorer 4 0 or above Netscape Navigator 4 7 or above Opera web browser Mozilla Firefox web browser or Safari web brow...

Страница 11: ...range extender please check if there is anything missing in the package Contact your place of purchase to claim missing items 1x 150N Mini Range Extender 1x 2dBi Dipole Antenna 1x Quick Installation G...

Страница 12: ...ected Off WLAN is disabled Flashing Wireless LAN activity transferring or receiving data LAN 1 On LAN port is connected Off LAN port is not connected Flashing LAN activity transferring or receiving da...

Страница 13: ...C 1A Power connector connects to A C power adapter Wired 1 2 Local Area Network LAN ports WPS Reset Reset the router to factory default settings clear all settings or start WPS function Press this but...

Страница 14: ...r source through the LAN Wired 1 or Wired 2 port of the range extender by Ethernet cable or connect to it wirelessly 2 Connect the A C power adapter to the wall socket and then connect it to the Power...

Страница 15: ...o enter the following default login and password to access the Quick Setup menu Login admin Password 1234 If it s set to use a static IP address or you are unsure please follow the following instructi...

Страница 16: ...rt button it should be located at lower left corner of your computer then click control panel Double click Network icon and Network window will appear Select TCP IP then click Properties 2 Select Obta...

Страница 17: ...then click control panel Double click Network and Dial up Connections icon click Local Area Connection and Local Area Connection Properties window will appear Select Internet Protocol TCP IP and then...

Страница 18: ...en click control panel Double click Network and Internet Connections icon click Network Connections and then double click Local Area Connection Local Area Connection Status window will appear and then...

Страница 19: ...12...

Страница 20: ...twork Status and Tasks then click Manage Network Connections Change Adapter Settings on the right hand column Right click Local Area Network then select Properties Local Area Connection Properties win...

Страница 21: ...14...

Страница 22: ...15 2 2 5 Mac OS X IP Address Setup Go to your system preferences go to network Select your network connection Make sure Configure is set to Using DHCP...

Страница 23: ...Please start your web browser and input 192 168 1 240 in address bar then press the Enter key The following message should be shown Please input user name and password in the fields respectively defau...

Страница 24: ...ed to input the user name and password again it means you didn t input the username and password correctly Retype the user name and password again If you re certain about the username and password you...

Страница 25: ...SID as your original wireless network If you wish to change it please uncheck and manually input a custom name Otherwise leave checked Step 2 Please select your wireless network from the list below by...

Страница 26: ...nt or wirless router Please contact your network administrator if you do not know the security code Click Continue to proceed to the next step or Back if you wish to make some changes Step 5 Final sum...

Страница 27: ...e Code Version Current Version of the firmware Wireless Configuration Range Extender ID The HWREN15 s wireless name SSID Source Access Point ID SSID of the connected access point wireless router Encry...

Страница 28: ...and on the left hand column click the Wireless Security sub tab in the web management interface There are three types of security levels you can select Disable no security data encryption disabled WE...

Страница 29: ...everal things you can do to improve wireless security 1 Always enable data encryption Only disable it when you want to open your wireless range extender to the public 2 Never use simple words as encry...

Страница 30: ...r the network is disabled After you finish with setting click Apply and the following message will be displayed When you see this message the settings you made are successfully saved You can click the...

Страница 31: ...your network environment When you select WEP as encryption type the following page will be displayed Here are descriptions of every setup item Key Length There are two types of WEP key length 64 bit...

Страница 32: ...SCII key format and if you select Hex as key format you can use characters 0 9 a f and A F You must enter at least one encryption key here and if you entered multiple WEP keys they should not be same...

Страница 33: ...are WPA TKIP WPA2 AES and WPA2 Mixed You can select one of them but you have to make sure your wireless client supports the cipher you selected Pre shared Key Format Please select the format of pre sh...

Страница 34: ...you made are successfully saved You can click the Continue button to return to the previous page and modify other settings or click the Apply button to restart the wireless range extender The changes...

Страница 35: ...mode and push a specific button on the wireless client to start WPS mode You can push Reset WPS button of this range extender or click Start PBC button in the web configuration interface to do this if...

Страница 36: ...ngs of this extender has never been set an unConfigured message will be displayed here If the data encryption settings have been set before a Configured message will be displayed here Self PinCode Thi...

Страница 37: ...nrolle mode is enabled the extender will follow the wireless settings of wireless client for WPS connection Start PBC Click Start PBC to start Push Button style WPS setup procedure This range extender...

Страница 38: ...Filtering on left hand column under the Security tab in the web management interface and the following page will be displayed This page contains two parts of MAC filtering information All allowed MAC...

Страница 39: ...ing MAC address and optional Comment click this button to add the MAC address to the list Reset Remove all characters in MAC address and Comments field Select Check this box to select one or more MAC...

Страница 40: ...he meaning and function of these settings do not modify them or the wireless performance will be reduced You can click Advanced Setting tab at the top of web interface to enter advanced settings menu...

Страница 41: ...it s safe to set this option to Auto and it s not necessary to change this value unless you know what will happen after modification Channel Width Select wireless channel width bandwidth taken by wire...

Страница 42: ...less radio Unless you re using this wireless range extender in a really big space you may not have to set output power to 100 This will enhance security malicious unknown users in distance will not be...

Страница 43: ...this wireless range extender Click System Utility on the left column and the following message will be displayed Input current password in Current Password field then input new password in both New Pa...

Страница 44: ...et To change IP address please click System Utility sub tab and the following message will be displayed Please input IP address and Subnet Mask in corresponding field and you can input the IP address...

Страница 45: ...will be displayed When you see this message the settings you made are successfully saved You can click the Continue button to return to the previous page and modify other settings or click the Apply...

Страница 46: ...here Start IP Please input the start IP address of the IP range End IP Please input the end IP address of the IP range Domain Name If you wish you can also optionally input the domain name for your n...

Страница 47: ...s message the settings you made are successfully saved You can click the Continue button to return to the previous page and modify other settings or click the Apply button to restart the wireless rang...

Страница 48: ...range extender configuration please follow the following instructions Click the Configuration tab in the web management interface and the following message will be displayed on your web browser Here a...

Страница 49: ...sfer the configuration file to range extender After the configuration is uploaded the range extender s configuration will be replaced by the file you just uploaded Restore to Factory Default Click thi...

Страница 50: ...nload the latest firmware file from our website http www hawkingtech com and save it to a location on your computer Then browse to it and use it to upgrade your range extender After a firmware upgrade...

Страница 51: ...may have to switch it off by unplugging the power plug and plugging it back again after 10 seconds To reset your range extender please click Reset tab in the web management interface and the following...

Страница 52: ...ort calls from our support department or by the user when on site for quick configuration purposes To run the support utility insert the CD into your computer s CD rom and click on Setup Wizard Note t...

Страница 53: ...you wish to configure Next to the Mac Address there will be an IP address that is assigned to that particular HWREN15 Highlight the unit and click Connect A web browser will open and take you into th...

Страница 54: ...2MB SDRAM 16MB LAN Port 10 100M UTP Port x 2 Antenna 2dBi Detachable Dipole Antenna Power 5VDC 1A Switching Power Adapter Dimension 20 H x 58 W x 87 D mm Transmit Power 11n 13dBm 1 5dBm 11g 14dBm 1 5...

Страница 55: ...cess it by web browser b Please check the connection of power cord and network cable of this range extender All cords and cables should be correctly and firmly inserted to the range extender c If all...

Страница 56: ...is disabled File download is very slow or breaks frequently a Try to reset the range extender and see if it s better after that b Try to know what computers do on your local network If someone s trans...

Страница 57: ...50 you re doing this and call Hawking Technologies for help...

Страница 58: ...ent to the proper IP address The DNS server IP address used by the computers on your home network is the location of the DNS server your ISP has assigned to you DSL Modem DSL stands for Digital Subscr...

Страница 59: ...1011001 10110000 10010000 00000000 and its host ID is 00000000 00000000 00000000 00000111 This is a convenient and efficient method for range extenders to route IP packets to their destination ISP Gat...

Страница 60: ...P 1720 SNMP UCP 161 SNMP Trap UDP 162 HTTP TCP 80 PPTP TCP 1723 PC Anywhere TCP 5631 PC Anywhere UDP 5632 PPPoE Point to Point Protocol over Ethernet Point to Point Protocol is a secure data transmiss...

Страница 61: ...m Protocol UDP TCP IP is the standard protocol for data transmission over the Internet Both TCP and UDP are transport layer protocol TCP performs proper error detection and error recovery and thus is...

Отзывы: