Hatteland JH 15C06 CTX Скачать руководство пользователя страница 6


OSD MENU USAGE


Product: JH 15C06 CTX 


Product: JH 15C06 CTX

6

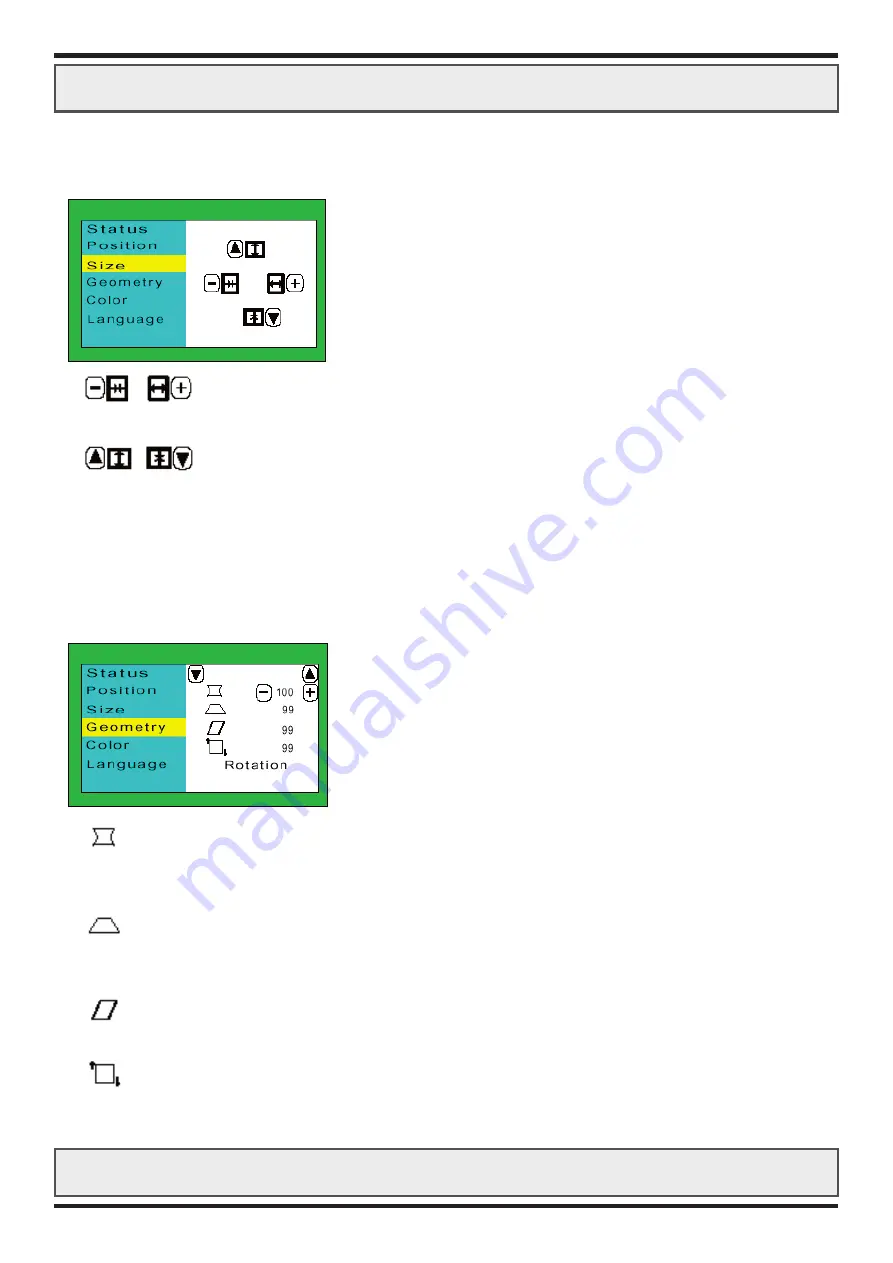
SIZE MENU: (Sub-Menu)

This sub-menu will enable the user to adjust Horizontal Size and Vertical Size of the display area.


HORIZONTAL SIZE

Expand the display area left or right. Decrease or increase by using “-” or “+” buttons.


VERTICAL SIZE

Expand the display area up or down. Decrease or increase by using the “UP” or “DOWN” buttons.

GEOMETRY MENU: (Sub-Menu)

This sub-menu will enable the user to adjust Trapezoid, Pincushion, Parallel or Rotation geometry of 
the display area.

 TRAPEZOID

Curves the left and right sides of the display area inwards or outwards.
Decrease or increase the curves by using the “-” and “+” buttons.

 PINCUSHION

Shrinks or expands the top and bottom sides of the display area inwards or outwards.
Decrease or increase the curves by using the “-” and “+” buttons.

 PARALLEL

Bends the top side of the display area left or right. Decrease or increase by using the “-” and “+” buttons.

 ROTATION

Rotates the display area clockwise or anti-clockwise. 
Decrease or increase the rotation by using the “-” and “+” buttons

Содержание JH 15C06 CTX

Страница 1: ...N 5578 Nedre Vats Norway Phone 47 5276 3700 Fax 47 5276 5444 www hatteland com CONT BRIGHT Jakob Hatteland Display AS Created 13 Jul 2001 Modified 18 Jan 2002 Created by Stein Eikesdal Title IND100036...

Страница 2: ...reen Connector 8 PIN ASSIGNMENTS 9 VGA 15P D SUB Touchscreen 9P D SUB 9 TROUBLESHOOTING 10 Common Errors 10 PRESET SIGNAL TABLE 11 Preset Signal Table Power Save 11 NOTES 12 SPECIFICATIONS 13 2 Featur...

Страница 3: ...ng a completely black image when the brightness knob is turned fully to the left CONTRAST Adjust the image brightness in relation to the background using the knob marked CONT BRIGHTNESS Adjust the ove...

Страница 4: ...b menus press the MENU button NOTE All menus including sub menus will automatically disappear after 8 seconds of inactivity All settings modified will also be saved in the user preset BRIGHTNESS CONTR...

Страница 5: ...for the current video mode Pressing will answer NO and exits the operation and leaves the user preset intact DEGAUSS Press the button to degauss the picture This will remove any color impurities that...

Страница 6: ...enable the user to adjust Trapezoid Pincushion Parallel or Rotation geometry of the display area TRAPEZOID Curves the left and right sides of the display area inwards or outwards Decrease or increase...

Страница 7: ...ode 1 2 or 3 Mode 3 can be selected by pressing the UP button The RGB values can be adjusted using the and buttons to decrease or increase the color saturation The settings will be automatically saved...

Страница 8: ...rminal You may secure the cable further by mounting it to the base mounted cable tie clamp TOUCHSCREEN optional Connect the RS 232 cable to the D SUB 9P Connector female on the rear side of the monito...

Страница 9: ...turn 7 green return 8 blue return 9 no connection 10 ground 11 ground 12 bi directional data SDA 13 horizontal sync or H V 14 vertical sync VCLK 15 data clock SCL TOUCHSCREEN D SUB 9P CONNECTOR FEMALE...

Страница 10: ...rd is compatible and that it is properly seated installed on the computer DISPLAY AREA IS NOT CENTERED SIZED CORRECTLY Make sure that a supported video mode has been selected on the display or on the...

Страница 11: ...th approximately the same frequencies may be regarded as the same signal To reduce visual tiredness and eye strain select a preset with higher refresh mode Maximum compability 640 x 480 120Hz 800 x 60...

Страница 12: ...NOTES Product JH 15C06 CTX Product JH 15C06 CTX 12...

Страница 13: ...to 90 non condensing User Adjustments by OSM OSD Menu on screen display contrast brightness degauss horizontal position vertical position horizontal size vertical size trapezoid pincushion parallel r...

Отзывы: