Part 2: FlexColor for Cameras
Importing Camera Images
Click on
Load
to open the
Load
window. This window provides more
scope controls and enables you to establish the initial setup, name and
numbers for the imported image(s). See also “Load Window Buttons and
Controls” on page 25 for details.
Double-click on an image to import that image and open it in the preview
window. (Or select an image and click on the
Show
button to do the same
thing.)
Drag one or more selected images from the
Import
window to the
Thumbnails
window.
6. The images are loaded and convert them to 3F. They will be saved in your
current image folder, which is the one shown in your
Thumbnails
window.
Import Window Buttons and Controls
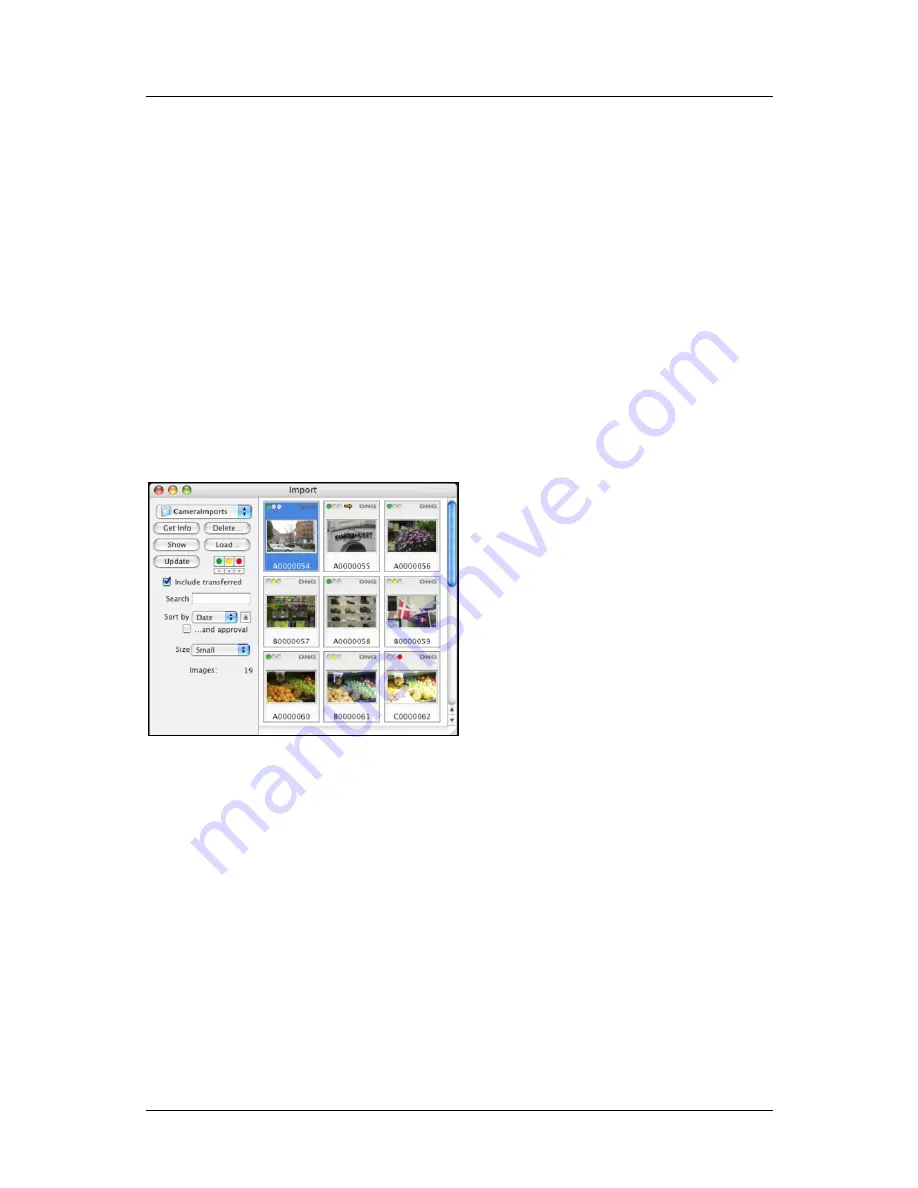
The controls of the
Import
window are similar to those of the
Thumbnails
window.
The following buttons and controls are provided:
Location
: this pop-up menu, located at the top of the window, enables you to
select the folder from which you will import. The menu lists your most
recently used folders and enables you to add or remove favorite locations that
you use often. Select “Choose Location” to open a browse window with which
to navigate to and select a new folder.
Get Info
: displays details about the currently selected image.
Delete
: permanently deletes the currently selected image(s).
Show
: imports the currently selected image into the currently active 3F folder
(this is also the folder currently shown in the
Thumbnails
window) and shows
opens the image into the preview window. This button is inactive when more
than one image is selected.
Load
: opens the
Load
window, which enables you to apply filters and change
options as you import images. The 3F images will be saved in the currently
FlexColor 4.5 Documentation Addendum
24
Содержание FLEXCOLOR V4.5 -
Страница 1: ...FlexColor 4 5 Documentation Addendum ...


