3
step 3
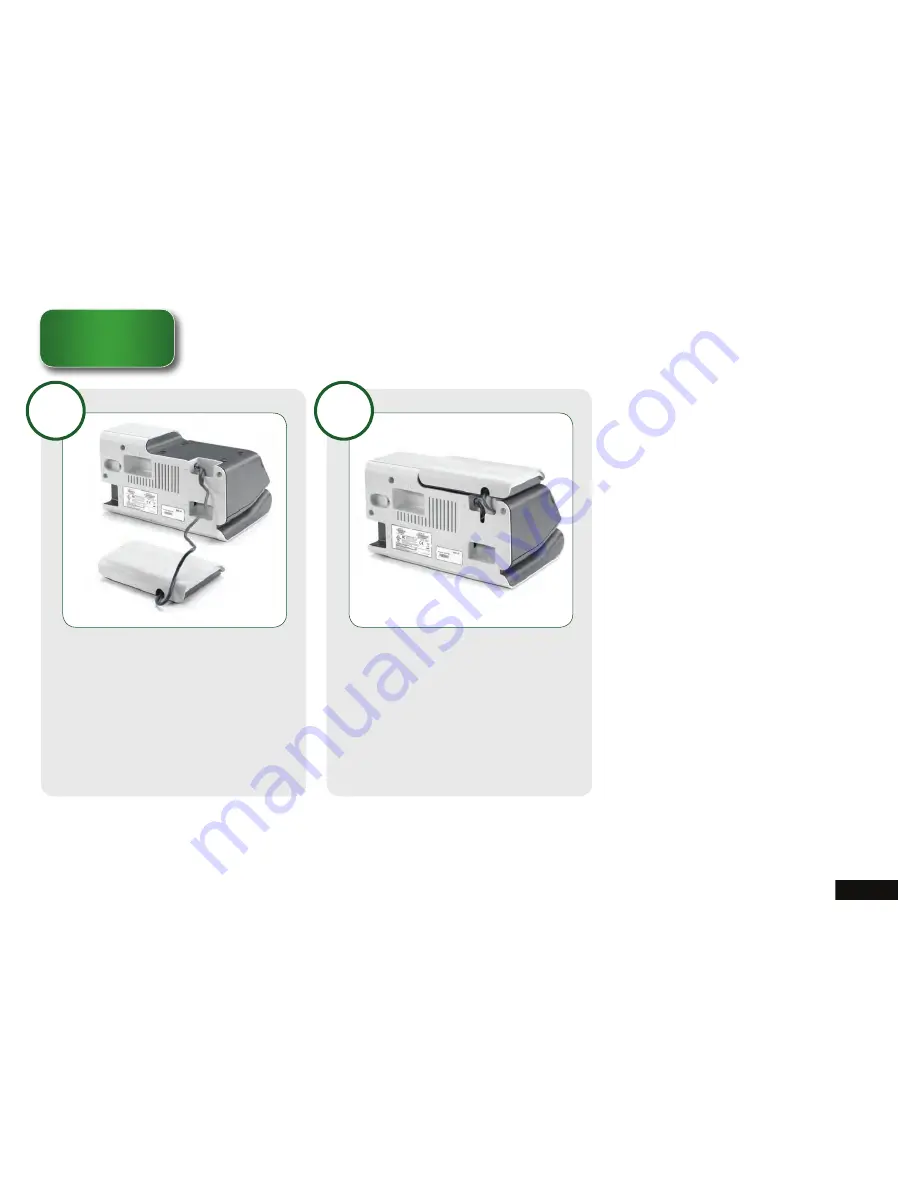
install the scale
place the scale on top of the im280 imeter™.
connect the scale connector to the scale jack.
a
b
Страница 1: ...internet install guide IM280 iMeter Postage Meter...
Страница 2: ...ng internal ink postage meter avoid using too much force to prevent personal injury or damaging equipment To prevent overheating do not block the equipment ventilation openings Do not remove bolted co...
Страница 3: ...Contents IM280 iMeter Power Supply AC Power Cord Scale Internet Cable Ink Cartridge Postage Meter USB Cable Not needed for this connection type...
Страница 4: ...ing Write down the serial number and store it in a safe place You will need to reference the serial number if support is needed A Insert the postage meter into the IM280 1 Insert with the labels facin...
Страница 5: ...foam and then remove the cardboard Remove the ink cartridge from the packaging Remove the tape from the ink cartridge Open the blue ink cartridge lever 1 Insert the ink cartridge with the tab to the r...
Страница 6: ...3 STEP 3 INSTALL THE SCALE Place the scale on top of the IM280 iMETER Connect the scale connector to the scale jack A B...
Страница 7: ...1 Plug one end of the internet cable into the internet cable port on the mailing system and the other end into the wall jack or router 2 If you do not know where your internet connection is located co...
Страница 8: ...5 STEP 5 CONNECT THE POWER Plug the power supply into the machine Plug the AC power cord into the power supply Plug the AC power cord into the wall outlet A B C...
Страница 9: ...ies of steps you will be performing functions directly on the control panel of the IM280 Power up The IM280 will display a progress screen It may take up to a minute to initialize STEP 5 continued CON...
Страница 10: ...7 Select Next by pressing the OK button Select OK by pressing the OK button Select Next by pressing the OK button This action was previously completed in STEP 4 STEP 6 CONFIGURING THE IM280 A B C...
Страница 11: ...ect Next by pressing the OK button NOTE You have already connected the internet cable Press the OK button Internet LAN should be highlighted indicating selection D E STEP 6 continued CONFIGURING THE I...
Страница 12: ...sing the OK button Several screens will display as the machine connects to the server Select No by pressing the BACK button Postage will be added in a later step Press the OK button STEP 7 ACTIVATE TH...
Страница 13: ...10 Select Ok by pressing the OK button D STEP 7 continued ACTIVATE THE POSTAGE METER...
Страница 14: ...11 Select Ok by pressing the OK button This was previously completed in STEP 2 Select Next by pressing the OK button Select Next by pressing the OK button STEP 8 PRINT ALIGNMENT A B C...
Страница 15: ...t on the envelope Choose which line on the imprint is the straightest Look at the test imprint and find the letter where the top and bottom lines are most closely aligned In this example line C would...
Страница 16: ...t Ok by pressing the OK button Use the up or down arrow buttons on the IM280 iMeter to select the letter C or whatever letter was represented as the straightest line from your test imprint Press the O...
Страница 17: ...button to select Add Funds Press the OK button Press the FUNDS button Use the numeric keypad to enter the amount of postage you want to add 1 Postage value must be whole numbers 2 Press the C button...
Страница 18: ...nt balance displays the amount entered in the prior step Select Ok by pressing the OK button Several screens will appear as the machine contacts the server D STEP 9 continued LOADING FUNDS INTO THE PO...
Страница 19: ...16 STEP 10 VERIFY OPERATION Place an envelope on the scale Place the envelope into the mail path to print the postage A B...
Страница 20: ...be found on your invoice Note Meter serial number begins with 128 B The TMS number is the Funding Account Number When entering this number do not enter the leading zeros From the internet explorer of...
Страница 21: ...r registration is almost done Check your email and click the link to activate your account Enter the requested information and then click Register Now Your registration is now complete Follow the inst...
Страница 22: ...continued web registration For additional information or general product questions visit www haslerinc com 280helpdesk You are now logged into your account Enter your username and password then click...
Страница 23: ...product names may be trademarks and are the property of their respective owners All information in this document including descriptions of features functions performance and specifications is subject...