MM-015371-001, Rev. C
35
MOTORCYCLE’S RADIO BRACKET
(NOT SUPPLIED)
(Made From AA01-MAMW, Sh. 2, Rev. -)
Figure 6-2: Alternate Mounting for Adapter Bracket
6.3 INSTALLING THE RADIO IN THE CASE
6.3.1
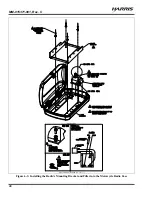
Install the Radio’s Mounting Bracket
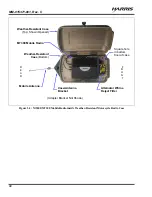
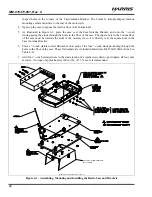
Install the radio’s mounting bracket into the weather-resistant motorcycle radio using the following
procedure. Also refer to Figure 6-3 as necessary:
1.
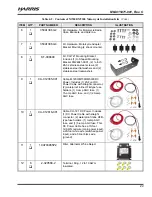
Obtain Radio Mounting Bracket FM103111V1 from Remote-Mount Radio Mounting Bracket Kit
KT23117 (Item 4 in Table 4-2).
2.
If not already, open-up the case to expose the interior floor in the bottom-half of the case.
3.
Position the bracket on the case’s interior floor, at its mounting location. The large notches in the
sides of the bracket must be positioned towards the front of the case. (Some early brackets did not
have these notches.) The square hole in the floor is towards the front.
4.
Secure the bracket to the case’s floor using four M6 x 14 mm bolts and four external-tooth
lockwashers included in Hardware Kit 350A1396G1 (Item 5 in Table 4-2).
5.
Tighten these four bolts securely. A torque of between 45 and 65 in.-lbs. (5.1 to 7.3 N.m.) is
recommended.
6.3.2
Install the Radio into Mounting Bracket
Install the radio into its mounting bracket as follows:
1.
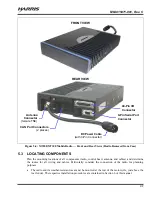
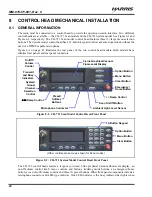
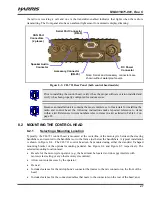
Lay the radio down into the mounting bracket with its front surface towards the front of the case. This
positions the connectors on the rear panel of the radio towards the rear of the case and motorcycle.
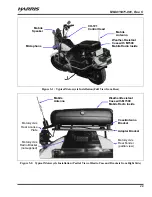
See Figure 5-3 and Figure 5-4 on pages 30 and 31.
2.
Attach the radio to the bracket using the six (6) M5 x 10 mm stainless-steel socket-head screws, and
flatwashers and lockwashers included with the Remote-Mount Radio Mounting Bracket Kit KT23117
(item 4 in Table 4-2). See Figure 6-1.
3.
Tighten all six screws using a 4-millimeter hex key wrench until each lockwasher is fully compressed
and the radio is firm and flush in between the brackets.

