


Straw Blower
Assembly
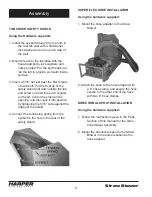
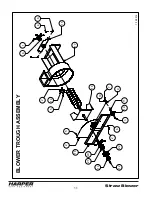
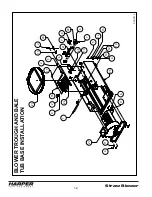
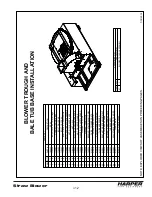
TUB COVER SAFETY SHIELD
Using the Hardware supplied:
1. Install the eyebolt through the top hole in
the rear tub wall with a flat washer,
lock washer and nut on each side of
the wall.
2. Mount the tub to the tub base with the
truss-head bolts, lock washers and
nuts provided. Put the bolt heads ins-
ide the tub to provide a smooth inside
surface.
3. Insert a 5/16” nut just past the first thread
of each bolt. Put the front lip of the
safety shield (lid) down inside the tub
and screw one bolt into each coupler
on the lid. Center the shield in the
opening, and then lock it into position
by tightening the 5/16” nuts against the
edges of the shield.
4. Connect the tensioning spring from the
eyebolt to the hole in the rear of the
safety shield.
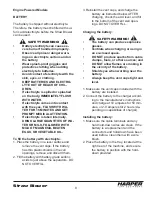
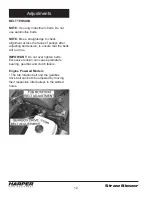
SUPER-FLEX HOSE INSTALLATION
Using the hardware supplied:
1. Mount the hose adapter to the Straw
Blower.
2. Attach the hose to the hose adapter with
a 6” hose clamp, and secure the hose
handle to the other end of the hose
with two 6” hose clamps.
DIRECTIONAL SPOUT INSTALLATION
Using the hardware supplied:
1. Follow the instructions given in the Parts
Section of this manual for the Direc-
tional Spout Assembly.
2. Mount the directional spout to the Straw
Blower in the same location as the
hose adapter.
8
Содержание Straw Blower 1800
Страница 1: ...Straw Blower Straw Blower 1800 5 2016 OPERATOR S MANUAL...
Страница 2: ...Straw Blower...
Страница 8: ...Straw Blower 6...
Страница 19: ...Straw Blower R R...
Страница 20: ...Straw Blower...
Страница 35: ...Straw Blower...
Страница 36: ...Straw Blower 1 11 7 21 2014 17 23 4 1 9 13 8 16 25 3 11 2 7 12 6 FINAL ASSEMBLY 19 21 20 10 14 22 15 1 5 23 18...
Страница 41: ...Straw Blower NOTES...


