background image


Setting up 


DMS 70

DMS 70

DMS 70

DMS 70 Quattro/Dual 


35 


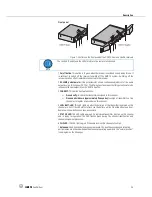
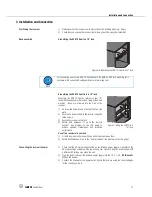
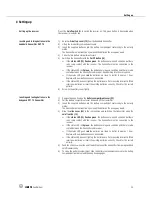
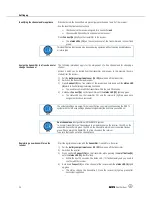
You can also start this process from the 

receiver

: Receiver -> Transmitter 

1)


Pull the 

battery compartment cover (14 / 22) 

down and off the transmitter. 

2)


Switch on the receiver. 

3)


Press 

Connect (3)

 on a free channel of the receiver and hold down until the 

status


LED 

(5)

 starts to flash after approximately 2 seconds. 


You need to confirm with the transmitter within the next 30 seconds. 

4)


Press  and  hold 

Connect  (16)

  on  the  transmitter  while  pressing  the 

on/off  button(15)


until the 

status


LED (13)

 lights up green. 


The  status  LEDs  on  the  transmitter  (13)  and  the  receiver  (5)  light  up  green  after 
successful registration. 


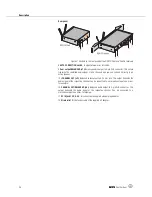
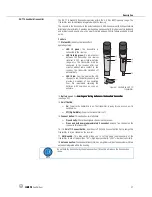
1)


Switch on the handheld transmitter using the 

on/off button (15)

2)


Switch on your PA system or amplifier. 

3)


Assign the handheld transmitter and receiver to a free channel. 

4)


Speak or sing into the microphone and watch the 

CLIP LED (6)

 on the receiver: 


Set the 

GAIN switch (17) 

to "HIGH" under normal conditions. 


If the CLIP LED lights up frequently or all the time when you sing loudly, the input 
sensitivity of the transmitter is too high. Set the GAIN to "LOW". 

5)


Set  the  volume  of  the  PA  system  or  amplifier  referring  to  the  appropriate  instruction 

manual or by ear. 


NOTE


After two minutes without radio contact with the receiver (receiver is OFF, power failure, outside 
range, etc) the connected transmitters switch off automatically. 


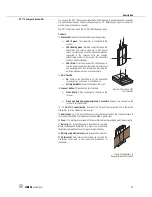
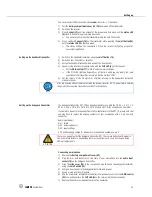
The bodypack transmitter DPT 70 has been designed for use with the CK 55 L, C 411 L, C 
520 L, C 555 L, C 516 ML, C 518 ML, C 519 ML and CK 77 WR-L microphones from AKG.  

If you wish to connect microphones from other manufacturers to the DPT 70, please note that 
you  may  have  to  replace  the  existing  connector  of  your  microphone  with  a  3-pin  mini  XLR 
connector. 

Audio input pinout:  
Pin 1: shield 
Pin 2: audio inphase (+) 
Pin 3: supply voltage 

A 4V positive supply voltage for condenser microphones is available on pin 3. 


ATTENTION


There is no guarantee that the bodypack transmitter DPT 70 will work perfectly with products 
from other manufacturers. Any damage that may result from such use is not covered by the 
AKG warranty scheme. 


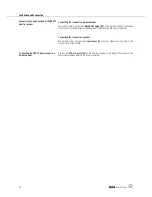
Connecting a microphone 

1)


Remove the 

battery compartment cover (22)

2)


Plug  the  mini  XLR  connector  on  the  cable  of  your  microphone  into  the

  audio  input 

socket (19)

 on the bodypack transmitter. 

3)


Slide the 

slide  cover  (20)

  to  the  rear  position  and switch  on  the bodypack  transmitter 

using the 

on/off switch (15)

4)


Assign a free channel to the bodypack transmitter and receiver. 

5)


Speak or sing into the microphone. 

6)


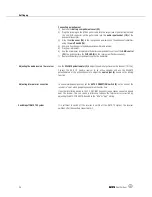
Use the screwdriver integrated in the battery compartment cover to set the 

GAIN control 

(23) 

to a position where the 

CLIP LED (6)

 on the receiver will flash occasionally. 

7)


Replace the battery compartment cover on the transmitter. 

Setting up the handheld transmitter 

Setting up the bodypack transmitter 

Содержание DMS 70 QUATTRO

Страница 1: ...USER INSTRUCTIONS 22 Please read the manual before using the equipement MODE D EMPLOI 42 Veuillez lire cette notice avant d utiliser le syst me MODO DE EMPLEO 62 Sirvase leer el manual antes de utili...

Страница 2: ...receiver 33 Inserting and testing batteries in the handheld transmitter DHT 70 33 Inserting and testing batteries in the bodypack DPT 70 transmitter 33 Identifying the channel and or appliance 34 Ass...

Страница 3: ...r heat sources such as radiators heating ducts amplifiers etc and do not expose it to direct sunlight excessive dust moisture rain mechanical vibrations or shock To avoid hum or interference route all...

Страница 4: ...de power supply 3 adapters EU UK US 1 guarantee card 1 Quick Start Guide 1 DHT 70 D5 handheld transmitter 1 DPT 70 bodypack transmitter 2 AA batteries 1 tripod adapter 1 MKG L cable 1 DSR 70 Quattro r...

Страница 5: ...nctions Press briefly to check the transmitters assigned to this channel Press and hold down approximately 2 seconds to assign a transmitter to a free channel or to register a transmitter on this chan...

Страница 6: ...ect it directly to an active speaker 10a CHANNEL OUT x2 Balanced audio output to 6 35 mm jack This output transmits the audio signal of the respective channel Can be connected to a microphone input on...

Страница 7: ...on as possible 14 Battery cover See Inserting and testing batteries in the handheld transmitter Inserting and testing batteries in the handheld transmitter Inserting and testing batteries in the handh...

Страница 8: ...T 70 Perception handheld transmitter has a dynamic standard capsule with a cardioid directional characteristic The controls are identical to those on the DHT 70 Description of the controls controls co...

Страница 9: ...transmitter is ready for use as soon as it is switched on Off Digital Mute Power to the transmitter is off 16 Connect button This button has two functions Press briefly Check the assigned channel on...

Страница 10: ...519 ML C 411 L The MKG L guitar cable from AKG lets you connect an electric guitar electric bass or keytar to the bodypack transmitter The MKG L guitar cable is included in the Instrumental Set and t...
Страница 11: ...e receiver using the fixing screws 3 Secure the receiver in the rack 4 Rotate both antennas 7 up to the normal position see diagram on the title page to achieve optimum transmission and reception perf...

Страница 12: ...put XLR socket on the mixer or amplifier Connecting the receiver to a speaker Use an XLR cable to connect the sum output 9 of all four channels on the back of the receiver to an active speaker Connect...

Страница 13: ...epress the snap hook on the battery compartment cover 22 2 Pull the battery compartment cover down and off the transmitter 3 Insert the supplied batteries into the battery compartment conforming to th...

Страница 14: ...LEDs on the transmitter 13 and the receiver 5 light up green once assignment has been successful NOTE The actuated settings are saved This means that you can simply continue using the DNS 70 system wi...

Страница 15: ...ailure outside range etc the connected transmitters switch off automatically The bodypack transmitter DPT 70 has been designed for use with the CK 55 L C 411 L C 520 L C 555 L C 516 ML C 518 ML C 519...
Страница 16: ...artment cover on the transmitter Use the VOLUME potentiometer 2 to adjust the audio output level on this channel 10 10a Connect the DSR 70 Quattro receiver to an active speaker and use the VOLUME pote...

Страница 17: ...cked up by a microphone amplified and fed back to the speakers Above a certain volume the feedback threshold this process becomes a vicious circle making the sound system howl and screech The only sol...

Страница 18: ...back or down If the microphone sounds thin or flat move the microphone capsule closer to your mouth Find the optimum position during the soundcheck Windshield If for instance on an open air stage exc...

Страница 19: ...ntaining alcohol or solvents since these may damage the enamel and plastic parts 1 Unscrew and remove the wire mesh cap of the handheld transmitter 2 Take the windshield foam insert out of the wire me...

Страница 20: ...batteries are not inserted properly Insert batteries conforming to and marks Transmitter batteries are flat Replace transmitter batteries Transmitter is too far away from the receiver Move closer to...

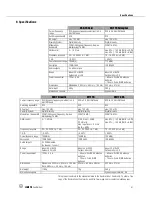
Страница 21: ...nge DFS dynamic frequency selection in 2 4 GHz ISM band DFS in 2 4 GHz ISM band DFS in 2 4 GHz ISM band Switching bandwidth DFS DFS DFS RF output max 100 mW max 100 mW max 100 mW Diversity System Digi...

Страница 22: ...Microphones Wireless Headphones Headsets Electroacoustical Components Microphones Casques HiFi Microphones sans fil Casques sans fil Micros casques Composants acoustiques Microfoni Cuffie HiFi Microfo...

Отзывы: