Producer Service
64
Vision
2
Instruction Manual
NOTE:
If configuring a firewall on a Vision2 server, incoming multicasts must be permitted.
Setting Up an Intermission
If there is no content scheduled for a certain period of time, Producer enables setting an intermission source which automatically
plays:
MPEG-2 or MPEG 4 h264 file from a Vision
2
archive
Multicast MPEG-2 source such as a DVB or Live MPEG channel
Unmanaged Live channels are also available for Intermission as well.
Perform these steps to set up an intermission:
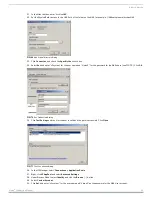
1.
Set the
File
or
Live Feed
options to indicate whether the intermission source is from a file or live feed. After making your
selection, do one of the following:
File
: Select an Archive using the Content drop down menu. Select a file using the Name drop down.
Live Feed
: Select a live channel from the Live drop down menu.
2.
Click
Apply
.
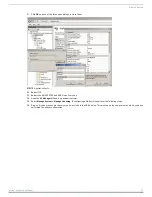
3.
Set the
Enable Intermission
setting to
ON
in the Intermission section and click
Apply
.
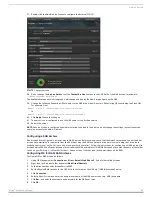
4.
Set the
Stream Enable
setting to
ON
to activate the Producer.
The Name and URL text boxes populate with the name and path of the intermission source. This source will play if there is no
scheduled content.
Viewing the Stream
Enable the Stream and click the
Watch
icon. Some content must be scheduled or an intermission source enabled, otherwise nothing
will be seen.
Intermission Enable
Use this setting to enable/disable the Intermission. If the Intermission is not
enabled and nothing is scheduled, the user sees a blank screen.
Source
Defines whether to use a file playing in a loop or a live feed during Intermissions
between scheduled content.
Live (Live Feed only)
Select the live channel from the available list. This option only appears if you select
Live Feed for your source.
Content (File only)
The Archive which is to be used as the source of the videos to be scheduled.
Name (File only)
Select the file matching the format and bitrate selected to use as the intermission
source.
URL
This value is read only and shows the path to the file or Live Channel as
appropriate.
Configure Options

