Using the Scheduling Panel Setup Wizard
Acendo Book Scheduling Touch Panels - Instruction Manual
32
Setup Wizard - GROUP page options
Clear Members
Press to clear any and all members of the Group with which this Master panel is associated.
Member Configuration
With
Member
selected, the following Member Configuration options are presented:
Master IP/Hostname Enter the Master IP/Hostname of the Master panel for the Group to which this Member panel belongs.
Username
Enter the Username associated with the Master panel for this panel’s Group.
Password
Enter the Passwords associated with the Master panel for this panel’s Group.
Creating a Scheduling Group
Creating a Group entails configuring one Acendo Book panel to be the
Master
panel, and configuring other panels to be
Member
panels:
Configuring the Master Panel
Only one Acendo Book panel can be assigned as the Master panel. If there only one Acendo Book panel, then it must be configured
as the Master (see FIG. 36 on page 29).
1.
In the
Setup Wizard: Step 5 - GROUP
page, select
Master
.
2.
Enter a
Username
and
Password
for this panel. These credentials will be required for the Member panels to communicate
with the Master panel.
3.
Press
Next
to proceed to the ROOM page.
Configuring Member Panels
Once an Acendo Book panel has been configured as the Master panel, up to 49 Acendo Book panels can be configured as
Members of the Master panel’s Group:
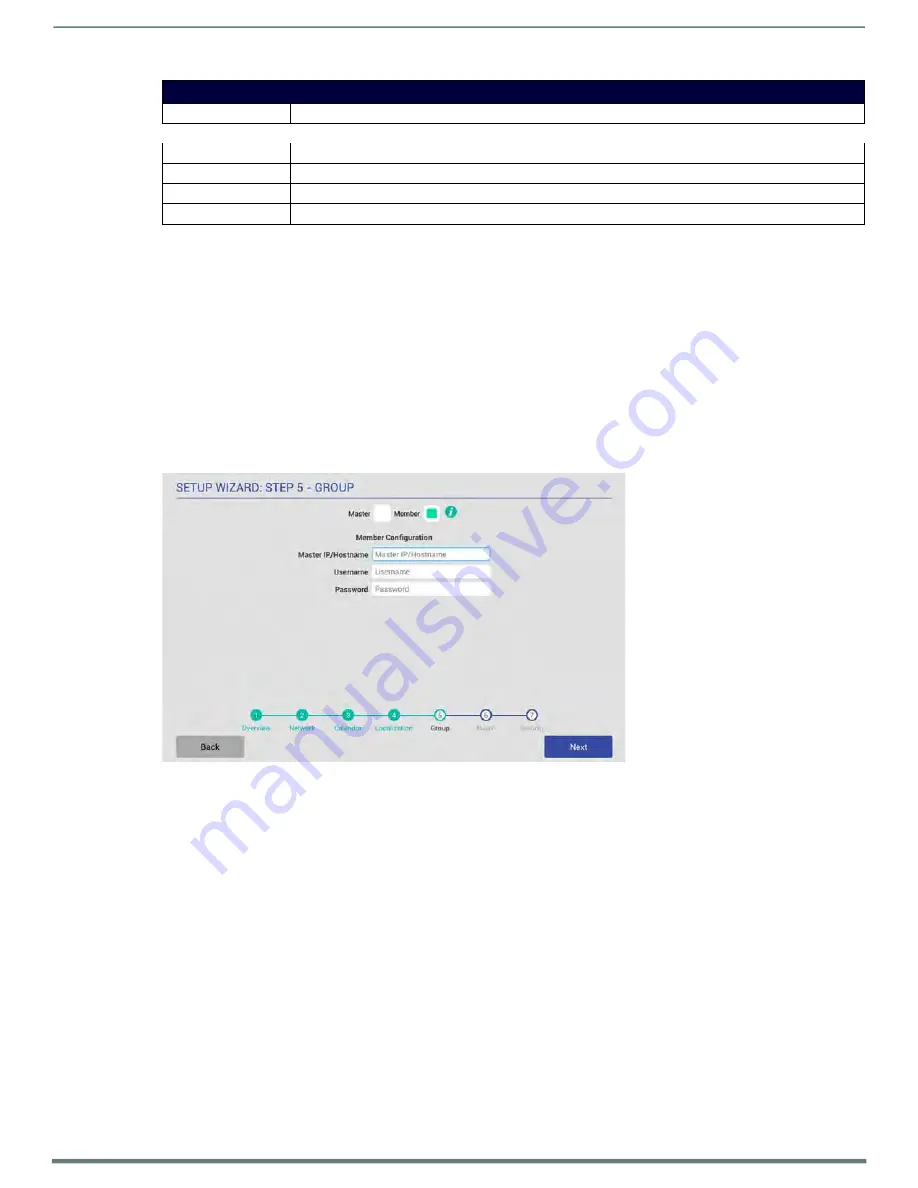
FIG. 38
Setup Wizard: Step 5 - GROUP page (Member Settings)
1.
In the
Setup Wizard: Step 5 - GROUP
page, select
Member
.
2.
Enter the IP or Hostname of the Master panel.
3.
Enter the
Username
and
Password
for the Master panel.
4.
Press
Next
to proceed to the ROOM page.
Once a Group has been configured, users can browse other Acendo Book panels in the Group for availability, and reserve a
meeting on any available panel in the Group. See the
section on page 69 for details.
NOTE:
These settings can be changed later if necessary, via the GROUP Settings page (see Viewing/Editing Group Settings