


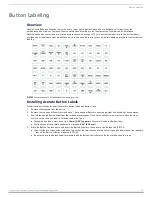


Button Labeling
22
Instruction Manual - Massio ControlPads and Keypads
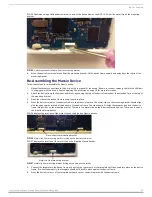
FIG. 25 illustrates using a flat-head screwdriver to unlock the device frame of an MCP-106 from the metal clip on the mounting
bracket.
FIG. 25
Unlocking the device frame from the mounting bracket
4.
When the device frame is unlocked from the mounting bracket, lift the device frame upward and away from the top lip of the
mounting bracket.
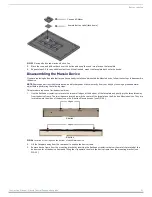
Re-Assembling the Massio Device
Follow these steps to re-assemble the Massio device.
1.
Make all necessary connections to the ports on the rear panel of the device. Be sure to connect category cable to the LAN port
to supply power to the device. See the
section on page 15 for more information.
2.
Attach the device frame to the mounting bracket by hooking the top of the device frame under the extended lip(s) at the top of
the mounting bracket.
3.
Press the sides of the device frame to snap them into place.
4.
Press the bottom corners of the device frame to snap them into place. The metal clips on the mounting bracket should align
with the open spaces located at the bottom of the device frame. The clips should fit inside these spaces and lock the device
frame into position on the mounting bracket. There are two metal clips on the 8-button Massio devices. There is only one on
the 6-button Massio devices.
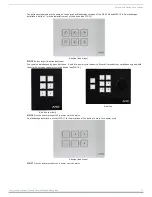
FIG. 26 displays the locations of the metal clips on the 8-button Massio devices.
FIG. 26
Metal clips from mounting bracket locking device frame onto bracket
FIG. 27 displays the location of the metal clip on the 6-button Massio devices.
FIG. 27
Metal clip from mounting bracket locking device frame onto bracket
5.
Connect the faceplate to the device frame by pressing the top corners of the faceplate until they snap into place on the device
frame. If connected properly, the faceplate should hold itself in place against the device frame.
6.
Press the bottom corners of the faceplate until each corner snaps into place with the device frame.
Metal clips from mounting bracket
Metal clip from mounting bracket


