Harman AMX ACENDO BOOK ACB-2110 Скачать руководство пользователя страница 3

3

Acendo Book Scheduling Touch Panels - Instruction Manual

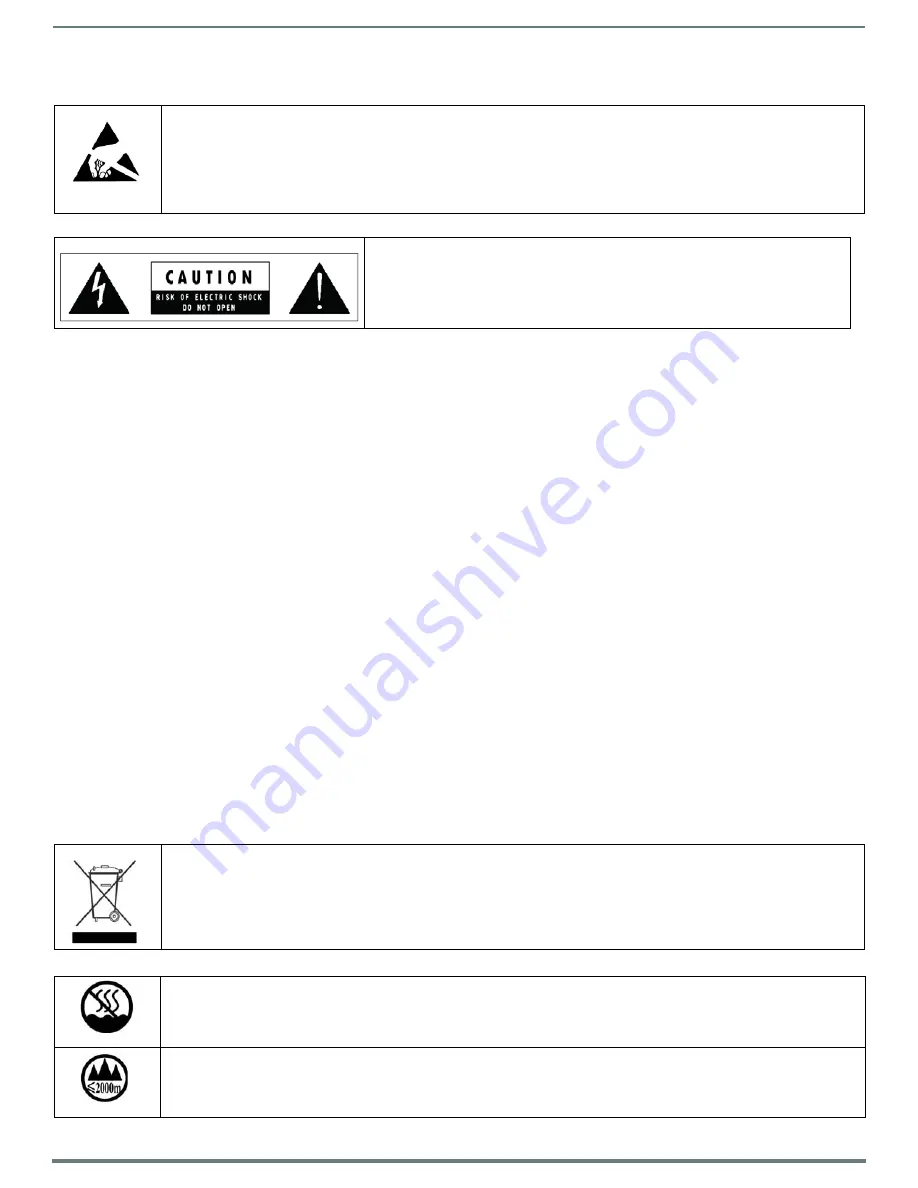
ESD WARNING 

WARNING

: This product is intended to be operated ONLY from the voltages listed on the back panel or the recommended, or

included, power supply of the product. Operation from other voltages other than those indicated may cause irreversible

damage to the product and void the products warranty. The use of AC Plug Adapters is cautioned because it can allow the

product to be plugged into voltages in which the product was not designed to operate. If the product is equipped with a

detachable power cord, use only the type provided with your product or by your local distributor and/or retailer. If you are

unsure of the correct operational voltage, please contact your local distributor and/or retailer.

WARNING

: Avoid exposure to extreme heat or cold. 

FCC AND CANADA EMC COMPLIANCE INFORMATION:

This device complies with part 15 of the FCC Rules. Operation is subject to the following two conditions:
(1) This device may not cause harmful interference, and (2) this device must accept any interference received, including

interference that may cause undesired operation.
NOTE: This equipment has been tested and found to comply with the limits for a Class B digital device, pursuant to part 15 of

the FCC Rules. These limits are designed to provide reasonable protection against harmful interference in a residential

installation. This equipment generates, uses and can radiate radio frequency energy and, if not installed and used in

accordance with the instructions, may cause harmful interference to radio communications. However, there is no guarantee

that interference will not occur in a particular installation. If this equipment does cause harmful interference to radio or

television reception, which can be determined by turning the equipment off and on, the user is encouraged to try to correct

the interference by one or more of the following measures:

•   Reorient or relocate the receiving antenna.
•   Increase the separation between the equipment and receiver.
•   Connect the equipment into an outlet on a circuit different from that to which the receiver is connected.
•   Consult the dealer or an experienced radio/TV technician for help.

CAN ICES-3 (B)/NMB-3(B) 

EU COMPLIANCE INFORMATION:

Eligible to bear the CE mark; Conforms to European Union Low Voltage Directive 2014/35/EC; European Union EMC Directive

2014/30/EU; European Union Restriction of Hazardous Substances Recast (RoHS2) Directive 2011/65/EU; European Union WEEE

(recast) Directive 2012/19/EU; European Union Eco-Design Directive 2009/125/EC; European Union Registration, Evaluation,

Authorization and Restriction of Chemicals (REACH) Directive 2006/121/EC.

You may obtain a free copy of the Declaration of Conformity by visiting 

http://www.amx.com/techcenter/certifications.asp

.

WEEE NOTICE: 

ENVIRONMENTAL:  

To avoid ESD (Electrostatic Discharge) damage to sensitive components, make sure you are properly grounded before

touching any internal materials. 

When working with any equipment manufactured with electronic devices, proper ESD grounding procedures must be

followed to make sure people, products, and tools are as free of static charges as possible. Grounding straps, conductive

smocks, and conductive work mats are specifically designed for this purpose.

Anyone performing field maintenance on AMX equipment should use an appropriate ESD field service kit complete with at

least a dissipative work mat with a ground cord and a UL listed adjustable wrist strap with another ground cord

WARNING

: Do Not Open! Risk of Electrical Shock. Voltages in this equipment are

hazardous to life. No user-serviceable parts inside. Refer all servicing to qualified

service personnel. 
Place the equipment near a main power supply outlet and make sure that you can

easily access the power breaker switch.

This appliance is labeled in accordance with European Directive 2012/19/EU concerning waste of electrical and electronic

equipment (WEEE). This label indicates that this product should not be disposed of with household waste. It should be

deposited at an appropriate facility to enable recovery and recycling. 

This device is designed and evaluated under the condition of non-tropical climate; it can only be used in locations in non-

tropical climate areas. Using the device in tropical climate areas could result in a potential safety hazard.

This device is designed and evaluated under the condition of altitude below 2000 meters above sea level; it can only be used in

locations below 2000 meters above sea level. Using the device above 2000 meters could result in a potential safety hazard.

Содержание AMX ACENDO BOOK ACB-2110

Страница 1: ...INSTRUCTION MANUAL ACB 2110 ACB 2107 ACENDO BOOK 10 7 SCHEDULING TOUCH PANELS...

Страница 2: ...ched particularly at plugs convenience receptacles and the point where they exit from the apparatus 11 ONLY USE attachments accessories specified by the manufacturer 12 USE ONLY with a cart stand trip...

Страница 3: ...p CAN ICES 3 B NMB 3 B EU COMPLIANCE INFORMATION Eligible to bear the CE mark Conforms to European Union Low Voltage Directive 2014 35 EC European Union EMC Directive 2014 30 EU European Union Restric...

Страница 4: ...allation 14 Installation Recommendations 15 Mounting Options 15 Power Over Ethernet 15 Plastic Backbox 15 STEP 1 Install the Plastic Backbox 16 STEP 2 Insert Connectors on the Touch Panel 18 STEP 3 Se...

Страница 5: ...ing the IP Address on the Acendo Book Panel 37 Proxy Setup 38 SERVICE CONTROLLER 38 PROXY SETTINGS 38 ACCOUNT INFORMATION 38 Viewing Editing Calendar Settings 39 More Information 39 Viewing Editing Lo...

Страница 6: ...ling VNC 49 Configuring VNC Access 50 CONNECTIONS Ethernet 50 Setting Static IP Information 51 Entering a New Hostname 51 SYSTEM Date Time 52 Manually Setting a Custom NTP Server 52 Manually Setting t...

Страница 7: ...Scheduling a Meeting for Later 68 Browse Rooms for Scheduling 69 BROWSE ROOMS Button 69 Viewing Editing Meeting Details 70 Editing Meeting Details 71 Editing Meeting Times 71 Deleting a Meeting From t...

Страница 8: ...n 80 Creating a New Room Mailbox Exchange 2013 and Exchange 2016 80 Additional Documentation 81 Creating a New Room Mailbox Office 365 81 Additional Documentation 81 Appendix D Configuring Google Reso...

Страница 9: ...en and availability bar LEDs and a low profile design for a subtle aesthetic The ACB 2110 2107 can be mounted on any flat surface including glass or stone inside or outside a conference room or classr...

Страница 10: ...e Setup Wizard Step 6 ROOM section on page 31 Recessed Settings pushbutton located on the left top edge provides access to the SETTINGS window To open the SETTINGS window use a paper clip or similar t...

Страница 11: ...mm x 90 mm 7 0 178 mm diagonal Resolution Landscape 1024x600 Aspect Ratio Landscape 16 9 Brightness 400 cd m2 Contrast Ratio 800 1 Color Depth 16 7M colors Illumination LED Touch Overlay Resistive VIE...

Страница 12: ...itial setup and configuration ACB 2107 Product Specifications Cont REGULATORY FCC Part 15 Class B AUS NZ EN 55032 2012 AC 2013 Class B CISPR32 2015 Brazil InMetro IEC EN 60950 KN32 Class B CAN ICES 3...

Страница 13: ...efer to the Scheduler Settings section on page 36 for details Configuring Touch Panel Settings ADVANCED SETTINGS are used to configure settings for the touch panel itself Touch panel specific settings...

Страница 14: ...into consideration to maintain the product within the specified operating temperature FIG 6 shows an AMX device installed in a wall with a filled volume such as with insulation or concrete as well as...

Страница 15: ...ed with each mounting kit for instructions Power Over Ethernet Power for Acendo Book Scheduling Panels is supplied via Power Over Ethernet PoE utilizing an AMX certified PoE injector such as the PS PO...

Страница 16: ...screws or nails from the drywall before beginning the cutout process MXD 1001 L Template Backbox 10 1 Touch Panel Modero S Series 68 2265 03 MXD 701 L Template Backbox 7 0 Touch Panel Modero S Series...

Страница 17: ...mounting surface should also be smooth and flat For thin walls or solid surfaces use mounting screws not included see FIG 8 5 Extend the Locking Tabs by tightening the Locking Tab screws until snug FI...

Страница 18: ...bottom edge of the touch panel into position until it rests against the lower outside edge of the Backbox NOTE If a gap is observed between the panel and the Backbox or binding is felt while locking...

Страница 19: ...t the two bottom clips FIG 16 FIG 17 2 Grasp the bottom of the panel and pull gently outward until the side of the panel is free of the snap Use your other hand to stabilize the front of the touch pan...

Страница 20: ...carefully lift up and out to release the tabs on the top edge of the panel Installation Dimensions ACB 2110 Dimensions Detailed specifications drawings for the ACB 2110 are available to download from...

Страница 21: ...imensions Detailed specifications drawings for the ACB 2107 are available to download from www amx com FIG 20 ACB 2107 Notes Dimensions in parenthesis are in millimeters Additional detailed installati...

Страница 22: ...details Press the Next button in each Wizard page to save changes and proceed to the next page Note that these settings can be changed later via the Settings pages see the Scheduler Settings section...

Страница 23: ...abled Static Select to manually configure the IP address for this panel using the fields provided on this page IP Address Enter a valid IP Address for this panel Subnet Mask Enter a valid Subnet Mask...

Страница 24: ...Acendo Book Panel for use with Microsoft Exchange 1 In the Setup Wizard Step 3 Calendar page select Microsoft Exchange to invoke the following options FIG 26 FIG 25 Setup Wizard Step 3 CALENDAR Micro...

Страница 25: ...server as required Calendar Email ID Enter the Email ID including domain used by the scheduling service Example ConfRoom1 acme onmicrosoft com Certificate Validation Select Strict to include hostname...

Страница 26: ...Google Calendar FIG 29 to invoke the Add option 2 Press Add to invoke the Google sign in page FIG 30 3 In the Google Sign In Page enter your Google Service account login information and press Next 4...

Страница 27: ...R page indicating the current Google Username and the Calendar Room associated with this panel FIG 33 7 Fill in these fields and press Verify to verify that the scheduling panel can connect to the sch...

Страница 28: ...priate time zone Time Format Indicates the current time display setting for this panel default 12 hour To change the time display to 24 hour format press the 24 hour button Date Format Indicates the c...

Страница 29: ...ot show availability information correctly a room listed in the Available Rooms page after pressing Browse Rooms will be listed as NOT AVAILABLE NOTE Up to 49 Acendo Book panels can be configured as M...

Страница 30: ...page select Member 2 Enter the IP or Hostname of the Master panel 3 Enter the Username and Password for the Master panel 4 Press Next to proceed to the ROOM page Once a Group has been configured users...

Страница 31: ...preview the specified image The LOGO IMAGE window provides a preview of the selected logo as it will appear on both the Available green and Occupied red backgrounds FIG 41 FIG 39 Setup Wizard Step 6 R...

Страница 32: ...t is displayed next to Logo Image FIG 44 Once a logo image has been uploaded a Delete button is provided on this page Press Delete to delete the current custom logo image FIG 41 Setup Wizard Step 6 Ro...

Страница 33: ...if the Require Meeting PIN Code option above is enabled Read Only Mode Press to toggle this option default disabled When enabled all fields on the Room page are displayed but are read only In this cas...

Страница 34: ...l Web Client If a meeting is booked directly via the scheduling system software then the subject line of the meeting will be replaced with the Private Meeting Subject text default Private Meeting Meet...

Страница 35: ...m page for this panel is displayed FIG 48 Note that the settings made in the Scheduling Panel Setup Wizard can be changed via the Scheduler Settings pages Refer to the Scheduler Settings section on pa...

Страница 36: ...the Administrator password for the scheduling system in the ENTER PASSWORD field FIG 50 The default password is 1988 This password is configured in the Security page of the Setup Wizard see Setup Wiz...

Страница 37: ...anually entered When DHCP is selected only the Hostname field is enabled for editing 5 Press Proxy Setup to enable disable the Proxy option and configure Proxy Settings and Account Information as requ...

Страница 38: ...Host Press to manually enter the Host IP Address of the proxy server Port Press to manually enter the Port number on the proxy server that will be used for this RMBK panel Proxy Type Press to select...

Страница 39: ...nfiguring Acendo Book Panels for Microsoft Exchange Office 365 on page 78 See Appendix D Configuring Google Resources on page 82 See Appendix A Troubleshooting on page 73 Viewing Editing Localization...

Страница 40: ...sting of all time zones that can displayed on this Acendo Book Panel in the SELECT TIMEZONE window FIG 60 NOTE Press anywhere outside the SELECT TIMEZONE window to close the window without making a se...

Страница 41: ...zation Page 2 Press Edit to access the LOCALIZATION Settings page 3 Next to Default Meeting Length Increment press to select 15 mins default setting 30 mins or 60 mins 4 Press Save in the LOCALIZATION...

Страница 42: ...d on page 31 4 Press Save to save changes and close the ROOM Settings page Viewing Editing Security Settings 1 In any SETTINGS page press Security to view the current Room settings for this panel FIG...

Страница 43: ...be altered with changes in connectivity connecting a USB stick to the panel for instance or changes to other pages within the menu Advanced Settings Menu Options The Advanced Settings Menu is separate...

Страница 44: ...isplays basic panel information such as available memory and screen resolution dimensions read only FIG 68 INFO Device Info page INFO Device Info page options DEVICE Device IP Displays the panel s IP...

Страница 45: ...ut rebooting press Cancel or press outside the Reboot window Shutting Down the Panel 1 In the Maintenance page select Shutdown This opens the Shutdown window FIG 71 2 Press OK to shut down the panel T...

Страница 46: ...Default notification sound window FIG 74 2 Choose a sound from the presented list selecting a new sound will play it once The sound will only be audible if the Notifications slide bar in Volumes is n...

Страница 47: ...CE Display page DEVICE Display page options Brightness Sets the display brightness and contrast levels of the panel See Adjusting Panel Brightness on page 47 for details Display Timeout Indicates the...

Страница 48: ...Book panels automatically self calibrate on startup The Calibration Test page may be used to verify the accuracy of that calibration Select Calibration Test to open the Calibration Test page FIG 78 N...

Страница 49: ...default setting is OFF FIG 79 Calibration Test Options window FIG 80 DEVICE VNC page DEVICE VNC page options VNC Enable Disable Press to toggle on off the VNC server on the panel default enabled VNC...

Страница 50: ...ns DHCP Static Sets the panel to either DHCP or Static communication modes DHCP is an IP Address assigned to the panel by a DHCP server If DHCP is selected the other Network Connection fields are disa...

Страница 51: ...rmation for each field presented If the field accepts alphanumeric characters a keyboard opens instead Press Next in the on screen keypad to proceed to the next field 5 When complete press OK to save...

Страница 52: ...e Set NTP Server window 2 Select Custom to invoke the NTP Server window FIG 87 3 Press Set NTP server to enter the IP address of the NTP Server to use via the on screen keyboard 4 Press OK to save cha...

Страница 53: ...l Settings menu fields Personal Dictionary Lists all words saved in the panel s personal dictionary file See Personal Dictionary on page 54 for details KEYBOARD INPUT METHODS Default Specify the defau...

Страница 54: ...to the panel s personal dictionary 1 In the Language Input page press Personal dictionary to open the Personal Dictionary window FIG 91 2 Press the Add button in the upper right hand corner of the pag...

Страница 55: ...e you may also change the input method such as choosing a Dvorak keyboard To change the keyboard layout 1 In the Language Input page under KEYBOARD INPUT METHODS press Default to open the Choose Input...

Страница 56: ...utside of the window to close the Choose Keyboard Layout window without changing the selection to return to the Keyboard Options window FIG 94 on page 55 Changing the Pointer Speed 1 Under MOUSE TRACK...

Страница 57: ...y the default admin password for this panel See the Setting a Password for This Panel section on page 57 for details CREDENTIAL STORAGE Trusted Credentials Press this option to view a listing of all t...

Страница 58: ...tificates is separated into two categories System and User The initial view of the Trusted Credentials page is the SYSTEM list an example is shown in FIG 102 NOTE It may be necessary to scroll down to...

Страница 59: ...r the selected certificate An example is shown in FIG 105 To disable this system certificate press the Disable button The panel will prompt you to verify this action press OK to proceed FIG 107 shows...

Страница 60: ...ystem certificates can be used with Microsoft Exchange and Office 365 Calendar setups see FIG 25 on page 24 Supported certificate file extensions are crt pem and der 1 Insert an external USB storage d...

Страница 61: ...SET Factory Data Reset Erases all data on the panel and resets the panel back to it s factory default settings See Factory Data Reset on page 61 for details Reset Settings Select to revert the panel b...

Страница 62: ...age without saving any changes press No NOTE The Scheduling Panel Setup Wizard will be launched again if a Reset Settings is performed on the panel see page 22 Enable Disable Web Services This option...

Страница 63: ...ew Firmware From An External USB Stick To install new firmware to the panel from a USB stick 1 Download the latest Acendo Book panel firmware from www amx com and save it to a USB stick or other exter...

Страница 64: ...on page 62 select UPDATE next to Install Firmware from Web FIG 123 NOTE Press README to view any notes associated with the selected firmware file press Close to close the README window 2 The panel wil...

Страница 65: ...nel Select Revert to Factory Firmware and then select Yes on the confirmation window for the system to extract the factory firmware this can take a minute and then automatically initiate a firmware up...

Страница 66: ...setup page see the Viewing Editing Room Settings section on page 42 NOTE Room Status may not be shown if a custom logo is in use Room Occupied Page If the Room is currently in use for a scheduled meet...

Страница 67: ...the duration of the meeting if necessary Use the Start End Left Right arrows to adjust the start time of the meeting if necessary 3 Press Reserve to reserve this room for the time alloted 4 If prompte...

Страница 68: ...ngs are set to last for 30 minutes FIG 132 3 Press Add Meeting Details to open the ADD MEETING DETAILS page FIG 137 4 Press Reserve to reserve the meeting as specified 5 If prompted enter the Meeting...

Страница 69: ...ing Groups If the device is configured as the Master panel of a Scheduling Group the BROWSE ROOMS button is automatically removed if no Member panels have communicated with the Master panel for 5 minu...

Страница 70: ...details and reserve the room for the specified time a Book for Use the up down arrow buttons to adjust the length of the meeting reservation default 15 minutes b Start End Use the left right arrow but...

Страница 71: ...ILS page press Edit Meeting Details to open the EDIT MEETING DETAILS page FIG 145 2 Press inside the first text field to edit the Meeting Title text via the on screen keyboard 3 Press inside the secon...

Страница 72: ...ing PIN Code in the ENTER PIN CODE page FIG 150 4 Press Submit to return to the Room page The selected meeting is removed from the updated calendar FIG 151 FIG 148 ENTER PIN CODE page FIG 149 DELETE M...

Страница 73: ...e did not pass the date time validation check typically because the time on the Acendo Book Scheduling Panel is incorrect this can cause the certificate to appear to have expired Verify that the curre...

Страница 74: ...sts Valid input for this parameter is true or false The default value is false NOTE 2 In the scenario that you do not want the recurring meetings rejected when they have an end date beyond the booking...

Страница 75: ...rom checked to unchecked To change meeting from private to visible delete the meeting and re enter it Master Connection Error Displayed If the Master panel goes offline for any reason the Master panel...

Страница 76: ...l unconfirmed waiting for rmsservice to approve or reject it After rmsservice approves the meeting the organizer in this example Alan Reid receives a message confirming acceptance Using Exchange Admin...

Страница 77: ...sts to delegates option 7 Click Apply to save your changes or click OK to save your changes and close the dialog Using PowerShell NOTE You need to have permissions assigned before you can perform this...

Страница 78: ...nd Calendar Email IDs The Exchange 2010 2103 2016 or Office 365 Server has a unique User Name for each user and a unique Calendar Email ID for each room The Username and Calendar Email ID is entered f...

Страница 79: ...he Exchange server must set the room s RemovePrivateProperty to false By default this is set to true Exchange 2010 Set a Delegate on a Resource Mailbox http technet microsoft com en us library bb12497...

Страница 80: ...alog click CTRL C 8 Click New to create the new Mailbox and proceed to the New Mailbox Completion dialog 9 Click Finish Repeat this process for each RMS Location that will synchronize with RMS Additio...

Страница 81: ...ipients select Resources 3 In the Resources page toolbar click the Add button to open the New Room Mailbox dialog 4 Fill in the fields and click Save to create the new mailbox and close the New Room M...

Страница 82: ...calendars with administrator see page 84 3 Share service calendars with room administrator account see page 85 4 Ensure calendar is set to deny conflicts see page 86 1 Create Resources 1 Log in to the...

Страница 83: ...es FIG 159 6 In the Resources pane select Create a new resource FIG 160 7 Define the Resource Name Resource Type and Description FIG 161 FIG 158 Google Admin Console Google Apps Page detail FIG 159 Go...

Страница 84: ...Apps window select the Calendar app FIG 164 4 In the Calendar share the new resource calendar by selecting Add a Coworkers Calendar under Other Calendars FIG 165 5 In the Add Coworkers Calendar windo...

Страница 85: ...dar for the resource calendar in the My Calendars list FIG 168 2 In the Room Details Share This Calendar page paste the Room Manager account email address in the Person field FIG 169 3 Under Permissio...

Страница 86: ...ew calendar resource and select Calendar Settings FIG 173 2 In the Calendar Details page Auto accept invitations section verify that Auto accept invitations that do not conflict is selected FIG 174 3...

Страница 87: ...X does not assume responsibility for errors or omissions AMX also reserves the right to alter specifications without prior notice at any time The AMX Warranty and Return Policy and related documents c...

Отзывы: