Harman Kardon HS 250 Скачать руководство пользователя страница 20

20

SYSTEM SETUP

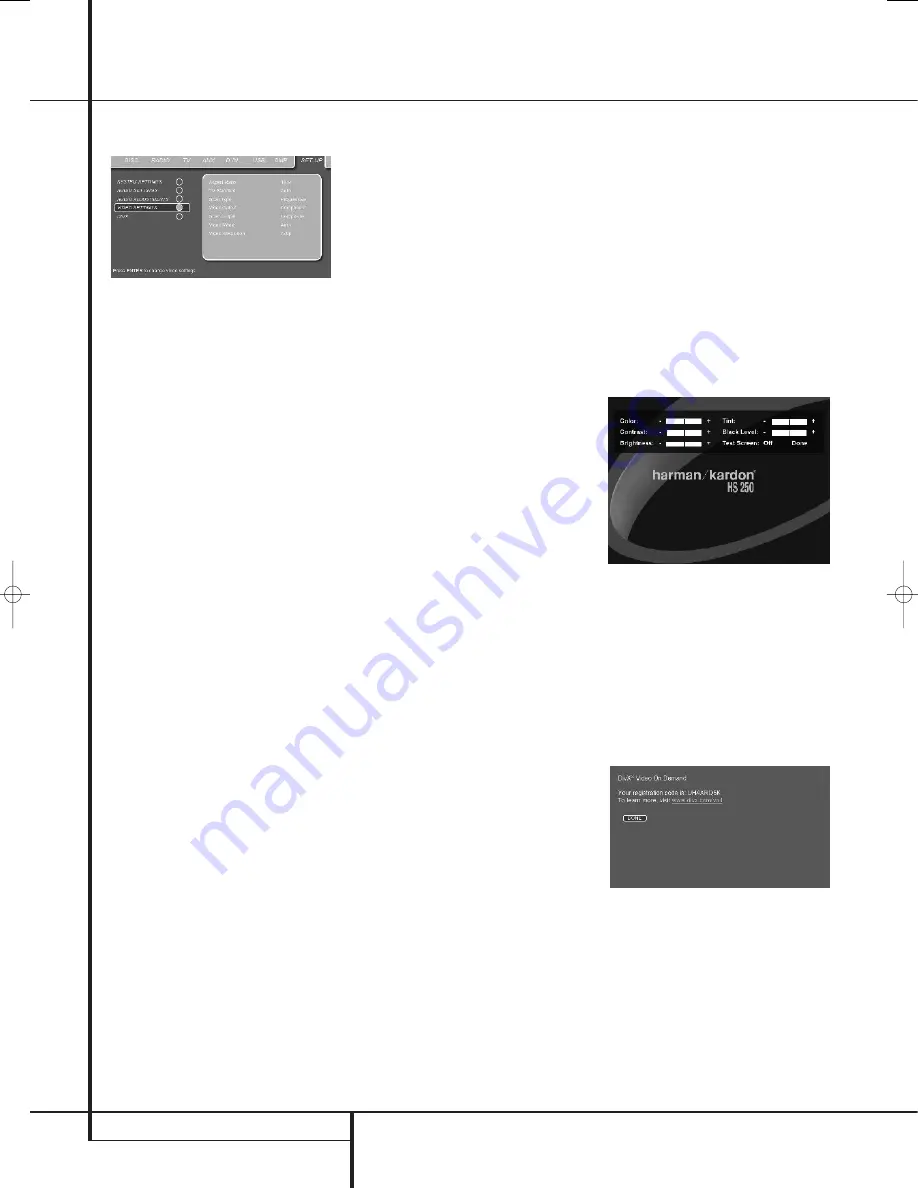
Video Settings

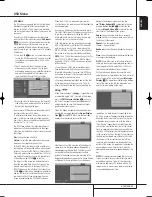
The Video Setting Submenu contains the follow-
ing settings. Follow the explanations in the
Upper Menu Line on the bottom of your screen
to change the settings.

Aspect Ratio:

This step selects the TV aspect

ratio, conventional screen shape (4:3) or
widescreen (16:9), according to your TV. If you
have a conventional 4:3 TV that can (automati-
cally) switch to show a 16:9 format, you should
select 16:9 rather than 4:3.

TV Standard:

Sets the output video format i.e.

NTSC or PAL, of the HS Controller. If you have a
multi standard TV, we recommend the AUTO
setting for optimal picture quality.

Scan Type:

Sets the component video output to

Interlace or Progressive. Before changing the
setting to Progressive, make sure that your video
display connected to the component output is
capable of handling progressive scan signals. As
soon as you select progressive scan the scan
type, the Video Output will automatically change
to Component. All other outputs, composite
video on cinch, SCART and S-Video, will be kept
Interlaced. The interlaced composite and S-Video
outputs remain active for connection to a second
(interlaced) video display.

Video Output:

Sets the video output type to

Scart or Component. Scart will be used for most
TV’s. Component will be used for most LCD,
Plasma and projectors.

Scart Output:

Selects which kind of video out-

put signals will be routed over the scart. RGB
will be used for most TV’s as it provides the best
picture quality.

Video Mode:

This setting affects only the

Component Video Outputs, and it controls how
the video signals are optimized for progressive
scan display. In most cases, the “automatic”
mode is your best choice, as it senses whether
the disc being played was originally recorded on
video or shot on film. However, in some cases
you may wish to compensate for errors in the
disc authoring that occur when the frame rate is
not properly maintained when films are
converted to video. Three choices are available:

• Auto:

This is the recommended setting, as it

lets the HS System analyze the signals from
the DVD and adjust the output accordingly.

• Movie:

Choose this option for optimal play-

back of material that was shot on film, even
though you are viewing it on video via a DVD.

• Video:

Choose this option for optimal playback

of material that was shot directly to video, such
as concerts and sports programming.

Video Resolution:

Selects the resolution of the

video output. When the HS system is connected
to either one of the Composite, S-Video or
SCART connectors, this setting should be left in
Standard.

When you connect your HS system via a digital
HDMI or Component Video connection, the pre-
ferred setting is either 720p (progressive scan
with 720 lines) or 1080i (interlaced with 1080
lines).

If you select any of the 720p or 1080i high
resolution formats, all analog video outputs
(Composite, S-Video and Scart) will become
temporarily in-active.

In order to watch low resolution formats again,
press the 

Video Output Button

on the

remote control.

Please note that with Component Video non-
encrypted movies will be upscaled to 720p.
Encrypted movies will not play in 720p and will
have to played back on standard progressive
scan component or HDMI.

Video Adjustment

The Video Adjustment Submenu contains access
to the Test Screen. Video Adjustments are only
possible when the HS source has been set to
Standard Definition. First adjust the video dis-
play device (TV) with the help of the Test Screen.
After that the output settings of the player can
be fine-tuned with the Color, Contrast,
Brightness, Tint and Black Level settings. In order
to change the settings, move the cursor to the
“+“ or “-“ icon on the same line as the setting.
Once one of the icons is highlighted, pressing
ENTER will increase or decrease the value of the
setting, as will be shown in the bar behind the
setting.
To exit the Video Adjustment Menu, move the
cursor to DONE, and press ENTER.

DivX Video On Demand

This code allows you to rent and purchase
videos using the DivX VOD service. For more
information, visit www.divx.com/vod. Follow the
instructions and download the video onto a disc
for playback on this unit. Note that all the
downloaded videos from DivX VOD can only be
played back on this unit.

Once the DivX icon is highlighted, press ENTER
to access your personal DivX VOD code.

System Setup

34138_HS250_UK  18/09/07  13:58  Side 20

Содержание HS 250

Страница 1: ...ENGLISH HS 250 Home Cinema System OWNER S MANUAL...

Страница 2: ...use this manual with the remote control front panel controls and rear panel connections certain conventions have been used EXAMPLE bold type indicates a specific remote control or front panel button o...

Страница 3: ...anguages soundtracks subti tles or aspect ratio while a parental lock func tion enables you to control which discs may be viewed by younger members of the household DVD players are among the fastest g...

Страница 4: ...is provided both above and below the unit for ventilation If this product will be installed in a cabinet or other enclosed area make certain that there is sufficient air movement within the cabinet U...

Страница 5: ...tion To conserve band width analog compression interlacing is employed first the odd numbered lines of a frame are displayed followed by the even num bered lines The result is that only half of the vi...

Страница 6: ...iscs may include a mix of features that are not compatible with the DVD Similarly although the DVD is capable of a wide range of features not all discs include every capability of the DVD system For e...

Страница 7: ...of audio image of video files or a USB hub The USB inputs are designed to power a single USB device at a time If additional hard disks are connected through a hub it is necessary that additional exte...

Страница 8: ...s will show the current track time time remaining in the current track or the total remaining time on the disc When an iPod is playing the display will show the elapsed and remaining time on the top l...

Страница 9: ...connector s video output signal 4 AC Power Cord Connect this plug to an AC outlet If the outlet is controlled by a switch make certain that it is in the ON position 5 FM Antenna Connect to the supplie...

Страница 10: ...sed to temporarily connect a USB thumb device or portable hard disk for direct playback of audio image of video files a digital photo camera or a USB hub H HDMI Output Connect this output to the HDMI...

Страница 11: ...s Button Skip Step Next Button Play Button Search Slow Reverse Button STOP Button Search Slow Forward Button Macro Buttons Pic Pic Button Zoom Button Playlist Button Random Button A B Repeat Button Vo...

Страница 12: ...ay from the begin ning J Search Slow Fwd Button Allows you to search forward through a disc while it is in play mode Each time you press this button the search speed changes as indicated by a number o...

Страница 13: ...ducts or leave it in a car parked in direct sunlight as there can be a considerable rise in temperature inside the car After playing store the disc in its case Do not write on the label side with a b...

Страница 14: ...nents NOTE To be able to listen to the sound of a live TV show through the loudspeakers of your HS system you need a connection between the audio output of your TV and the HS controller to achieve thi...

Страница 15: ...of a compatible computer sound card to the Optical and Coaxial Digital Inputs 89 Connect the Coaxial Digital Output E on the rear panel of the HS to the matching digital input connections on a CD R or...

Страница 16: ...ure at all not even the Harman Kardon screen check the setting of the video input used on your TV most SCART inputs on TVs can be configured in the TV s menu If this doesn t work connect your TV with...

Страница 17: ...session DVD containing Windows Media Audio files may not be supported open session discs are not supported the DVD player does not support PC data this DVD player does not support an unfinalized disc...

Страница 18: ...Buttons 9 until the requested setting is shown and confirm this setting by pressing ENTER 6 Note that when you cycle though the options for this setting the cursor cycles though the options on the Lo...

Страница 19: ...M does not make any changes to the original playback and should be used when the volume setting in the listening room may be as loud as you desire MEDIUM applies a moderate amount of compression so th...

Страница 20: ...e DVD and adjust the output accordingly Movie Choose this option for optimal play back of material that was shot on film even though you are viewing it on video via a DVD Video Choose this option for...

Страница 21: ...may be reduced when the surrounding light is dimmed usually improving the sharpness of a video a lot thereby 4 The grey scale in the middle line needs to have the same clear difference between each b...

Страница 22: ...il the icon is highlighted in light blue and the full Track list is visible on the screen In the same way the Disc list can be removed from the screen by de activating the PROGRAM Submenu When the HS...

Страница 23: ...4 even if the cursor is highlighting preset 11 Pressing the Play button will always return the cursor to the current station played no matter were it was previously even when another menu is open Remo...

Страница 24: ...ibility to increase or decrease the input level of the analog input so that its sound will have the same level as the radio the DVD player or the other audio inputs DIGITAL IN MENU In addition to all...

Страница 25: ...n external USB hard drive You will need a FAT32 pre formatted external hard disk drive with USB connector If your disk is formatted with another file system like NTFS you will need to re format it Ple...

Страница 26: ...press them as noted in Step 5 7 When all buttons to be erased have been pressed press the Learn button to complete the process To erase all codes within a single device follow these steps 1 Press and...

Страница 27: ...ngala 7678 Lithuanian 7684 Macedonian 7775 Malagsy 7771 Malay 7783 Malayalam 7776 Maltese 7784 Maori 7773 Marathi 7782 Moldavian 7779 Mongolian 7778 Naru 7865 Nepali 7869 Norwegian 7879 Occitan 7967 O...

Страница 28: ...nking on the front panel display The protective circuitry has been activated because of a short circuit Turn off the system eliminate the short circuit problem and turn on the power again The audio in...

Страница 29: ...ited on the DVD In that case the audio language must be selected by the main menu on the DVD The subtitle language cannot be changed when you play a DVD Multilingual subtitles are not recorded on the...

Страница 30: ...all channels are recorded discretely and processed digitally Manufactured under license from Digital Theater Systems Inc US Pat No 5 451 942 and other worldwide patents issued and pending DTS and DTS...

Страница 31: ...6 Vp p 75 Ohms Audio line Outputs Audio L R 2 Vrms 1 kilohms General Power requirements AC 230 V 50 Hz Max power consumption 300 W Idle power consumption Less than 2 W Dimensions WxHxD 350mm x 84mm x...

Страница 32: ...ve Woodbury New York 11797 516 422 HKHK 4545 Fax 516 682 3523 USA only www harmankardon com Harman Consumer Group Inc 2 route de Tours 72500 Ch teau du Loir France 2007 Harman Kardon Incorporated Part...

Отзывы: