9
AVR
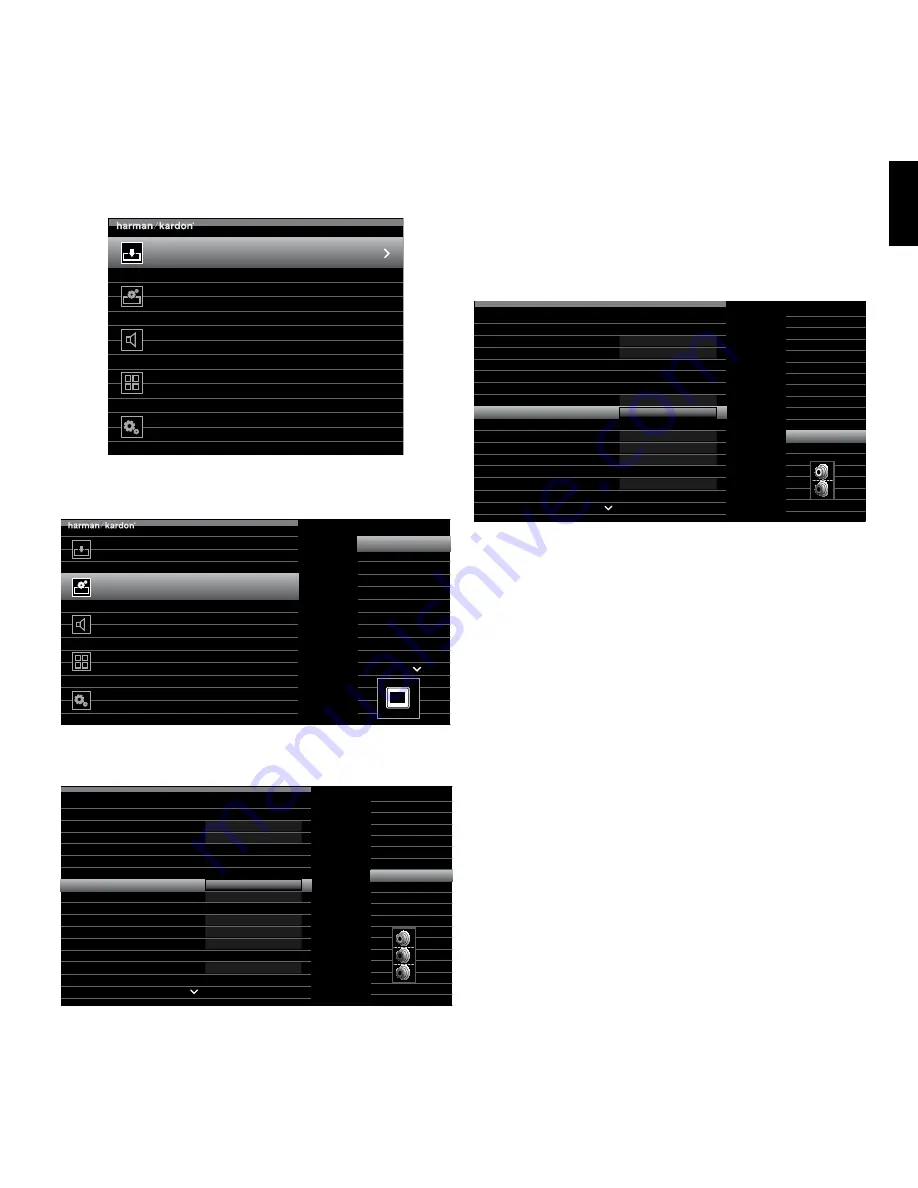
3. Press the remote control’s AVR button. The receiver’s on-screen display (OSD) setup menu will appear
on the TV. (Note: If you have used a composite video connection to your TV, the OSD menus will not
appear on your TV. Follow the steps below using the receiver’s front-panel display.)
Source Select
Select the Source Device to Enjoy
Setup Source
Setup Source Devices Connected to the AVR
Speaker Setup
Speaker Optimization, EQ
Zone 2
Manage and Control Zone 2
System
General AVR Settings
4. Use the remote’s arrow and OK buttons to select “Setup Source,” and select a source button that you
want to re-assign from the list that appears. Press the OK button.
Source Select
Select the Source Device to Enjoy
Cable/Sat
Blu-ray
Bridge
USB
SIRIUS Radio
FM Radio
AM Radio
TV
Game
Media Server
Setup Source
Setup Source Devices Connected to the AVR
Speaker Setup
Speaker Optimization, EQ
Zone 2
Manage and Control Zone 2
System
General AVR Settings
Cable/
Sat
5. Select “Video Input From Source” and select the video input connector you want to assign to the
source button. Press the OK button. (The setup menu will disappear from the TV.)
Cable/Sat
Audio Effects
Video Modes:
Surround Modes:
Off
Auto Select
720p – 60Hz
No Input
Off
Cable/Sat
NO AUDIO INPUT
HDMI 2
HDMI 2
HDMI 1
HDMI 2
HDMI 3
HDMI 4
HDMI 5
HDMI Front
Component 1
Component 2
Composite 1
Composite 2
Audio Format from Source:
Video Input from Source:
Audio Input from Source:
Change Name:
Adjust Lip Sync
Resolution to Display:
Resolution from Source:
HDMI Bypass:
6. Press the remote control’s AVR button again. The receiver’s on-screen display (OSD) setup menu will
reappear on the TV. (Note: If you have used a composite video connection to your TV, the OSD menus
will not appear on your TV. Follow the steps below using the receiver’s front-panel display.)
7. Use the remote’s arrow and OK buttons to select “Setup Source,” and select the source button whose
video input you just re-assigned.
8. Select “Audio Input from Source” and select the audio input connector you want to assign to the
source button. Press the OK button.
Cable/Sat
Audio Effects
Video Modes:
Surround Modes:
Off
Auto Select
720p – 60Hz
No Input
Off
Cable/Sat
NO AUDIO INPUT
Component 1
Analog 1
HDMI 1
HDMI 2
HDMI 3
HDMI 4
HDMI 5
HDMI Front
Optical 1
Optical 2
Coaxial 1
Coaxial 2
Analog 1
Audio Format from Source:
Video Input from Source:
Audio Input from Source:
Change Name:
Adjust Lip Sync
Resolution to Display:
Resolution from Source:
HDMI Bypass:
9. Press the remote’s Back/Exit button and repeat steps 3 – 8 for the remaining source buttons you
want to reassign.
You are now ready to enjoy your receiver!
IMPORTANT: For complete information about using all of your audio/video receiver’s features
and capabilities, download the
AVR 3650, AVR 365, AVR 2650, AVR 265 Owner’s Manual
from
www.harmankardon.com.
General Specifications
Power consumption
(AVR 3650):
<0.5W (standby); 480W (maximum)
(AVR 365):
<0.5W (standby); 480W (maximum)
(AVR 2650/AVR 265):
<0.5W (standby); 420W (maximum)
Dimensions (W x H x D):
17-5/16" x 6-1/2" x 17-1/16"
(440mm x 165mm x 435mm)
Weight
(AVR 3650/AVR 365):
27.25 lb (12.4kg)
(AVR 2650/AVR 265):
24.4 lb (11.1kg)
Connections
ENGL
IS
H


