


9
AVR
Configure the AVR for Your Speakers: AVR 1510/AVR 151
Note: The on-screen menus shown in this guide may differ slightly from your AVR’s actual
menu screens.
Before you use your AVR you need to configure it to work with your speakers and to
compensate for the acoustic characteristics of your room. Before beginning, place your
loudspeakers as explained in the
Place Your Speakers
section, on page 2, and connect
them to the AVR as explained in the
Connect Your Speakers
section, on page 4.
1. Turn on your TV and select the TV input where you connected the AVR in
Connect Your
TV or Video Display,
on page 4.
2. Press the remote control’s OSD/Menu button. The AVR’s on-screen display (OSD) setup
menu will appear on the TV. (Note: If you have used a composite video connection to
your TV, the OSD menus will not appear on your TV. Follow the steps below using the
AVR’s front-panel display.)
M A S T E R M E N U
S o u r c e S e l e c t
S o u r c e S e t u p
S u r r o u n d M o d e
S p e a k e r S e t u p
N e t w o r k
S y s t e m S e t u p
3. Use the remote’s arrow and OK buttons to select “Speaker Setup.”
S p e a k e r S e t u p
S p e a k e r s
C r o s s o v e r
D i s t a n c e
O u t p u t A d j u s t
4. Select “Speakers.”
S p e a k e r s
F r o n t L e f t / R i g h t
C e n t e r
S u r r L e f t / R i g h t
S u b w o o f e r
O n
O n
O n
O n
5. Use the Up/Down buttons to select a speaker group and use the Left/Right buttons to
select “On” when the speakers are present in the system, or”Off” for positions where
no speakers are installed. The Front Left/Right setting is always On and may not be
disabled. (Note: The settings in this menu affect the remainder of the speaker-setup
process and the availability of various surround-sound modes.)
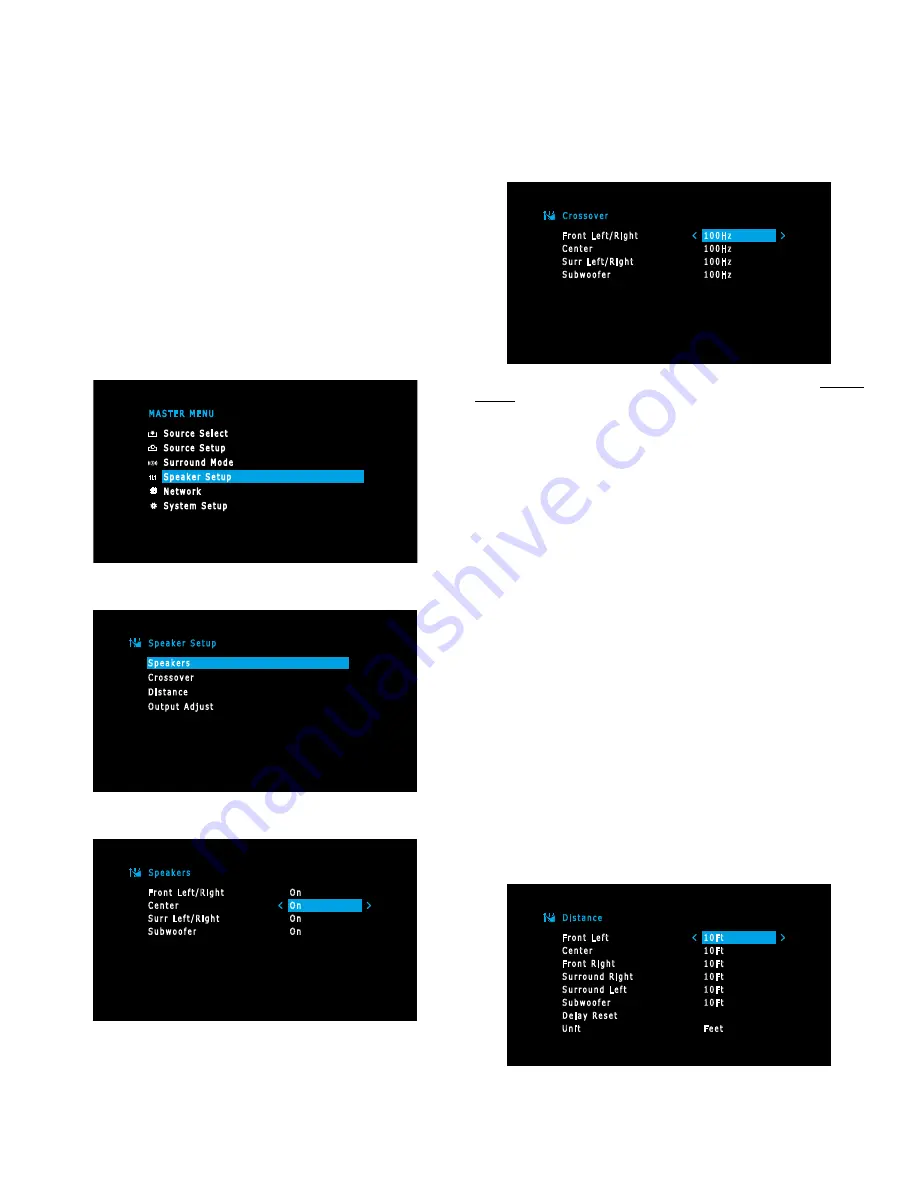
6. Press the Back/Exit button to return to the Manual Setup screen, then select
“Crossover.”
C r o s s o v e r
F r o n t L e f t / R i g h t
C e n t e r
S u r r L e f t / R i g h t
S u b w o o f e r
1 0 0 H z
1 0 0 H z
1 0 0 H z
1 0 0 H z
Consult the technical specifications for all of your speakers and locate their frequency
response, usually given as a range, e.g., 100Hz – 20kHz (±3dB). Write down the lowest
frequency that each of your speakers is capable of playing (100Hz in the above example).
7. Use the Left/Right buttons to set each speaker group’s crossover frequency to the
frequency that most closely matches the frequency you noted above in the speaker’s
specifications. If the speaker’s crossover frequency is lower than 40Hz, select the first
option, “Large.” (This setting doesn’t refer to the speaker’s physical size but to its
frequency response, which is also called “full range.”)
• We recommend that you set the Subwoofer Crossover to the same frequency you use
for the Front Left/Right speaker setting.
Your AVR will divide the source signal at the crossover frequency; all information above
that crossover point will be played through your system’s speakers, and all information
below the crossover point will be played through the subwoofer. This way, each
loudspeaker in your system will perform at its best, delivering a powerful and enjoyable
sound experience.
• If you set the Front Left/Right speakers to “Large,” select one of the three following
settings for the subwoofer:
L/R+LFE: This setting sends all low-frequency information to the subwoofer, including
a) low-frequency information that is also played through the front left and right
speakers and b) the special LFE (low-frequency effects) channel information that is
present on some DVDs, Blu-ray
™
discs and other digital programming.
LFE: This setting plays low-frequency information contained in the full-range program
channels through the front left and right speakers, and directs only the LFE-channel
information to the subwoofer.
OFF: Select this setting when no subwoofer is in use. All low-frequency information will
be sent to the front left and right speakers.
8. When you’re finished, press the Back/Exit button to return to the Manual Setup screen,
then select “Distance.”
D i s t a n c e
F r o n t L e f t
C e n t e r
F r o n t R i g h t
S u r r o u n d R i g h t
S u r r o u n d L e f t
S u b w o o f e r
D e l a y R e s e t
U n i t
1 0 F t
1 0 F t
1 0 F t
1 0 F t
1 0 F t
1 0 F t
F e e t
AVR Setup


